Best Tips To Grow Siberian Squill In Containers
Best Tips To Grow Siberian Squill In Containers
Siberian Squill, known for its delicate blue blooms that herald the arrival of spring, is a charming and resilient plant that can thrive in containers.
Whether you have limited outdoor space or want to add a burst of colour to your patio or balcony, growing Siberian Squill in containers offers a delightful way to enjoy these lovely flowers up close.
In this article, we'll explore tips and techniques for growing Siberian squills in containers, which will bring a touch of early spring beauty to your outdoor living spaces.
Benefits Of Siberian Squill
Siberian Squill, also known as Scilla siberica, not only adds beauty to your garden but also brings several benefits. Here are the details on some of its key advantages:
1. Early Spring Colour
Siberian Squill is one of the earliest blooming spring flowers. Its vibrant blue or sometimes white flowers emerge when most other plants are still dormant, bringing a splash of colour to your garden and signalling the arrival of warmer days.
2. Low Maintenance
Once established, these low-maintenance flowers require minimal care. They are hardy and can thrive in various soil types, making them ideal for novice and experienced gardeners.
3. Naturalizing Ability
Siberian Squill readily multiplies through self-seeding and bulb division, forming clusters over time. This naturalizing habit means that once planted, they can create a stunning carpet of colour over the years without much effort.
4. Attracts Pollinators
The early blooms of Siberian Squill provide much-needed nectar for bees and other pollinators that emerge early in the spring. By planting these flowers, you can contribute to pollinator health and support local ecosystems.
5. Deer And Rodent Resistance
Deer, rabbits, and rodents avoid Siberian Squill bulbs and foliage due to their toxic compounds. This makes them a great choice for gardens in areas with these pests.
6. Versatile Planting
Siberian Squill thrives in various settings, including garden beds, borders, and containers. They are appropriate for various landscapes because of their small size and lovely leaves.
7. Naturalization In Lawns
These bulbs can be planted in lawns to create a naturalized effect. They won't interfere with regular lawn maintenance as they die back after flowering.
8. Educational Opportunities
Growing Siberian Squill can be a learning experience for children and novice gardeners. Watching these bulbs bloom and naturalize can spark an interest in gardening and nature.
9. Early Blooms For Cut Flower Arrangements
The early blooms of Siberian Squill can be cut and used in indoor floral arrangements, bringing a touch of spring indoors before other garden flowers are in full swing.
Incorporating Siberian Squill into your garden adds visual beauty, contributes to the ecosystem, and offers multiple advantages for you and the environment.
Tips To Grow Siberian Squill In Containers
In gardening, the allure of cultivating vibrant blooms in confined spaces holds an undeniable charm. Whether you're a seasoned gardener or just starting your green journey, discovering the art of growing Siberian Squill in containers is a captivating adventure.
These petite, bell-shaped flowers are a feast for the eyes and an emblem of beauty that can flourish within limited quarters. Here are some of the best tips for successfully growing Siberian Squill in containers:

1. Container Selection To Grow Siberian Squill
The first step in successfully growing Siberian Squill in containers is selecting the ideal container. Ensure it offers sufficient depth of at least 6 to 8 inches for root establishment and has proper drainage holes to prevent waterlogging, which can lead to root rot. The container size can vary depending on your preference and the bulbs you intend to plant.
Choosing a larger container offers the advantage of creating a more stunning and impactful display of these charming blooms.
In addition to depth, ensure that the chosen container has proper drainage holes to prevent waterlogging, which can lead to root rot. Consider the container's aesthetic appeal as well, as it will contribute to the overall visual allure of your growing space.
With the right container, you set the stage for the flourishing journey of Siberian Squill, where roots can spread comfortably, and blooms can grace your space with their delicate beauty.

2. Well-Draining Soil To Grow Siberian Squills
Selecting the right soil is crucial when growing Siberian Squills in containers. Choose a well-draining potting mix that ensures proper moisture management and prevents waterlogged conditions, which can harm the bulbs' health.
Consider using a potting mix specifically formulated for bulbs or one designed for general use with the addition of perlite or sand to enhance drainage.
These amendments promote aeration and prevent excess moisture from accumulating around the bulbs' delicate roots. Well-draining soil also helps prevent rot and encourages healthy root development and overall growth.
As Siberian Squill bulbs establish themselves in the container, they can access the nutrients and water they need while avoiding the risks of poor drainage.
By providing a balanced mix that promotes moisture retention and drainage, you're setting the groundwork for a thriving display of Siberian Squill blooms in your container garden.

3. Planting Siberian Squill Bulbs
Following proper bulb planting techniques is essential when growing Siberian Squill in containers. Siberian Squill bulbs should be carefully planted to ensure their successful growth and vibrant blooms.
Aim to plant the bulbs in the fall, ideally about 4-6 weeks before the first expected frost in your region. This timing allows the bulbs to establish their root systems before winter.
When planting, position the bulbs with their pointed ends facing upwards, where the shoots will emerge. The depth at which you plant the bulbs is crucial. A general guideline is to place them about 2-3 inches deep in the soil.
This depth protects the bulbs from extreme temperature fluctuations and allows them to anchor themselves securely in the container. Planting at the appropriate depth facilitates proper root development and promotes healthy shoot emergence.
As the bulbs begin to grow, they will follow their natural growth pattern, sending up shoots that will eventually burst into the characteristic blue blooms of Siberian Squill.
Adhering to the recommended planting depth and positioning ensures that your container garden showcases a beautiful and thriving display of Siberian Squill flowers when spring arrives.

4. Sunlight Requirements For Siberian Squills
When growing Siberian Squill in containers, your choice of location plays a pivotal role in its success. Aim to position the container in an area that receives partial to full sunlight. Siberian Squill thrives in well-lit conditions, which are necessary for healthy growth and vibrant blooms.
However, this versatile plant can also tolerate some shade. If you live in an area with intense sunlight or are concerned about extreme heat, consider placing the container where it will receive a balance of direct sunlight and filtered shade during the hottest parts of the day.
The goal is to give the plant the right light to fuel its photosynthesis and ensure strong, upright growth. By choosing a suitable location and optimizing the sunlight your Siberian Squill receives, you're setting the stage for a successful and visually appealing container garden.
Remember that the balance between light and shade can contribute to your Siberian Squill plants' overall health and vitality, allowing them to flourish and delight you with their charming blue blooms come spring.

5. Watering Siberian Squills In Containers
Maintaining appropriate moisture levels in the soil is crucial for successfully cultivating Siberian Squill in containers. Although these plants enjoy wetness, waterlogging must be avoided because it can cause root rot and other problems.
After placing your bulbs, give the container a good watering to ensure enough moisture for their early establishment. As the growing season advances, monitor the soil's moisture level and modify your watering schedule as necessary. Consistently moisten the soil, but don't let it become wet.
If the top inch of soil feels dry to the touch, it's time to water. This is an efficient method of determining when to water. Be aware of the weather; you might need to water more often to keep the soil from drying out during hot, dry spells.
However, remember to strike a balance; overwatering can be equally detrimental. Maintaining the right moisture level will promote healthy root development and ensure your Siberian Squill plants have the hydration they need to thrive and produce charming blue flowers.

6. Fertilization Requirements To Grow Siberian Squills In Containers
When growing Siberian Squill in containers, don't overlook the importance of proper fertilization. Before planting your bulbs, you can enhance the nutrient content of the soil by mixing in a slow-release bulb fertilizer.
This can provide a steady supply of essential nutrients, such as nitrogen, phosphorus, and potassium, crucial for healthy plant growth.
However, it's important to exercise caution and avoid over-fertilizing, as excessive nutrient levels can lead to problems like excessive foliage growth and reduced flower production.
Siberian Squill's fertilizer requirements are generally reasonable. The slow-release fertilizer should be applied according to the manufacturer's recommendations, ensuring you don't exceed the recommended dosage.
Additionally, remember that the nutrients in the potting mix and any residual nutrients from the pre-planting fertilizer can contribute to the plant's overall nutrient intake.
You can encourage robust growth, vibrant foliage, and beautiful blue flowers by balancing nutrient supply and plant needs.
Regularly monitoring the plant's health and observing any signs of nutrient deficiencies or excesses will help you adjust your fertilization routine as necessary for optimal results.

7. Cold Treatment For Siberian Squill Bulbs
Implementing a cold treatment can be a beneficial strategy to encourage optimal flowering in Siberian Squill grown in containers.
While not essential for all climates, this technique mimics the natural winter conditions these bulbs experience in their native habitat.
A cold treatment involves exposing the planted bulbs to cooler temperatures for a specified period before placing them in their final growing location.
This exposure to cold stimulates the bulbs' natural dormancy process and promotes the development of strong flower buds.
To implement the cold treatment, place the container in a cool, dark area, such as a garage or unheated basement, for about 6-8 weeks.
During this time, ensure that the temperature remains consistently within the range of 35-45°F (1.5-7°C). After the cold treatment period, you can move the container to its desired growing location, and the bulbs will be primed for healthy growth and prolific flowering.
Keep in mind that while a cold treatment can enhance flowering, it may not be necessary in milder climates where winter conditions are naturally met.
Observing the specific requirements of Siberian Squill, your local climate, and the potential benefits of a cold treatment will help you decide whether to employ this technique for a more vibrant and abundant display of blue blossoms.

8. Naturalizing Siberian Squills
Encouraging Siberian Squills to naturalize is a wonderful way to create a sustainable, low-maintenance display of these charming spring flowers.
While Siberian Squill can be left in containers for multiple years, transferring the bulbs to a garden bed after a few years can lead to more vigorous and widespread growth. Naturalizing allows bulbs to multiply and spread independently, creating a stunning carpet of blooms over time.
To initiate naturalization, carefully remove the bulbs from the container and select a suitable garden bed with similar growing conditions – well-draining soil, partial to full sunlight, and adequate moisture.
Plant the bulbs at the same depth as in the container, spaced a few inches apart to allow for expansion. As the bulbs multiply, they create a dense and enchanting display, providing a burst of colour and beauty each spring.
Remember that the Siberian Squill is a hardy and resilient plant, making it well-suited for naturalization. Over the years, the bulbs gradually spread and form clusters, creating a captivating scene that requires minimal maintenance.
This approach enhances your garden's aesthetic appeal and contributes to the overall health and vitality of the local ecosystem by providing a valuable source of early-season nectar for pollinators.

9. Pest & Disease Management For Siberian Squills
While Siberian Squill is known for its resilience and ability to withstand various conditions, it's still essential to monitor for potential pests and diseases that could impact its growth.
Slugs and rodents are among the pests that may be attracted to the bulbs, especially in the early stages of growth. Slugs can chew on the tender leaves and flowers, while rodents might dig up and damage the bulbs.
To protect your Siberian Squill, consider implementing preventive measures such as placing physical barriers around the container, like copper tape, which slugs tend to avoid crossing.
You can also create a barrier using crushed eggshells, diatomaceous earth, or organic slug repellents. If rodents are a concern, placing a wire mesh or hardware cloth over the container can deter them from accessing the bulbs.
Regularly inspect the plants for signs of damage or unusual growth patterns, as these can indicate potential issues. Although Siberian Squills are generally less susceptible to diseases, it's still a good practice to provide proper spacing between bulbs for good air circulation.
Well-draining soil and avoiding overwatering can also help prevent issues like bulb rot. By staying vigilant and proactively protecting your Siberian squill from pests and diseases, you can ensure a healthy and thriving display of these delightful spring flowers in your container garden.

10. Mulching When Growing Siberian Squills In Containers
Mulching is an important practice when growing Siberian Squill in containers. Spreading a thin layer of organic mulch, like straw or wood chips, on top of the soil has various advantages for the health and vitality of the plants.
The mulch acts as a natural insulator, helping to regulate the temperature within the container. This is particularly valuable during temperature fluctuations in spring when the weather can be unpredictable.
Additionally, the mulch helps suppress weed growth by blocking sunlight from reaching weed seeds, which can compete with the Siberian Squill for nutrients and water.
As the mulch breaks down over time, it contributes organic matter to the soil, improving its structure and fertility. When applying the mulch, keep it a few inches away from the base of the bulbs to prevent potential issues with excess moisture around the bulb's neck, which could lead to rot.
Overall, incorporating mulch into your container gardening routine for Siberian Squill is a simple yet effective way to create a conducive environment that supports healthy growth, enhances moisture retention, and maintains an attractive appearance in your container display.

11. Early Spring Blooms Of Siberian Squills
Growing Siberian Squill in containers, you embrace its enchanting early spring blooms and bring this delightful plant's vibrancy to your container garden.
Siberian Squill, also known as Scilla siberica, is renowned for its vibrant and early spring blooms, making it a delightful addition to your container garden.
As the cold winter months begin to wane and the first hints of spring emerge, the small bell-shaped flowers of Siberian Squill burst forth in brilliant shades of blue, creating a stunning visual display.
These charming blooms are harbingers of the changing seasons, providing a much-needed pop of colour and a sense of renewal after the dormant winter period.
The early spring flowering period of Siberian Squill coincides with the emergence of new growth in many other plants, making it a wonderful complement to various springtime blooms.
Whether planted in individual containers or as part of mixed container arrangements, Siberian Squill brings charm and elegance to your outdoor space.
The dainty flowers rise above the foliage on slender stems, creating a striking contrast against the backdrop of the surrounding environment.
As the weather warms and the days lengthen, the blooms of Siberian Squill provide a captivating sight that can be enjoyed by both you and any passersby.
By including Siberian Squill in your container garden, you can relish the beauty of its early spring blooms and celebrate nature's awakening as the gardening season unfolds.
Conclusion
In conclusion, growing Siberian Squill in containers can be a rewarding and relatively straightforward endeavour. It allows you to enjoy the charming beauty of these early spring blooms up close.
Following the tips outlined in this guide will give you the knowledge and tools to create a successful container garden filled with Siberian Squill's vibrant blue flowers.
While Siberian Squill is generally hardy and low-maintenance, vigilance against pests and diseases is key to ensuring their health.
With proper care and attention, your containers will come alive with the beauty of early spring as the Siberian Squill flowers grace your outdoor space with their captivating colours and delicate blooms.
Embrace the joy of watching these resilient and lovely plants thrive in your containers, adding a touch of enchantment to your gardening journey.
I trust you enjoyed this article on the Best Tips To Grow Siberian Squills in Containers. Please stay tuned for more blog posts soon. Take care!
JeannetteZ
>>>Please click here to read my all-inclusive article about Container Gardening<<<
>>>Are you interested in homegrown herbs and medicine? Please click here to find out more about it!<<<

Your Opinion Is Important To Me
Thoughts? Ideas? Questions? I would love to hear from you. Please leave your questions, experiences, and remarks about the Best Tips To Grow Siberian Squill In Containers in the comments below. You can also reach me by email at Jeannette@Close-To-Nature.org.
Disclosure
This post may contain affiliate links. As an Amazon Associate and other affiliate programs, I earn from qualifying purchases at no extra cost to you. Please read my full affiliate disclosure.
You might also enjoy these blog posts:
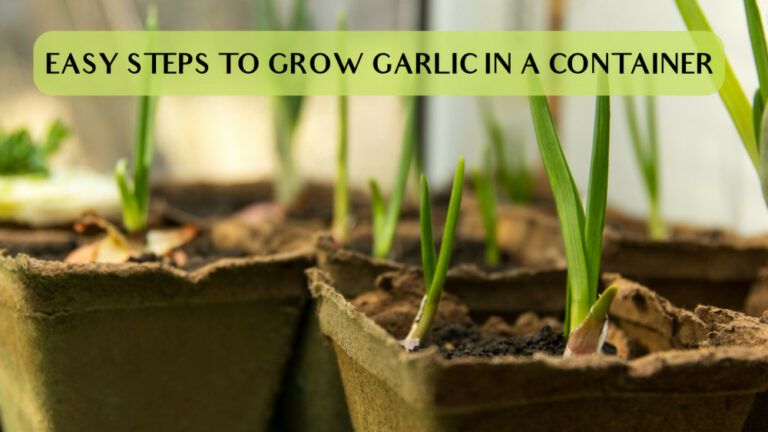
A Guide To Growing Horseradish In Containers
Best Eco-Friendly Practices For Animals
LED Lighting For Solar-Powered Applications
The Science Behind LED Technology