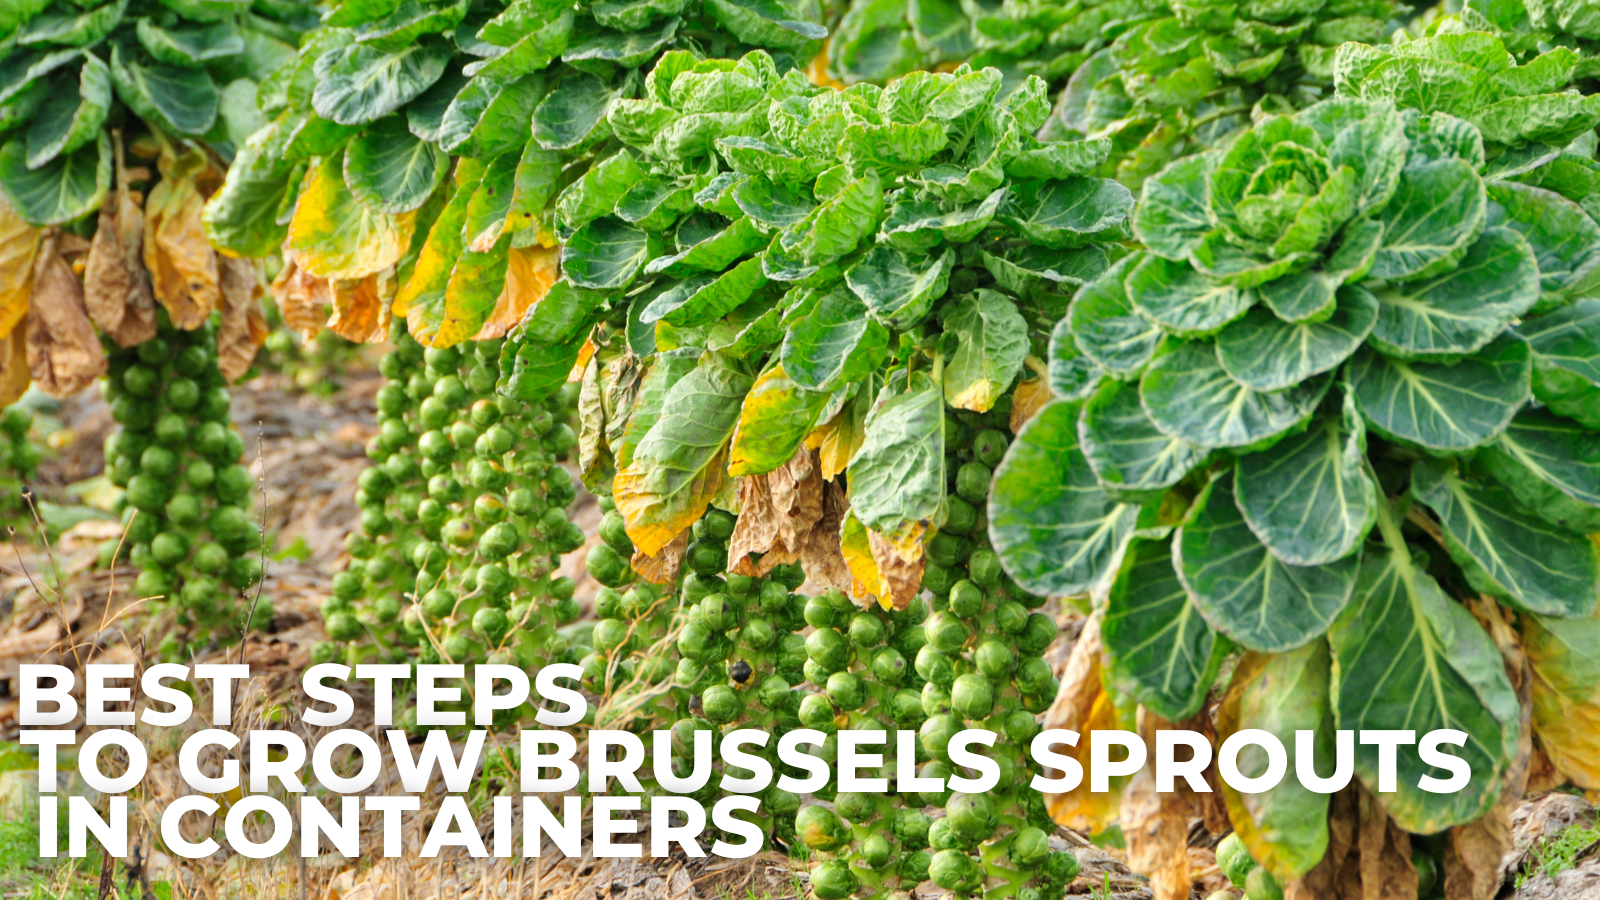
Best Steps To Grow Brussels Sprouts In Containers
Best Steps To Grow Brussels Sprouts In Containers
Although growing Brussels sprouts don't require a big garden, they are delicious when fresh. If you don't have much space for a garden, you can still harvest fresh sprouts by growing them in containers.
Seriously! All you require for growing is a sunny location and an appropriately sized container. They are excellent plants, especially if this is your first time encountering one.
Unlike any other plant, Brussels sprouts grow tall plants with enormous stalks.
The sprouts resemble tiny cabbages that ascend and descend the stems. Let’s try to grow Brussels sprouts in containers.
Best Brussels Sprouts Varieties
Before growing Brussels sprouts in containers, you should know the best varieties to determine which suits your climate.
1. Catskill Brussels Sprouts
The “Catskill” cultivar of Brussels sprouts, an heirloom plant created in 1941 by Arthur White, is one of the most popular types.
‘Catskill' has proven that it is worth all the hype despite being a newer heirloom variety than other varieties.
A small plant that grows to a height of 24 inches produces extra-large sprouts that are typically two inches long.
You never have to be concerned that lodging, or “Catskill” Brussels, will collapse. These stems resemble baseball bats because they are THICK and sturdy. Nothing will if the rich flavour isn't enough to persuade you to try Catskill.
Although you might not have the biggest harvest, these sprouts are excellent for freezing and taste great on your dinner plate. The maturation of your plants should take 90–110 days.

2. Churchill Brussels Sprouts
One of the most widely grown and earliest-maturing hybrid Brussels sprout varieties is “Churchill.”
Due to the plant's inability to grow in hot weather, gardeners frequently struggle to grow this vegetable.
The best seasons for growing Brussels sprouts are spring and fall, but these don't always correspond to the number of days you have available for growth.
This plant produces a lot in just 90 days. You can anticipate each plant to produce almost a pound of sprouts.
3. Diablo Brussels Sprouts
Here is another hybrid plant that can grow to two feet and make medium-sized smooth heads.
The plants yield a substantial crop of these tasty sprouts. If you let these buds experience a frost before harvesting, their nutty yet sweet flavour will be even more enhanced.
The drawback is that ‘Diablo' Brussels sprouts grow slowly and take almost 110 days to mature.
Since you probably won't have enough time to harvest them in the spring before the hot weather arrives, growing them in the fall is best.

4. Gustus Brussels Sprouts
Regarding Brussels sprouts varieties, “Gustus” is the newest kid on the block, but despite being a more recent hybrid, gardeners are raving about this plant.
On a two-foot-tall stalk, it produces medium-sized sprouts; the buds are dense, sweet, and dark green.
Make sure to mark your calendars because “Gustus” matures in about 100 days. They keep better in the refrigerator than other varieties; you'll love the flavour.
5. Hestia Brussels Sprouts
This is a great plant because “Hestia” is one of only two Brussels sprouts to win the All-America Selections award (it did so in 2015). This variety produces bright green sprouts with a buttery yellow interior.
One way “Hestia” differs from other varieties is that these sprouts don't require a frost to have a sweet flavour. It's advised to keep your sprouts on the plant until a frost, making them taste sweeter.
Although a frost will make them beyond perfect, it is not required. These plants won't be ready for harvest for 95 days.

6. Jade Cross Brussels Sprouts
Jade Cross is an excellent option if you're looking for smaller-sized sprouts because the sprouts range from half an inch to an inch wide.
They resemble buttons more, but their small size aids in better flavour preservation and freezer storage. They are perfect for freezing due to their size.
The first Brussels sprout variety to receive the All-America Selections award was “Jade Cross” in 1959, and it has remained a favorite ever since.
This hybrid plant is renowned for its disease resistance and compact growth pattern. It matures more quickly than other varieties, taking just 85 days to be ready for harvest.
7. Long Island Improved Brussels Sprouts
Most Brussels sprout varieties can withstand cold temperatures, but if you live in one, you might want to grow “Long Island Improved.” This variety grows well in cold and frosty climates, enhancing the sprouts' flavour.
If you purchase Brussels sprouts from the grocery store, you probably consume Long Island Improved sprouts.
The plants yield medium-sized sprouts that mature in 100 days and have a nutty, earthy, buttery flavour.

8. Mighty Brussels Sprouts
These picture-perfect little vegetables are one inch long, deep green in colour, and flavorful with a nutty undertone.
This is the sprout you should use to decorate your holiday table. They grow evenly spaced and have round heads.
Cut the stalk off at the base, then use it as a table. They are resistant to Alternaria, leaf spots, and mildew. In 100 days, this hybrid will be ready for harvest.
9. Nautic Brussels Sprouts
The “Nautic” variety is the way to go if you want to get a lot of vegetables from one plant. Around 12 ounces of yield per plant are consistently available from this hybrid cultivar.
In 120 days, the buds will be ready for harvest, and you'll be greeted by tender, sweet treats.
The fact that the heads are evenly spaced along the stalk distinguishes this variety and helps prevent disease.
This variety is resistant to disease, especially powdery mildew, which is the bane of many garden plants.

10. Octia Brussels Sprouts
‘Octia' is an early maturing plant that only needs 78–80 days to reach harvesting time, in contrast to most Brussels sprout varieties that require a long time.
Given the size of the plant, the plants produce tiny, one-inch sprouts, and the yields are substantial.
Keep in mind that you need to top this plant. Removing the plant's top tip encourages it to focus more energy on producing larger sprouts; topping increases the size of the harvest.
11. Redarling Brussels Sprouts
There aren't many red Brussels sprout varieties on the market, but “Redarling” is one of the most well-liked options. These sprouts look gorgeous on your dinner plate and retain their colour well when cooked.
Due to its deep, rich colour, the hybrid cultivar “Redarling” takes longer to mature than other varieties.
The best places to grow these plants are cooler growing zones, as the purple sprouts can mature up to 145 days.

12. Tasty Nuggets Brussels Sprouts
Who doesn't adore the name of this particular strain of Brussels sprouts? It's a hybrid that yields flavourful, one-inch-tall sprouts the size of buttons.
They develop on two-foot-tall, compact plants renowned for being the best for container gardens; they resemble tiny vegetable nuggets.
“Tasty Nuggets” refers to more than just tasty, bite-sized vegetables. This one matures the quickest out of all the varieties of Brussels sprouts on this list.
Since the plants reach maturity in 78 days, even gardeners in warmer climates can successfully grow these plants.
Grow Brussels Sprouts In Containers
Time To Plant Brussels Sprouts
The growing conditions must be ideal for Brussels sprouts. It's a cool-season crop, and it tastes the best when it matures in the cool air temperature. Therefore, bear that in mind if you intend to grow Brussels sprouts.
Planting in the early spring and spring is ideal for regions with cool summers. Start growing Brussels sprouts in mid- to late summer or early fall in temperate and moderate climates for the fall and early winter harvest.
Fall (autumn) and winter are the best times to start growing Brussels sprouts in pots for a winter or spring harvest if you live in a region without frost and mild winters.
Choose The Right Spot
Find a location on your property with plenty of sunlight and good airflow by looking around. Productive plants must have that.
In addition, there should be some safeguards against strong winds. Brussels sprouts are naturally unstable due to their thinner bases.
A partially shaded spot should be provided if you live in a warmer area. Their growth will be hampered or damaged by excessive heat.

Container Requirements
Make sure you buy the correct-sized pot whenever you grow a vegetable in a container.
Look for a standard-sized pot 5-7 gallons large for Brussels sprouts. It must be between 12 and 14 inches in diameter and 12 inches deep.
One plant can be grown in a 5-7 gallon container. Choose a container that is at least 15 gallons in capacity and has an 18-inch diameter if you want to grow more than one at once. It is possible to grow two plants in a square foot.
Clay pots make a good container for Brussels sprouts because they retain their coolness, drain well, and have adequate airflow.
Make sure there are plenty of drainage holes in the pot. Brussels sprouts prefer moist soil but dislike standing water.
Therefore, avoid purchasing containers that don't have numerous holes that allow water to drain.

Soil To Grow Brussels Sprouts In Containers
Brussels sprouts thrive in moist soils, just like many other cool-season plants, so you want to ensure the soil retains as much moisture as possible without becoming soggy.
They don't mind clay-like dirt, but it can be challenging to replicate in containers.
Use a light, well-draining organic potting mix that is high in quality, and think about adding more compost to boost the soil's fertility and humus.
Brussels sprouts prefer neutral soil pH. You can add lime to your soil to help neutralize it if it is too acidic.
If your soil is too alkaline, you can raise the acid level in your containers by adding peat moss or wood ash.

Grow Brussels Sprouts From Seeds
Get the seeds for the containerized dwarf Brussels to sprout varieties. Plant seeds in the appropriate containers or pots depending on the temperature. The ideal soil temperature for seed germination is between 45° and 85°F (7° – 30°C).
Plant seeds half an inch deep, and then wait for the young plants to emerge—this usually takes five to twenty days.
When the seedlings have produced their first set of leaves, thin them out and keep only the healthiest ones. Transplant these seedlings once they have gotten about four to five inches tall.
If you didn't sow your seeds in time or want readily available plants, you could also look for transplants in the nearby nursery.

Sunlight Requirements
Place your Brussels sprout plants in full sunlight for the best growth.
These plants require a minimum of six hours of sunlight daily to remain healthy. More is always appreciated, though.
Overheating isn't a significant concern for the plant because it thrives in more relaxed environments.
The pots should be placed on the south side of your home to benefit from the sun's rays all day.
Keep them away from shade areas or buildings that will block the sun. Your plant will do better the more sun it receives.
Larger yields and better general health may result from more sunlight. Increased sun exposure, however, might call for more frequent watering.

Watering Requirements
Growing any crop in a container can be tricky because the soil dries out more quickly than it does in the ground.
You must pay close attention and distribute the water as evenly and frequently as possible.
Avoid letting the soil dry out in the sun, especially as the plant ages or when the plant's heads are developing.
Growth will be stunted, and sprout sizes will decrease. You don't want to overwater, though, at the same time.
Crops are killed by overwatering and underwatering equally quickly. Put your finger into the soil to determine whether or not your plants need watering.
Watering is necessary if the soil is dry two inches below the surface. Deeply water the pot, but ensure it has plenty of drainage holes. Standing water quickly kills plants.
Stake Brussels Sprouts
If you've ever seen a Brussels sprout plant, you know its peculiar shape and size.
It is a good idea to stake plants because it helps keep them from toppling over. In a container, the likelihood is that the entire pot will topple over if the plants fall over.
Put a stake in the pot before or after you plant your seedling, and be ready to use twine to keep the plant against the stake as it grows.
You probably won't need to do any staking if you plant dwarf varieties. These plants rarely grow taller than 24-28 inches, smaller than most tomato plants. You might need to stake them if you choose not to grow the dwarf varieties.
Mulching
If you don't want to, you don't HAVE to mulch your containerized plants. Weeds in container gardening aren't typically a problem.
Mulching is done because it keeps the soil in your garden cool and moist. Since we know that Brussels sprouts prefer excellent, moist soil, this does aid in producing a good crop.

Fertilizing Brussels Sprouts
Brussels sprouts, like many other brassica family members, are heavy feeders, so you should give your plants plenty of manure or compost in addition to fertilizer.
You should add well-rotted manure or compost when you first plant in the containers to provide the initial burst of nutrients required to establish the plants and promote rapid growth.
Then, 3–4 weeks after planting, you can fertilize or side-dress the plants with compost or manure.
The fertilizers 10-10-10, 5-10-5, or 5-10-10 are the best for Brussels sprouts. Always make sure to abide by the fertilizer's instructions.
Utilizing a liquid fertilizer explicitly made for vegetable crops is an additional choice. Every few weeks, you can also try composting tea as an alternative to fertilizer.
Pruning
To encourage the plant to concentrate on growing taller and producing more leaves and sprouts on the top, prune the lower leaves as you harvest the matured sprouts from the bottom.
The best way for a home gardener to guarantee a consistent supply of this nutty and sweet-tasting vegetable is to harvest Brussels sprouts from the bottom up.
However, if you want your sprouts all at once, remove the terminal bud (top portion) three to four weeks before harvest.

Harvesting Brussels Sprouts
The average time it takes to reach a potential harvest after you plant your seedlings in the ground is three months.
Brussels sprouts are not harvested all at once. Instead, you collect from the bottom up as they grow to the desired size.
By focusing the plant's energy on producing more sprouts, this method of harvesting aids in maintaining a consistent supply of sprouts.
When prepared for harvest, a sprout's diameter ranges from one to two inches. They have a consistent, dark green colour and have a firm feel.
Keep from pulling the sprouts off the plant. Instead, carefully turn and twist the sprouts to fall off the plant immediately.
Pests & Diseases Of Brussels Sprouts
Let's not wait another minute if insects infest your Brussels sprouts!
The top 10 pests and how to control them are listed below:

1. Aphids
Aphids will inevitably become a problem for gardeners at some point.
Since they are so common, I tend to ignore them unless my garden appears to have more aphids than plants. Aphids also draw beneficial insects that eat various other, worse bugs. So, there you go.
The drawbacks of aphids include their ability to spread disease and their general badness due to their rapid reproduction and energy-sucking nature. Your plant will be more vulnerable to various other pests and diseases if they weaken it.
The Brussels sprout-eating aphids are classified as Brevicoryne brassicas. They are manageable in the same manner as any other common aphid.
2. Armyworms
Armyworms are related to cutworms, but they cause different kinds of damage. These three types of worms, the larvae of specific night-flying moths, can attack Brussels sprouts.
These include the Bertha armyworm (Mamestra configurata), the Western yellow-striped armyworm, and the beet armyworm (Spodoptera exigua) (S. praefica).
They can be solid, striped, or spotted, and their colours can range from pale yellow to almost black. Each one is about an inch long.
These worms can skeletonize leaves and burrow into buds or flower heads. They tend to come in waves, making them incredibly annoying.

3. Cabbage Loopers
The inch-long green cabbage loopers (Trichoplusia ni) have a talent for making the leaves of Brussels sprouts resemble lace rather than foliage.
If you're growing brassicas, there's a good chance you'll run into them sooner or later because they can have multiple generations each year and are extremely widespread throughout North America.
When that occurs, refer to our guide on spotting and removing loopers.
4. Cutworms
The cutworm is one caterpillar that ought to make you uneasy. A cutworm can kill your seedlings in just one evening, whereas other pests can’t harm your plants for weeks or months.
Cutworms are the larvae of various Noctuidae night-flying moths. When Brussels sprouts are seedlings, they are most harmful because they gnaw through the base of the plants, killing them. You won't need to be as concerned about this pest once the stems thicken and mature.

5. Diamondback Moths
Despite their small size, the larvae of diamondback moths (Plutella xylostella) are voracious eaters.
Additionally, they feed on the sprout buds' bases, weakening them to the point where sprouts don't develop. They can quickly devour young seedlings.
The caterpillars are only a third of an inch long and green. Some have two prolegs that form a distinctive v-shape at the back.
The wings of the adults have diamond-shaped markings, as you might have guessed from their light and dark brown colouring.
Act quickly if you see either the adults or the larvae. Although Btk is effective against this pest, you should take action immediately to prevent further damage.
6. Earwigs
An earwig's long, brown body and distinctive pinchers on the back are features that almost everyone is familiar with.
There are numerous species, but not everyone harms vegetable plants. You should look for Forficula auricularia, one of the most prevalent varieties.
Regardless of the species, earwigs can benefit the garden by eating aphids and other unwanted pests. However, eradicating a sprouting Brussels sprout plant only takes a few days.
Earwigs won't harm your plants if you start your seedlings indoors.
The sprouts will be large enough to withstand an assault when transplanting them. But you'll need to take precautions if you plant seeds outside and notice earwigs nearby.

7. Flea Beetles
Little pests called flea beetles, which belong to the Chrysomelidae family, are a common problem. Despite being relatively small, they have a pretty significant capacity for damage.
It can be challenging to see them because they're so small, so it's best to look for the damage they leave behind.
There will be a ton of tiny shotholes all over the lower foliage if flea beetles are eating your Brussels sprouts. The sprouts and younger leaves at the top are usually unaffected.
While minor damage is usually not a big deal because we are more concerned about those sprout heads, severe damage can stunt your plant's growth.
Trap crop planting, tilling, and the use of floating row covers, as well as planting early or late in the year, can all be beneficial.
8. Leaf Miners
The larvae of the Liriomyza flies are known as leaf miners. These tiny worms leave their distinctive maze-like trails as they chew through vegetables and ornamentals. The sprouts are unharmed, but the foliage suffers minor cosmetic damage.
The issue is that bacterial and fungal diseases are encouraged by the damage they leave behind because both adults and larvae can spread the disease.
Brassica growers are aware that fungal diseases should be avoided at all costs.
If you've previously dealt with these pests, your best option is to cover your sprouts with floating row covers in the fall. In the spring, adult miner females do not lay eggs on plants.
Do not worry about attempting to get rid of leaf miners if you already have them in the garden. Simply keep an eye out for disease symptoms.

9. Root-Knot Nematodes
Honestly, root-knot nematodes seem more like a disease than a pest. Because you can't see them, that is.
They are microscopic, live in the soil, and feed on the roots of your sprouts and various other vegetables.
These Meloidogyne genus roundworms can seriously harm domestic gardens and industrial farm operations.
Plant roots become clubbed and deformed as a result of root-knot nematodes. However, one of the worst aspects of this pest is that you don't even realize you have an infestation until it's too late to take any action.
The symptoms are a little less clear above ground because they can resemble those of various other illnesses.
The plants may become stunted, and the sprouting foliage may wilt or turn yellow. Even pass away.
When root-knot nematodes infest your sprouts, they are doomed. Without eradicating the plant, the issue cannot be resolved.
10. Thrips
Thrips in the garden can either be beneficial or highly harmful.
The wrong kind (Frankliniella occidentalis and Thrips tabaci) can cause yellow, silvery, or brown leaves that may or may not be distorted. In contrast, the good kind can help control undesirable bugs in the garden.
The shape of heads can also change. The plant's growth may even be stunted if enough of them exist.
And that's not the end of it. They can spread many diseases, some of which can kill your plants and have no cure, such as mosaic viruses.
They are tiny, one and a half millimetres long, and incredibly slender, making them hard to see. Instead of the bugs, most gardeners focus on the symptoms of their plants.
The good news is that you can do a few things to prevent thrips from damaging your Brussels sprouts.
First, avoid planting them close to cereals or plants from the Allium genus, such as chives, onions, and garlic. The primary prey of western flower and onion thrips are these plants.
How Long Can You Keep Brussels Sprouts?
The state, care, and storage of Brussels sprouts will affect how long they last. Brussels sprouts can be stored in the crisping drawer for a week if bought at the grocery store.
If kept dry and cool, they can last a week but are at their best after a few days. Those roasted and stored in the fridge can endure for about a week.
Brussels sprouts will last six months or longer if kept in an airtight container and in the freezer, roasted with olive oil or blanched in boiling water.

How To Store Fresh Brussels Sprouts
To properly store fresh Brussels sprouts, follow these steps:
Keep Brussels Sprouts Dry
Until they are used, Brussels sprouts should not be washed because too much moisture can lead to moulding.
If your vegetables are wet when you get them home from the store because they were spritzed there, pat them dry with a paper towel.
Transfer Brussels Sprouts
The plastic bags that customers receive from farmer's markets and grocery stores to package their products may contain moisture, so transferring the dried vegetables to an airtight container at home will keep them fresher for longer.
Store In The Dry Produce Drawer
Brussels sprouts should be kept in an airtight container in the crisper drawer to reduce the amount of incoming moisture and oxygen. In this chilly environment, Brussels sprouts should last for about a week.
Blanch And Freeze Brussels Sprouts
Put them through a cold water rinse. The Brussels sprouts should be blanched in a large pot of boiling water for four minutes.
Remove from the pot and soak in a bowl of ice water for four more minutes. Spread out after thoroughly drying, place on a baking sheet, and freeze overnight.
Place in an airtight container the following day and freeze; Brussels sprouts can be frozen for up to six months.

Conclusion
Are you prepared to start growing Brussels sprouts in containers now that you know it's possible? Remember to water your plants frequently and prevent the soil from drying out.
Do you need to prune and fertilize your plants for the best possible harvest? Feel free to comment here if you face any problems growing Brussels sprouts in containers.
I trust you enjoyed this article on the Best Steps To Grow Brussels Sprouts In Containers. Please stay tuned for more blog posts to come shortly. Take care!
JeannetteZ
>>>Please click here to read my all-inclusive article about Container Gardening<<<
>>>Are you interested in homegrown herbs and medicine? Please click here to find out more about it!<<<
Your Opinion Is Important To Me
Thoughts? Ideas? Questions? I would love to hear from you. Please leave me your questions, experience, and remarks about this article on the Best Steps To Grow Brussels Sprouts In Containers in the comments section below. You can also reach me by email at Jeannette@Close-To-Nature.org.
Disclosure
This post may contain affiliate links. As an Amazon Associate and other affiliate programs, I earn from qualifying purchases at no extra cost to you. Read my full affiliate disclosure.
You might also enjoy these blog posts:
Best Steps To Grow Bok Choy In Containers
Best Steps To Grow Oranges In Containers
Best Steps To Grow Turmeric In Containers
Best Steps To Grow Saint John's Wort In Containers
Best Steps To Grow Milk Thistle In Containers