Easy Steps To Grow Celery In Containers
Easy Steps To Grow Celery In Containers
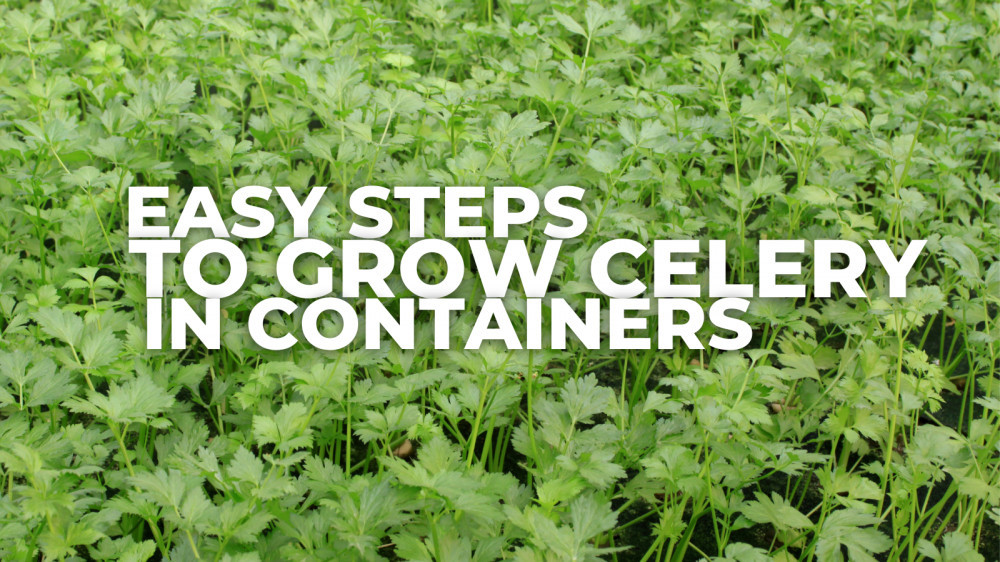
Celery takes 16 weeks of ideal weather to reach maturity. Celery is a cool-season crop. Even though you reside in a region with hot summers or a short growing season, can you grow celery in a pot? Let’s find out together! The blog will assist you to grow celery in containers ideally.
History & Origin Of Celery
It is said that celery originated in the Mediterranean region. Before 850 B.C., celery or a related plant variety was cultivated for its medical properties, according to ancient texts.
Its volatile oils, present in all parts of the plant but primarily the seed, are said to have been used for medical purposes.
Ayurvedic doctors used celery seeds to cure several diseases, including colds, the flu, water retention, poor digestion, various forms of arthritis, and problems with the liver and spleen. Early Egyptian tombs are rumoured to have had wild celery garlands that had been woven.
Similar to how winners of the Olympic Games wore bay leaves, celery was revered as a sacred plant during the classical era of Greek life.
Beginning in 573, the little city of Nemea in southern Greece's Peloponnese peninsula held the Nemean Games every other year.
Even though there was a lot of superstition associated with celery, the Romans valued it more for cooking than for their religion.
The celery plant was believed to bring bad luck when specific conditions were present.
The indigenous “wild” relatives of celery can be found in southern Sweden, the British Isles, Egypt, Algeria, India, China, New Zealand, California, and the southernmost regions of South America, even though celery is supposed to originate from the Mediterranean.
It is unlikely that its genesis was that widespread, though. In the 17th century, the Italians domesticated celery as a vegetable, producing varieties with sturdy stems. Celery with early stalks tended to have hollow stalks.
After years of domestication, selection eradicated this trait with bitterness and strong taste.
Early cultivators discovered that growing in cooler settings and blanching might lessen the naturally strong flavours.
To prevent sunlight from turning the stalks green, the method of “blanching” involves putting soil up around the base of the plants.
Types Of Celery
Did you know there are more types of celery plants outside the stalk variety, Apium graveolens L. var. dulce, which most of us are familiar with today?
For example, celeriac, a different variety of celery produced for its root, is becoming more and more well-known in the United States.
If you want to try new celery recipes, you might be interested in knowing what common types exist.
1. Conquistador Celery
Try “Conquistador” if you require a cultivar that will thrive all season long and yield early stalks.
This hybrid of “Pascal” grows in just 80 days in warmer climates, making it an excellent plant for eager gardeners everywhere.
You'll need to wait about 115 days if you live in a more relaxed growing zone. Still, not at all bad!
Conquistador yields erect, crisp stalks that are excellent and slow to bolt. It can withstand heat and even brief periods of drought.
2. Giant Red Celery
This resilient cultivar is well-liked in England. Its reddish-purple stalks turn delicate pink when cooked.
It has a robust flavour that is slightly stronger than the green types. What an excellent method to give your cooking colour and taste!
Giant Red grows to a staggering two feet tall, so leave lots of room for it in your garden. This vibrant cultivar grows in about 85 days despite its height.
3. Golden Pascal Celery
‘Golden Pascal,' also called ‘Winter King' or ‘Pascal Giant,' is a French heirloom cultivar. This cultivar, which Livingstone Seeds first brought to the US in 1913, grows soft, yellow-green stalks up to 20 inches tall.
4. Golden Self-Blanching Celery
Johnson and Stokes Seed Company first made this heirloom variety available in 1886. Golden Self-Blanching works for individuals who like the flavour of celery but would prefer not to deal with blanching at home.
For the majority of the season, the stalks are a rich, deep green hue, but in the fall, they start to turn a stunning golden colour, indicating that the flavours are mellowing into a soft but delectable crunch.
In roughly 105 days, the plant reaches a height of over two feet, and thick, juicy stalks with deep ribs are ready for harvest.
5. Monterey Celery
Tozer Iberica in Spain developed the early-maturing hybrid cultivar “Monterey.” It is resistant to bolting and ideal for growers in hotter areas.
Spain is one of my favourite places to travel, and “Monterey” is the most popular. It is grown commercially there. A strong grower produces tasty, 12-inch dark-green stalks in just 80 days.
How To Grow Celery In Containers
Celery is a fantastic crop to try at home once you understand how to produce it. You can experiment with several cultivars, such as the lovely Chinese pink celery, and grow a wholesome harvest inside or outside in a garden.
Celery is simple to grow yet challenging to cultivate. Though it may be used for more than simply eating raw as part of a salad or with a dip, it is worth learning how to cultivate it properly as part of your vegetable garden ideas. It can be cooked, desiccated, and used to make celery salt and stock. It also enhances the flavour of food when added to it.
Choose The Right Container
To plant additional celery plants 10 inches (25 cm) apart, choose a container at least 8 inches (20 cm) deep and long.
If possible, avoid using unglazed clay pots because celery prefers to keep moist and tends to dry out rapidly.
Celery from the summer has shown to be an excellent vegetable for container gardening. Several plants can be grown together in planters built from plastic storage bins, or one plant can grow nicely in a 12-inch (30 cm) broad plastic pot (use the lid as a watering tray).
Soil To Grow Celery In Containers
Celery prefers alkaline soil with a pH of 6.0 to 6.5. Acidic soil can be made less acidic by adding limestone to it.
Select a long container at least 8 inches (20 cm) deep to add more celery plants. ten inches (25 cm.) Celery prefers rich, composted or well-rotted manure-enriched soil that has been improved.
Because wild celery grows in soggy soil, you'll need to provide consistent watering for this demanding crop, and a sunny location should guarantee good, even growth. Celery must grow in loose, organically rich, well-draining soil.
Growing Celery From Seeds
The best time to plant celery from seeds is about 10 to 12 weeks before the last spring frost. Soak the celery seeds overnight while adding soil to your container to aid germination.
When selecting and filling your container, remember that celery prefers rich soil with a neutral pH of between 5.8 and 6.8 and that your seedlings will only grow to a height of about 2 inches before being transferred. Good Housekeeping suggests mixing half-aged compost and half sand for better results.
After planting the seeds, cover them with a half-inch layer of sand and space them out in rows about 1 inch apart.
Burlap or wet sphagnum moss can be added and left in place until the celery sprouts. Keep your sprouting celery seeds away from direct sunlight and in a bright area.
Celery prefers ideal temperatures of about 75 degrees Fahrenheit during the day and 60 degrees at night.
Celery also benefits from good airflow. Maintain moist soil, ensure it is well-drained, and mist your celery seedlings frequently.
Sunlight To Grow Celery In Containers
The recommended sunlight daily is at least six hours. To get the mildest flavour, keep the pot away from direct sunlight.
Celery can be grown in garden beds in zones 2 through 10. Aim for daytime temperatures of 60° to 75 °F and nighttime temperatures of 60° to 65°F.
Watering
Do you know how celery is essentially a crunchy, green liquid? Well, to get there, it needs a LOT of water.
Water shortages can cause bitter flavour, hollow stalks, and poor growth. To maintain stable moisture levels, ensure your celery receives at least 1-1.5 inches of water weekly.
Soil that is evenly damp but not quite wet is good. Mulch can also aid in retaining moisture.
Maintaining consistent water levels might be difficult when growing celery in pots since the soil dries out more rapidly. So be sure to mulch and provide lots of water for your thirsty celery!
Temperature & Humidity
Before planting the seedlings in their permanent position for the season, harden off the young plants once the air temperature reaches 40° to 50°F. (Putting them out too soon may cause them to bolt, which is another word for going to seed.)
Start celery from seed: You must grow your plants because it is challenging to find celery seedlings for sale.
- Celery can't tolerate high temperatures and needs a long, chilly season to grow. Start seeds within 10 to 12 weeks before the last anticipated frost. Sow 10 to 12 weeks before the first anticipated autumnal frost date. Plant in the middle of winter in warm climates.
- Celery seeds are tiny! Before planting, soak in warm water for the night. To secure the seeds, sow them only 14 inches deep and lightly pat down the soil or mixture.
- Keep uniformly moist and warm at a window with natural light or on a heating pad.
- In one to three weeks after planting, seeds should begin to sprout.
- Trim the seedlings with kitchen shears when they reach 3 inches in height, leaving the strongest one. Keep in a light-filled window and keep the soil moist.
- Apply seed-starting fertilizer when the seedlings are a few weeks old.
- Celery dislikes being transplanted and has a taproot. When they develop at least three sets of true leaves, move them to their larger location if you planted them in seed-starting pots. Leave them alone after that to avoid upsetting their fragile roots.
Transplanting Your Celery
It's time to transplant your celery seedlings into individual pots once they are around 2 inches tall.
Putting the celery outside and exposing it to the sun for a few hours each day will help them get accustomed to being outside once in pots.
When the plants are about 6 inches tall, transplant them onto an organically rich garden bed, spacing the rows 2 to 3 feet apart with 6 to 8 inches between each plant. Attempt to bury them as deeply as you did in the pot.
Celery grows best outside in cool, overcast settings between 60 and 70 degrees (celery does not like high heat at all).
After transplanting, Good Housekeeping advises watering each seedling with compost tea, which has been steeped in compost to offer nutrients and beneficial microbes. Mulch the bed with a few inches of non-toxic organic material.
Fertilizing And Caring For Celery
Celery needs at least 1 inch of water every week, and the soil must always be moist (almost wet but always well drained).
Ensure to weed the beds once weekly and fertilize your celery every 10 to 14 days with a balanced 5-10-10 fertilizer or compost tea.
Protect your crops if overnight lows are below 55°F (13°C) for a few days.
Watch for caterpillars so you may pick them off by hand. Spray the vegetables with liquid seaweed extract every two weeks to address any potential boron deficit if the stems of your celery start to crack. You'll be able to harvest your celery 125 days after transplanting.
The stalks should be tied at the tops two weeks prior, and the soil should be formed into small mounds at the base.
To avoid getting the leaves and stalks wet before harvesting, which might cause rot, you must also wrap the knotted stalks in cylindrical sleeves.
Here, wide paper rolls or tall cans with the tops and bottoms removed can be used. To keep the sun off the plants and arrange boards, wet the soil when you water.
After two weeks, the celery will be ready to be harvested (by cutting just below the soil line) and used in your salad.
Pests & Diseases Of Celery
As soon as they emerge, seeds decay or seedlings with black, water-soaked stems fall.
A fungus called “damping off” thrives in soil, especially in areas with high relative humidity. In chilly, wet soil, avoid planting. Ensure the soil is properly drained.
Stunted seedlings and plants with what appear to be knotted or beaded roots. Some root-knot nematodes are pests, but most of these minute worm-like creatures reside in the watery layer that covers soil particles.
Sand-based soils are the most typical habitat for root-knot nematodes, which eat on plant roots and inhibit plant growth. Crop rotation In the middle of summer, solarize the soil using clear plastic.
Plants grow slowly and generate a lot of leaves but no stalks. Sudden changes in temperature during the early stages of growth.
Use horticultural cloth or cloches when the temperature is low to protect young plants from the cold. Avoid planting too soon.
The plant loses strength; leaves become yellow and brown from the bottom up; plants seem stunted, and worms penetrate the roots.
The soil-dwelling click beetle larvae known as wireworms resemble wiry-jointed worms. Before planting, inspect the soil; if wireworms are found, water the area. The soil around the infected plants should be removed.
Harvesting Celery
After germination, celery usually takes 100–120 days to reach harvestable size.
Since this varies considerably per variety, read the seed packet carefully and make a note in your gardening journal or calendar.
When your celery grows at least 6 inches tall from the root to the first leaves, it is time to harvest it.
You can either wait until the entire plant is ready and pick it all at once or harvest individual stalks as you go. You're interested in growing celery in pots if you're reading this.
You'll probably only have a few celery plants in that instance. Therefore, cutting down the entire plant at the end of the season will probably be better for you than collecting individual stalks as needed. Use the exterior stalks first and use a sharp knife to snip off individual stalks close to the base.
Celery's outer stalks, which are deeper green and more bitter than the lighter, sweeter internal stalks, will be present if you haven't blanched it. It would be easier to tell the difference if you blanched it.
Cut along the root at the soil level if you'd prefer to harvest the entire plant immediately.
Making Homemade Celery Salt
Making your own celery salt is simple; combine celery leaves with table salt, kosher salt, or sea salt.
Celery leaves only need to be picked, washed, and dried as much as possible with a fresh dish towel or salad spinner before being dried. Use a dehydrator or an oven to dry out your celery leaves.
Set your oven to 350°F (180°C) if you use one. Celery leaves should be spread out in a single layer on a baking sheet lined with parchment paper.
The leaves should be crispy but not browned after heating for five to ten minutes.
Crush them once they have cooled, then combine them with equal salt. Next, keep the mixture sealed in a container.
Conclusion
Although celery is often thought of as the tasteless water of vegetables, it has a stronger flavour when grown at home.
So don’t miss to grow celery in containers. If you want to try some delicious Vegan Celery Recipes, you may check out my Vegan website.
I trust you enjoyed this article on the Easy Steps To Grow Celery In Containers. Please stay tuned for more blog posts to come shortly. Take care!
JeannetteZ
>>>Please click here to read my all-inclusive article about Container Gardening<<<
>>>Are you interested in homegrown herbs and medicine? Please click here to find out more about it!<<<
Your Opinion Is Important To Me
Thoughts? Ideas? Questions? I would love to hear from you. Please leave me your questions, experience, and remarks about this article on the Easy Steps To Grow Celery In Containers in the comments section below. You can also reach me by email at Jeannette@Close-To-Nature.org.
Disclosure
This post may contain affiliate links. As an Amazon Associate and other affiliate programs, I earn from qualifying purchases at no extra cost to you. Read my full affiliate disclosure.
You might also enjoy these blog posts:
Easy Steps To Grow Goldenseal In Containers
Easy Steps To Grow Feverfew In Containers
Easy Steps To Grow Ginkgo In Containers
15 Best Essential Oils For Natural Healing
30 Powerful Fruits And Vegetables With Healing Powers

