Best Steps To Grow Cauliflower In Containers
Best Steps To Grow Cauliflower In Containers
Can cauliflower be grown in a container? Although cauliflower is a big vegetable, its roots are surprisingly shallow.
You may grow this delightful, healthy, cool-season veggie with a large container to fit the plant. Continue reading to grow cauliflower containers.
History & Origin Of Cauliflower
Cauliflower is assumed to have been domesticated in the Mediterranean region because the wild forms of B. oleracea exhibit the most fantastic range of variety.
It started in Cyprus and spread to Syria, Turkey, Egypt, Italy, Spain, and northwestern Europe.
The cole crops, which include cauliflower and cabbage, descended from a kale-like ancestor known as wild cabbage (B. oleracea L. var. sylvestris L.), which is still present in Western and Southern Europe and North Africa.
Cabbage, cauliflower, broccoli, Brussels sprouts, and other vegetables have been morphologically distinguished based on a few gene changes.
The cauliflower has been growing in India for over 150 years. Dr. Jemson, in charge of Company Bagh, Saharanpur, U.P., imported it from England in 1822.
The imported seeds were tested throughout India. The crop was grown by the growers from May to July, coinciding with the growing season in England.
However, the climatic circumstances of the same period in both countries varied significantly, resulting in the adaptation of some introduced types to early production in the country during warmer and humid conditions.
Growers selected such early adapted kinds and cultivated their seeds for personal use. The seeds of local strains grown in the country were discovered to be better adjusted and early in development.
When compared to crops developed from imported seeds, the local strains, seeds of which were created in the country, were found to be more suited and matured earlier, being ready in November-December.
This marked the start of the evolution of an altogether different cauliflower, today known as Indian cauliflower.
Early and Main Crop Patna and Early and Main Crop Benaras were the first four Indian cultivars listed by Sutton and Sons, India, in 1929.

Types Of Cauliflower
Cauliflower is an annual plant in the cabbage family that belongs to the cruciferous vegetable family.
It originated in Asia Minor and was cultivated in Turkey 600 years ago. It became popular in Europe in the 16th century but was not cultivated in America until the early twentieth century.
Cauliflowers come in hundreds of colours, sizes, shapes, flavours, and nutritional compositions. Cauliflowers come in various colours, including white, green, purple, orange, brown, and yellow.
To grow cauliflower in containers, you need to know the best varieties.
")
1. Green Cauliflower (Broccoflower)
Green cauliflower, also known as “broccoflower,” features a vibrant green hue and a slightly sweeter, milder flavour than white cauliflower.
Due to its delicate texture, it can be roasted, steamed, or eaten raw, making it a versatile cooking component.
While it shares many similarities with white cauliflower, its distinctive colour and sweeter taste can add a fresh twist to various dishes.
Green cauliflower is a visually appealing alternative and can enhance salads, stir-fries, and vegetable platters with its unique flavour and nutrient profile.

2. Romanesco Cauliflower
Romanesco, often confused with cauliflower, is distinguished by its striking fractal pattern and light green colour. Despite having a tougher texture and a slightly nutty flavour, this unusual vegetable is related to cauliflower.
Its geometric appearance is due to the arrangement of its florets, which spiral in a mesmerizing fractal pattern.
Romanesco is versatile in cooking, ideal for roasting, steaming, or sautéing, and adds visual appeal and a subtle, earthy taste to dishes.
It can be used as a colorful alternative to cauliflower or broccoli in various recipes.
Cauliflower and broccoli are both members of the same plant, Brassica oleracea. This makes it simple to cross them and create new varieties.
The Romanesco cauliflower, also known as Broccoflower or Romanesco Broccoli, is one of these. The Romanesco cauliflower is a member of the Brassica oleracea family.
It resembles a cross between broccoli and cauliflower in several ways. Romanesco heads are about the size of a regular cauliflower, measuring around 7″.

3. Orange Cauliflower
This hybridized species, often known as Cheddar cauliflower, produces curds that are vivid orange in colour.
They contain more beta-carotene, an orange pigment precursor to Vitamin A, and they stay on the plant well even when they don't produce blooms during harvest time.
When you cook this sort of cauliflower, the colour becomes even brighter and deeper, and because the plants are durable, you may pick them at different periods rather than all at once and still enjoy their flavour and texture. Orange Bouquet is yet another orange cauliflower type.

4. Purple Cauliflower
Graffiti and Purple Head cauliflower boast eye-catching purple curds that are soft and mild in flavour.
These cauliflowers can be cooked or tossed in salads; however, while Graffiti cauliflower retains its purple hue even after cooking, Purple Head cauliflower turns green.
Like other cauliflower forms, the purple cauliflower plants taste delicious and contain vitamins and minerals.
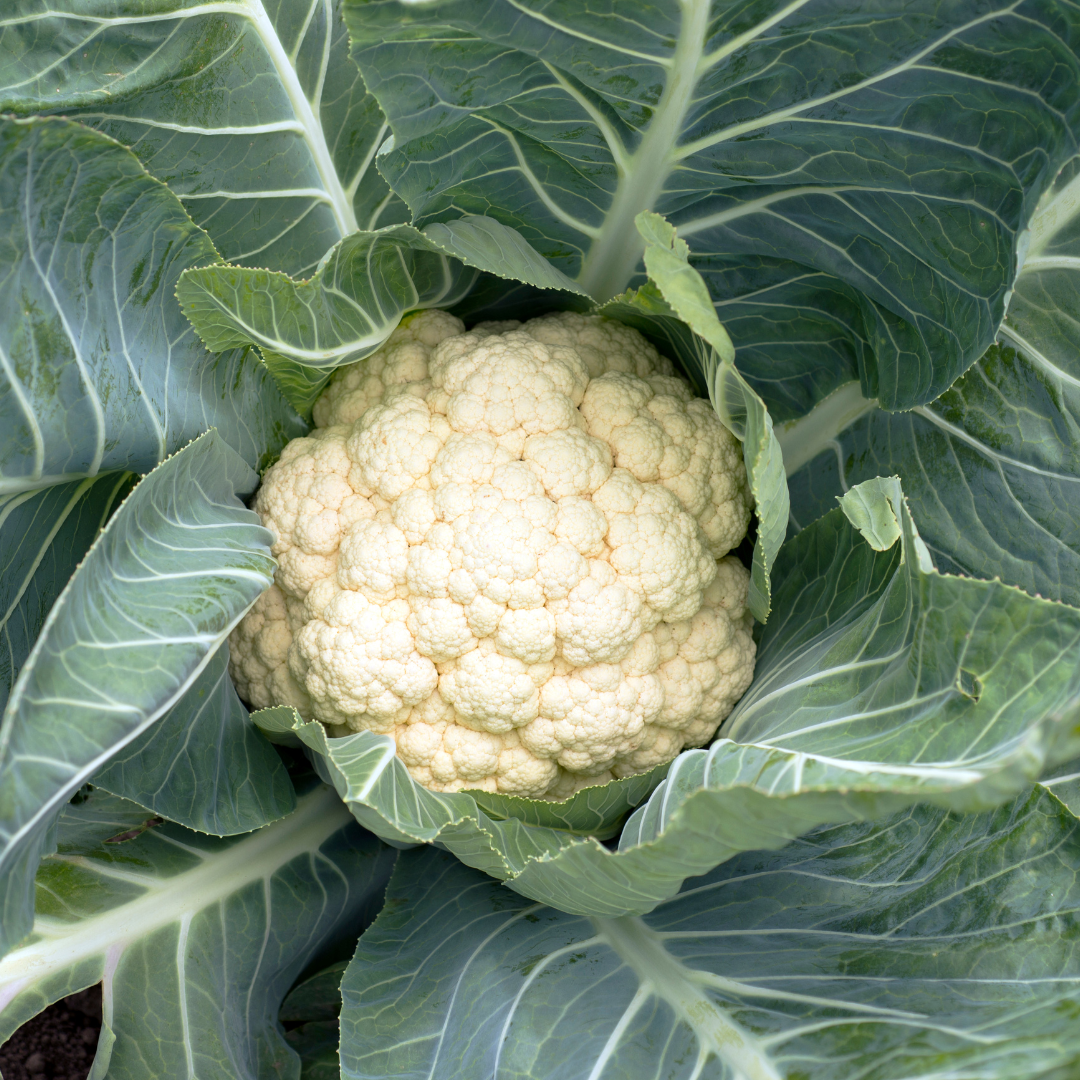
5. White Cauliflower
There are other varieties of white cauliflower, including the White Cloud and the Early White Hybrid.
However, all white cauliflower have white curds, or the head of flower buds surrounded by enclosing leaves.
The curd is the edible part of the plant, and as it grows, it becomes larger and larger, eventually becoming pure white and appearing without the side branches.
Some are frost tolerant in the spring or fall, while others mature quickly, but white cauliflower is the most common and popular form of cauliflower.
Grow Cauliflower In Containers
Anyone may grow Cauliflower in a garden, but did you know it can also be grown in pots?
Growing cauliflower in pots is a fantastic alternative if you have limited space or are new to gardening.
In this essay, we will discuss how to produce cauliflower in pots so that you may enjoy this delicious food throughout the season.
1. Sowing Cauliflower Seeds
Fill your chosen container halfway with potting soil and plant seeds ½ inch deep. Plant the seeds two to three inches apart.
Water the soil thoroughly using a soaker hose to avoid disturbing the seeds. Maintain moist but not soggy soil.
The seeds should germinate in 10-14 days. As the seedlings mature, ensure they get at least eight hours of sunlight daily.
Thin to 18-24 inches apart (if growing more than one seedling in a container), or remove all except the most vigorous seedling from each pot once they have two true leaves.

2. Starting Cauliflower Seeds
You have two options if you start your seeds indoors due to a short growing season. Start them in the pot in which you intend to grow them or in seed trays.
Choose the second option (outdoors) if your pots are too huge or awkward to transport easily. Starting seedlings in trays or tiny pots allows you to use a heating pad to control the soil temperature.
Fill a seed beginning tray or cells halfway with the seed starting mix. Sow one seed per cell or two to three inches apart in a tray ¼ to ½ inch deep. If you're beginning them in cold weather, place your seed starting tray on a heat mat set to 70°F.
If you're beginning them in cold weather, place your seed starting tray on a heat mat set to 70°F to assist germination.
Water thoroughly with a spray bottle to avoid disturbing the seeds. Maintain moist but not damp soil.
Following germination, seedlings should be exposed to direct sunshine or artificial lighting from a grow light for at least eight hours daily.
You can transplant the seedlings to their permanent container and move them outside once they have two sets of genuine leaves.
Whether you're transplanting seeds started in cells or moving a pot begun indoors, it's a good idea to harden them off for a week before moving them permanently outside.
Hardening off entails leaving the plants outside in indirect sunlight for an hour before bringing them back inside.
Add an hour each day for a week until they've adapted to the outdoor environment and can be outdoors full-time.

3. Choose The Best Container
Cauliflower's roots are shallow. That means you don't need a bottomless container, simply one wide enough to support the plant's mature size and supply it with adequate soil to draw moisture and nourish.
To cultivate one plant, you'll need a pot with a minimum depth of eight inches and a width of 18 inches.
If you want to grow more than one, expand the width to allow 18-24 inches between plants or buy extra pots.
You can use terra cotta pots, but you must be particularly vigilant about monitoring the moisture level in the soil because terra cotta dries out quickly.
Cement or stone pots are better at retaining water. But given their weight, you might want to put them on wheels so you can move the plant as needed without putting too much strain on your back.
Make sure that every square foot of surface area at the base of the container has at least one drainage hole that is 1/2 inch in diameter.
If you are not using a new container, sanitizing it by wiping it off with a 1:10 mixture of bleach and water is always a good idea.
You won't be disappointed if your seedlings become ill due to a hidden infection. If you have trouble keeping up with your watering schedule, you might want to consider one with a self-watering system.

4. Soil To Grow Cauliflower In Containers
Cauliflowers, like all brassicas, have high soil requirements. Fill the pot with light, deep, humus-rich, and slightly clayey potting soil.
Because cauliflower grows best in damp soil, use a medium that retains some moisture while also draining effectively. In addition, 1/4 part peat moss or coco peat can be added to your commercial potting mix.
5. Sunlight Requirements To Grow Cauliflower
Keep the pot in a sunny location with at least 6-8 hours of direct sunlight. Growing this tasty vegetable in partial sun (4-6 hours) is also doable in sweltering climates.
6. Watering Cauliflower
Cauliflower requires moist soil to flourish, so you must water it frequently. It is critical to keep the soil moist during the maturation process. Drought-like conditions cause smaller heads to form, possibly their complete disappearance.
7. Temperature Requirements To Grow Cauliflower
Cauliflower is believed to be an excellent weather plant, and it thrives in temperatures ranging from 70° to 85° Fahrenheit.
When sprouting cauliflower seeds, the optimal temperature should be between 50° and 85° Fahrenheit, but when maturing the heads, the ideal temperature should be between 58° and 68° Fahrenheit.
High temperatures should be avoided for sweet and edible cauliflower yield and its look, as they will alter the quality and taste of your plant.
8. Blanching Cauliflower Heads
Unless you choose a self-blanching variety, you must blanch each cauliflower head as it forms. This is the practice of protecting the developing head from direct sunlight to keep the creamy-white hue and keep it from turning bitter.
When the head is about the size of a golf ball, pull some leaves up and tie them loosely around the head with twine or a rubber band.
The leaves should completely cover the head but leave a few open and exposed to sunlight.
9. Transplanting Cauliflower
To transplant seedlings to their permanent container home, prepare your container as instructed above, then dig a hole twice the depth and width of the seed starting tray or nursery start cell.
Place the seedling into the hole and backfill with potting soil, careful not to disrupt the fragile roots. Use an all-purpose fertilizer like Miracle-Gro All Purpose Plant Food, available at Home Depot.
Add ½ teaspoon of the granules to one gallon of water. You should choose a fertilizer that will not burn your cauliflower's tender roots, and this one is a fantastic choice.
If you begin them outside, fertilize them for the first time when they have at least two pairs of true leaves.

10. Fertilizer For Cauliflower
The cauliflower plant is a voracious eater. When planting, you can incorporate compost or well-rotted manure into the soil.
In the middle of the growth, side-dress the plant with a handful of compost or manure. If you aren't adding compost or seeing the required growth, fertilize it once a month or according to the product's directions.
11. Mulching Of Cauliflower
Mulching is optional while growing cauliflower in pots. However, you can do it to keep the soil cool and retain moisture. Mulching in the winter will keep the soil warm and the roots warm.
12. Pests & Diseases Of Cauliflower
Pests that damage the leaves, such as flea beetles, cabbage butterfly larvae, and moths, eat this plant. Aphids and whiteflies can also infest it.
It is infected by clubroot in illnesses, which can be detected if quality soil is used. Powdery mildew might also impact it. To avoid it, avoid soaking the leaves during the day if they can't dry out.
Aphids damage a wide range of plants, including cauliflower. Sucking on the leaves and infesting the heads cause little brown patches or fading leaves.
They can also result in stunted growth. That's a lot of harm for such a small animal. Because the bugs are only 1/8 of an inch long, they might be challenging to see.
They might be pink, white, gray, green, black, or tan, depending on the type. They are most active during warm weather, ranging from 65° to 80°F.
These bugs are frequently found on the undersides of plants, or you may notice the sticky residue they leave behind, known as honeydew.
Flea beetles are tiny black or brown bugs from the Chrysomelidae family that received their name because they jump around like the bugs that enjoy chewing on your pets. Instead, these will peck small shotholes in your vegetation.
This bug can also be kept at bay by using floating row coverings. The water mould Hyaloperonospora parasitica causes downy mildew.
Cool temperatures and damp circumstances aid the spread of this disease. Typically, little yellow spots will appear on the leaves of your plants, followed by a gray mould that might cause the leaves to die.
This can also impair the vigour of your weak plant. As the first line of defence, continuously irrigate at the plant's base and avoid wetting the leaves.
Spray plants with a 50:50 mixture of milk and water every few days as a prophylactic measure.

Harvesting Cauliflower
Cauliflower harvesting occurs almost yearly, depending on the type, seeding date, and temperature.
Harvesting typically occurs 3-4 months after planting. When the head is fully matured (6 to 12 inches in diameter, depending on the variety) and remains compact, cauliflower is ready for harvest. After blanching, the cauliflower can be harvested in 7-12 days.
The cauliflower in your container should be ready to harvest 3 to 4 months after planting. It is best to harvest the cauliflower head when it is 6 to 8 inches in diameter, as this is when the head is at its peak. Use a clean, sharp pair of scissors to chop the Cauliflower head.
Ensure to cut low enough so a few leaves accompany the cauliflower head. After you've harvested the edible bloom, you can compost the rest of the plant.
You should never reuse the same soil to grow another Cauliflower or any other plant in the same family, as this will result in unhealthy plants.
On the other hand, this soil can be used to grow vegetables such as peas, beans, lettuce, or tomatoes.

Conclusion
Fresh cauliflower heads should be kept in the refrigerator in a plastic bag that is perforated or loosely closed.
Cauliflower requires airflow, so don't tie the bag closed or seal it. If you bought a plastic-wrapped head of cauliflower from the grocery store, loosen up the knot.
To stop condensation from developing on the head of the cauliflower, make sure to keep the stem end up.
The cauliflower may become discoloured or begin to rot due to moisture. Additionally, only wash your cauliflower once you're ready to use it. Cauliflower keeps well in the refrigerator for three to five days.
I trust you enjoyed this article on the Best Steps To Grow Cauliflower In Containers. Please stay tuned for more blog posts to come shortly. Take care!
JeannetteZ
>>>Please click here to read my all-inclusive article, About The Essential Companion Planting Guide<<<
>>>Please click here to read my all-inclusive article about Container Gardening<<<
>>>Are you interested in homegrown herbs and medicine? Please click here to find out more about it!<<<

Your Opinion Is Important To Me
Do you have thoughts, ideas, or questions? I would love to hear from you. Please leave me your questions, experiences, and remarks about this article on the Best Steps To Grow Cauliflower In Containers in the comments section below. You can also email me at Jeannette@Close-To-Nature.org.
Disclosure
This post may contain affiliate links. I earn from qualifying purchases as an Amazon Associate and other affiliate programs. Please read my full affiliate disclosure.
You might also enjoy these blog posts:
Best Steps To Grow Lentils In Containers
Best Steps To Grow Zucchini In Containers
Best Steps To Grow Pumpkins In Containers
Best Steps To Grow Kiwi In Containers
Best Steps To Grow Asparagus In Containers