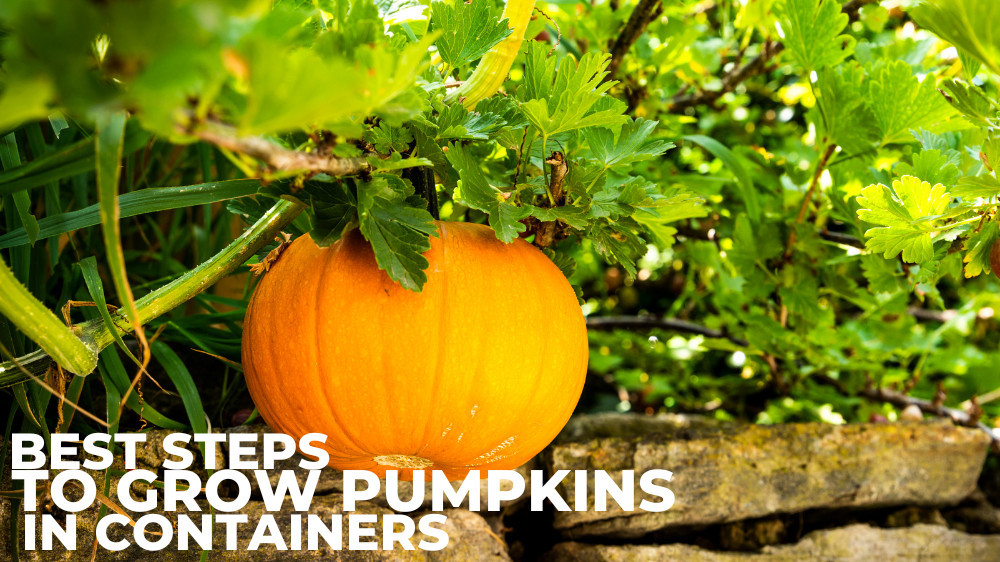
Best Steps To Grow Pumpkins In Containers
Best Steps To Grow Pumpkins In Containers
Are you surprised to learn that it is possible to grow pumpkins in containers? That is correct!
There is no reason why you cannot grow pumpkins in pots right on your patio if you have the right size container.
Most of us associate pumpkins with the fall when used in dinner recipes and around us as decorations.
Growing pumpkins in pots is simpler and incredibly easy than growing vegetables because pumpkins can be grown in various climates and locations.

What Are Pumpkins?
Pumpkins are in the same plant family as melons and cucumbers. They are a variety of winter squash. Given that it has seeds, it is technically a fruit. However, in terms of nutrition, it resembles a vegetable more.
Pumpkins are typically round and orange, though the variety can affect the size, shape, and colour.
The pumpkins are attached to the leafy plant by a stem, which is thick, smooth, and ribbed on the outside.
They are hollow inside, save for ivory-coloured seeds covered in stringy flesh. Native to North America, these squash are significant to two holidays.
They are prepared into pies for Thanksgiving desserts in the United States and Canada and carved into jack-o-lanterns for Halloween.
Aside from Antarctica, they are also grown on every continent worldwide. They all have edible flesh, seeds, and leaves.

Nutritional Facts Of Pumpkins
One cup (245 grams) of canned pumpkins provides:
- Calories: 137
- Protein: 3 grams
- Fat: 7 grams
- Carbs: 19 grams
- Fiber: 7 grams
- Vitamin A: 209% of the Daily Value (DV)
- Vitamin K: 37% of the DV
- Copper: 28% of the DV
- Vitamin E: 22% of the DV
- Iron: 18% of the DV
- Magnesium: 13% of the DV
- Riboflavin: 10% of the DV
- Vitamin B6: 10% of the DV
- Vitamin C: 10% of the DV
- Potassium: 10% of the DV

Origin Of Pumpkins
Although the origin of pumpkins is still largely unknown, they have been seen growing wild in some areas of northeastern Mexico.
The earliest known evidence for humans' domestication and consumption of pumpkins comes from Mexico, where traces of squash and seeds have been discovered in the Oaxaca valley and dwellings in Tamaulipas, possibly dating to 8750 BCE and 7000 BCE, respectively.
Relevant discoveries have also been made in Mississippi (1400 BCE) and Missouri (4000 BCE). During the colonial era, pumpkins were shipped by boat to other regions of the globe after becoming domesticated.
For instance, a prayer book created between 1503 and 1508 for Anne de Bretagne, the duchess of Brittany, contains the earliest documentation of pumpkins in Europe.
Compared to the wild plant, the crop produced more significant, more varied fruit after being domesticated.
Best Pumpkin Varieties To Grow In Containers
Before starting to grow pumpkins in containers, you should know about the best varieties.

1. Casper Pumpkins
White pumpkins are typically displayed as unusual decorations rather than eaten, but “Casper” has lovely and delectable flesh.
One hundred fifteen days after planting, the 15-pound fruits can be harvested. The deep orange flesh is excellent for both sweet and savoury dishes.

2. Cherokee Bush Pumpkins
This one is one of the few bush varieties you can grow at home, though it still requires space due to its four to five-foot spread.
The five to eight-pound fruits have a golden-yellow flesh that is delicious when roasted, used as the base for a cream soup, or pureed and added to pancake or muffin batter.

3. Cinderella Pumpkins
About 15-inch orange fruits resemble the famous fairy tale carriage. Additionally, they only need about 110 days from direct sowing to harvest.
This gives you extra time to prepare the freezer and fire up the canner for savouries made with pumpkins, such as butter, soups, and pickles.

4. Pepitas Hybrid Pumpkins
Don't expect to use these in pies; grow them for delicious eating only! These hybrids generate the “naked” or hull-free seeds, which are so simple to slow roast and enjoy by the handful.
However, the flesh is paper-thin and flavourless, unfit for roasting or pureeing.
The nine to ten-pound fruits are still a two-for-one pumpkin option for the garden due to the mature shells' mottled green and gold colouring, which are also suitable for fall décor.
Despite their small size, they require a lot of space. During the 100-day growth cycle from planting to harvest, the vines can spread up to 13 feet.

5. Red Warty Thing Pumpkins
Red Warty Thing? That is the name of this cultivar, and it is equally accurate and peculiar.
These might be the most popular cultivars that are great for cooking but not attractive. (However, I would add that it is beautiful in a “isn't nature odd and grand?” way.)
It's an heirloom that's becoming increasingly well-liked as a roadside autumn display element.
The rind of a sunset orange is hard and develops tiny bumps that resemble warts. It can be challenging to get rid of the tough rind, but once you do, you'll have pounds and pounds of smooth, dense, sweet flesh that you can cook, roast, pickle, or freeze.
Imagine them as Hubbard squashes that are bigger and even funnier-looking. One fruit can yield a substantial amount of flesh because it typically weighs 20 pounds.
And because of that shellac-like exterior, they are simple to store for a few months in an excellent, dark location.

6. Cushaw Green-Striped Pumpkins
When we moved into her South Knoxville home, and she moved a few blocks away, my first mother-in-law, Genevieve, who I adored, allowed us to keep the enormous stock of frozen “Cushaw” cartons in the freezer.
Since then, I've been captivated by these winter squash with creamy flesh. They are pumpkins, but their curved necks and white and green striped shells might make you think otherwise.
Creative decorators freely use them in Halloween and harvest-themed decorations because they grow to be about 20 inches long.
However, the flesh is entirely flavourful of pumpkins. It has a beautiful light colour and is mildly sweet and tasty when roasted, pureed for pies or custards, or steamed to add to salads and other dishes.
These heirloom sprawlers require a minimum of four feet of space between them in the garden, but they will compensate you with an enormous crop of sweet, tender cooking squash.

7. Rouge Vif d’Etampes Pumpkins
If you're still picturing pumpkins as orange and spherical, let this French heirloom serve as an eye-opener: it's flat and rouge red, hence the name.
This stunning flower, also known as “Red Etampes” in English-speaking markets, is almost the same colour as the morning red sky, the sailor's age-old and frequently repeated caution.
Despite its unappealing appearance, its heavy, dense flesh is a staple in warm, savoury autumnal dishes like roasted soups and vegetable curries.

8. Dill’s Atlantic Pumpkins
If you enjoy watching the “largest pumpkin” competitions at your county fair, you might be surprised to learn that:
This enormous pumpkin produces flesh that is suitable for eating in addition to being the variety of choice for growers aiming for awards and even world records (a 1,500-pound pumpkin!).
It takes 120 days from direct sowing to harvest for “Dill's Atlantic.” To produce one of the whoppers that triumph in state fair competitions would require commitment and work.
However, you can reasonably anticipate that your “Dill's Atlantic” gardening efforts will result in one or two gourds that weigh up to 400 pounds.
The vines require much care to bear fruit, particularly since they need extra water and nutrition to grow those enormous offspring and must be spaced at least eight feet apart.
But if you have enough room for the plants to sprawl, you can grow enormous pumpkins that you can use to make savoury soups, stews, and butter, as well as a deep orange, creamy puree.

9. Fairytale Pumpkins
The French-made “Fairytale” is another whimsical-yet-useful heirloom shaped like Cinderella's humble pumpkin turned haughty carriage.
When ripe, the fruits weigh about 15 pounds, which takes 125 days from direct sowing to harvest.
This perseverance will be rewarded for the patient home cook because the deeply lobbed fruit has excellent dark orange flesh that is dense and smooth, perfect for cooking.

10. Jarrahdale Pumpkin
I decided to grow this heirloom cooking cultivar from New Zealand because it is renowned for its productivity and can produce mature fruits in just 100 days after direct sowing.
Its exterior, with its ribbed, matte, blue-green shell and flattened shape, was merely a bonus.
They stack well and look nice in a fall arrangement, but I'm most interested in the heavy, dense flesh.
It can be used for desserts like pies, but its stringless flesh, which holds its body when roasting or used as an ingredient in a stew, makes it stand out in savoury dishes.
In regions of the South and Southwest, “Jarrahdale” is an excellent option due to its heat resistance, but it is also suitable for Northern climates as long as your growing season lasts 100 days.

11. Musquee De Provence Pumpkin
These French vintage 1899 heirloom cooking pumpkins come from that country. They yield a delicious, firm, sweet orange flesh ideal for savoury or sweet dishes. It takes about 120 days from direct sowing until the fruits are harvested.
The shells of this cheese variety are ribbed and lobed, a muted brown-deep pink colour rather than the bright orange of your typical jack-o'-lantern, and are also known as “Muscade de Provence,” named for its musky aroma.
However, it's alright because you'll want to cook these winter squashes rather than carve them.
Grow Pumpkins In Containers

Time To Plant Pumpkins
Pumpkins are a warm-season crop that cannot tolerate frost. Wait to plant your pumpkins until all risk of the last frost has passed since these heat lovers prefer fertile soil that has reached at least 70° Fahrenheit.
In temperate climates, pumpkins can typically be left outside from mid-May to early June. Your pumpkins may benefit from being started inside if you reside in a region with a shorter growing season and a colder climate.
Plant pumpkin seeds indoors two to three weeks before the last spring frost. Sow the seeds in two-inch or four-inch pots to give the seedlings room to grow without becoming rootbound.
Place one or two seeds in each pot and give them regular watering. After two to three weeks, pumpkin seedlings can be moved outside.
Start pumpkin seeds indoors for two to three weeks before the last spring frost. Sow the seeds in two- or four-inch pots to give the seedlings room to grow without becoming rootbound.
One or two seeds should be planted in each pot. Water frequently. The last average frost date in your area is when pumpkin seedlings can be transplanted outside for another two to three weeks.

Container Requirements
Choosing a properly sized pot is crucial when growing pumpkins in containers. Your plant will perish if you don't get the right size; it needs lots of room for the roots to spread, allowing the plant to grow.
For smaller pumpkin varieties, a pot should be at least 10 gallons in capacity. You would need a larger container, typically 15 to 25 gallons, to grow larger cultivars, such as the pumpkins perfect for carving into jack-o-lanterns.
The pots should be 20–24 inches deep and the same width to accommodate growing pumpkins.
Pumpkins can be successfully grown by some gardeners in 6-foot-wide plastic kiddie pools. That's special and reasonably priced!
Additionally, check that the containers have sufficient drainage. Because pumpkins dislike standing water, choose a pot with many holes in the bottom so water can drain.
If the containers don't already have holes, you can often drill the holes with a drill.

Soil And Location
The ideal location would have well-drained, moderately fertile soil, free of problematic weeds, and no nematodes.
Since neither pumpkins nor gourds can tolerate wet or poorly aerated soils, coarse to medium-textured soils are best.
Where rainfall is likely to be insufficient, soil that can retain moisture is best (such as soil with a medium texture).
The location should be in direct sunlight, and the pH level should be between 6.0 and 6.5.
Dolomitic lime should be applied following the soil test results at least three months before the crop establishment if the soil test shows a lower pH.
Pumpkins can grow in soils with a pH as low as 5.5, but you should avoid highly acidic soils (pH 5.5).
Due to the risk of disease transmission, pumpkins and gourds shouldn't be planted in succession with other cucurbits or with one another.
Never grow either in a rotation with tobacco, tomatoes, peppers, or peanuts. Although other non-curbit crops are acceptable, rotation with rye, wheat, or other small grain crops is ideal.
Avoid growing pumpkins or gourds in areas with an issue with herbicide residue from a previous crop.

Fertilizer
Base all fertilization plans for pumpkins and gourds on the findings of soil tests.
On Coastal Plain soils, nitrogen (N) rates for pumpkins and gourds should be between 80 and 120 pounds per acre, and on Piedmont, Mountain, and Limestone Valley soils, between 80 and 100 pounds per acre.
Ideally, 80 to 90 pounds of nitrogen per acre should be adequate. Leaching rains may necessitate the addition of additional N. Based on the results of soil tests, phosphorus (P) and potassium (K) rates should be set.

Plant Pumpkin Seeds Or Seedlings
Pumpkins quickly become root-bound, so planting the seeds directly in the pots is usually preferable to transplanting seedlings you started indoors.
If you purchase seedlings from a nursery, move them as soon as possible to prevent transplant shock.
Use biodegradable pots if you're growing seeds indoors. As a result, it is simpler to transplant seedlings because the roots are not disturbed.
When the second accurate set of leaves appears, thin the number of seeds per pot to one or two, depending on size.
You might decide to keep one or two seedlings, depending on the size of your chosen container.
Each seed should be sown 1-2 inches deep in the ground. It may be more difficult for them to emerge from the soil if you plant them any more profoundly. The seeds typically germinate in 5 to 10 days.
Support
Consider the size of these plants as a whole; you will need to erect a sturdy, sizable trellis that can hold the pumpkin vines.
Generally, you don't want to let the vines grow along the ground or your patio because they could contaminate your plant.
Most gardeners have had success supporting pumpkin vines with an A-shaped trellis. The trellis must be kept from walls to prevent the plant from catching any diseases.
You'll need to train the vines to climb the support system as your plant grows. It's much simpler than it sounds to do that.
You must carefully move the tendrils as they expand throughout the trellis. The tendrils naturally cling to anything nearby to aid in growth.
You'll need to create slings to hold the fruits as they grow. If not, they will hang down and possibly break the vines. Numerous gardeners sling pantyhose beneath the fruit and fasten them to the trellis.
Watering
One thing you must do is give your plants lots of water. Pumpkins require frequent watering, just like melons or gourds.
Water deeply and frequently because pumpkins prefer moist soil. Every week, each plant requires one inch of water.
At the same time, you must be careful to water the plant from the base and avoid getting water on the foliage.
Mulching
Adding mulch to the area around your pumpkin plants is a great idea. You don't want to cover the pumpkin plant with mulch accidentally, so do this when your plants are a few inches tall.
Mulching slows the water evaporation out of the soil, retaining more moisture and promoting pumpkin plant growth.
Additionally, it can water soil temperatures in the late spring and help them remain a little cooler in the summer.

Hand Pollinate
If you want your plants to produce fruit, pollination is necessary. Although bees and other pollinators are essential, you might need to manually pollinate the flowers if you notice that they aren't.
A few days after the male flowers appear, the female flowers will have an ovary, or the beginning of a pumpkin, at the base of the flower.
The pollen required to pollinate the female flowers is present in the male flowers. If you need to manually pollinate the flowers, gently swab a cotton swab inside the male flower to gather pollen. Move the pollen afterward, then rub the swab inside the female flower.
Yes, you just portrayed the birds and bees in a garden setting!
Pests & Diseases Of Pumpkins
Various insects and diseases can harm pumpkin plants. Here are some you might come across as your plants develop over the year.
1. Squash Mosaic
Squash mosaic symptoms can vary, but typically, they begin with ring spots, blisters, and mottled leaves.
Usually, the infected plants grow slowly, and the fruits could be deformed. Cucumber beetles spread a virus called squash mosaic through infected seeds.
Using seeds that are verified to be disease-free is the only way to control this virus. By keeping your garden beds free of clutter, you can reduce the likelihood that cucumber beetles will visit.
2. Phytophthora Blight
Your plant may have phytophthora blight if you notice sudden, persistent wilting but no colour change in the leaves.
Sadly, the plant usually perishes after a few days. The roots and stem often have a discoloured appearance close to the soil and are easily pulled out of the ground.
This disease appears in warm, moist conditions and has no known cure. The best course of action is to avoid soggy soil and short-term irrigation.

3. Aphids
Aphids are tiny, soft-bodied insects that prefer to adhere to plant stems or the underside of leaves. The leaves may turn yellow if the infestation spreads too far.
A sticky substance that aphids secrete may promote plant mould development, necrotic spots on leaves, and stunted shoots.
You can remove the aphids from the leaves with water from a hose. Typically, only severe infestations are treated with insecticides.
You can also use insecticidal soap or oil, such as neem oil, to reduce the population.

4. Cucumber Beetles
You may have a cucumber beetle problem if your seedlings are stunted, or your leaves are harmed. The plant may display signs of bacterial wilt and beetle-caused scarring on the fruit.
When the weather is warm, these beetles can emerge from the soil they overwintered in and from the piles of soil and leaf debris left behind at the end of the season.
Keep an eye out for beetle signs on your plants. Floating row covers can protect your plants from these pests and the damage they cause.
5. Squash Bug
The plant may wilt and develop yellow and brown leaves if there is a squash bug infestation. These pests can also kill fruit and leave it with blemishes.
Grey-black squash bugs have stripes of orange and black on their abdomen. The debris under the plants and rocks is where these bugs prefer to spend the winter.
After harvesting, you must remove all crop residue and debris. When you plant, use row covers to protect your plants from pests. You can also try insecticidal soaps and oils.
Applying kaolin clay to manage small populations is another tactic.

Harvesting The Container Grown Pumpkins
It's time to harvest your pumpkins 90 to 120 days after planting (depending on the type of pumpkins you are growing). You have been patiently waiting for this moment to come.
Make sure your pumpkins are mature and prepared for harvesting before anything else. Pressing your fingernail into the pumpkin rind can help determine the pumpkin's maturity.
The fully grown pumpkins will withstand the strain. It is time to pick the pumpkin because you can knock on it; it should sound hollow.
It's time to choose your pumpkins right now. You should avoid yanking or pulling the fruit from the vine.
As you might expect, that could cause the vine to break, harming any other fruits growing on the vines.
Use a good knife or a pair of pruning shears instead. Cut the vine with shears or knives, leaving a long stem about 10 cm long.

Store Whole Pumpkins
Pumpkins that have just been picked and cured can be kept for about 6 months or longer if they have thick skins. What you should do is:
- Choose a spot in your house that is dark, dry, and generally between 50 and 60 degrees Fahrenheit (10 and 16° Celsius). Many people keep their pumpkins in the garden shed, garage, or basement.
- Wash and thoroughly dry the pumpkins.
- Use a weak mixture of water and bleach to clean each pumpkin. Add 2 tablespoons of bleach to 1 gallon of water to create the solution. By doing this, bacteria won't grow on your pumpkins.
- To place the pumpkins on, spread out a sheet of cardboard or plywood. This will safeguard your floor if any of the pumpkins begin to rot. You could also place your pumpkins on hay bales if any are available. Remember that if you put your pumpkins directly on concrete, they will rot.
- Put a single layer of pumpkins on the cardboard with the stems facing up.
- Alternatively, You can keep your pumpkins on a wire or wood shelf. Make sure to store them in a single layer and attempt to leave some space between each one for air to circulate.
- Regularly inspect your pumpkins to ensure none are beginning to show signs of decay. Be sure to also check the underside of your pumpkins by lifting them up. Any pumpkins that exhibit signs of rot should be thrown away. Clean any other pumpkins that may have come into contact with the rotting one with the diluted bleach solution.

Store Pumpkin Puree
Pumpkin puree is simple to store in usable amounts in the freezer. You can always have some pumpkins on hand in savoury dishes, pumpkin pies, cakes, or muffins because this takes up very little freezer space.
Follow these instructions to make pumpkin puree and store it in the freezer:
- Cooking the pumpkin is the first step. The pieces can be steamed on the stovetop or roasted in the oven.
- To accomplish this, split the pumpkin in half and scoop out the seeds.
- If you're steaming the pumpkin, you can either peel it or leave the skin on because it will be simpler to remove once the pumpkin is cooked if you cook it in the oven.
- Make small chunks out of the pumpkin.
- Now you have two options: either put the chunks on a baking sheet and bake them in the oven until soft, or put the chunks of peel into the top basket of your steamer and steam them until soft.
- After cooking, allow the pumpkin to cool to room temperature.
- Scrape the flesh from the pumpkin's skin if it still has skin on it.
- Use an immersion blender or a food processor to puree the pumpkin flesh.
- Put pumpkin puree in freezer-safe zip-lock bags in recipe-size portions and lay these flat on a tray.
- In the freezer, place the tray.
- The puree can be taken out of the tray and neatly stacked in your freezer after it has frozen. Label the bags with the date to ensure that you can use the oldest bags first.
- Alternatively, you could put the puree in single-use cups and store each in a freezer bag.

Conclusion
Pumpkins are very nutritious vegetables with a lot of fiber, vitamins, and minerals. It can be used in sweet and savoury dishes and is versatile.
The seeds, a great source of plant-based fat, can also be used as a salad topping or a healthy snack.
However, you should eat pumpkins as a vegetable rather than a dessert to reap its health benefits. So don’t miss to grow pumpkins in containers.
I trust you enjoyed this article on the Best Steps To Grow Pumpkins In Containers. Please stay tuned for more blog posts to come shortly. Take care!
JeannetteZ
>>>Please click here to read my all-inclusive article about Container Gardening<<<
>>>Are you interested in homegrown herbs and medicine? Please click here to find out more about it!<<<
Your Opinion Is Important To Me
Thoughts? Ideas? Questions? I would love to hear from you. Please leave me your questions, experience, and remarks about this article on the Best Steps To Grow Pumpkins In Containers in the comments section below. You can also reach me by email at Jeannette@Close-To-Nature.org.
Disclosure
This post may contain affiliate links. As an Amazon Associate and other affiliate programs, I earn from qualifying purchases at no extra cost to you. Read my full affiliate disclosure.
You might also enjoy these blog posts:
Best Steps To Grow Kiwi In Containers
Best Steps To Grow Asparagus In Containers
Best Steps To Grow Brussels Sprouts In Containers
Best Steps To Grow Bok Choy In Containers
Best Steps To Grow Oranges In Containers