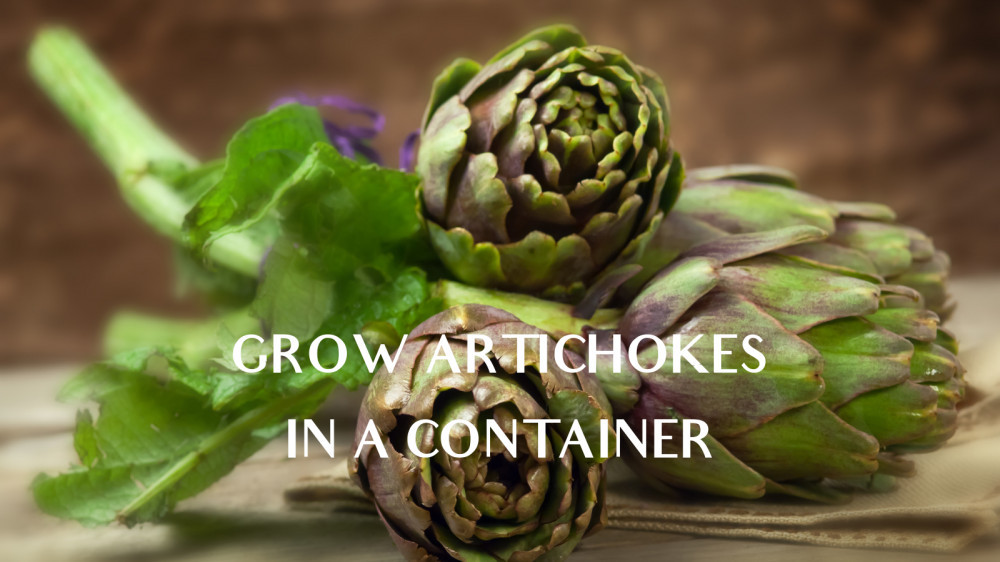
Simple Steps To Grow Artichokes In A Container
Simple Steps To Grow Artichokes In A Container
Growing artichokes in a container allows you to enjoy fresh, homegrown produce, even in small spaces. Artichokes' unique look and tasty harvest add beauty and flavour to any patio or balcony.
This guide covers simple steps to help you grow and care for artichokes in a container, ensuring a rewarding experience and a bountiful yield right from home.

What Is An Artichoke?
An artichoke is an immature thistle flower bud. In food, it is regarded as a vegetable and eaten as such.
Instead of the aster plant's blooms, its buds are harvested. An artichoke is a challenging vegetable because it requires some work to reach its edible parts.
Thorny points can be found on the bud's outer leaves, or “bracts,” (thornless varieties have been cultivated). The leaf bases and innermost leaves are both delicate enough to be consumed.
The choke (the hairy core) is then discovered on top of the heart, followed by the stem. An artichoke's heart is the meatiest part, and the core of the stem is also edible. The choke is usually not eaten unless it is a baby artichoke.

History & Origin Of Artichokes
The globe artichoke (Cynara cardunculus var. Scolymus), sometimes called the French artichoke or green artichoke in the United States, is a food-producing variant of the thistle plant.
The plant's edible portion consists of unopened flower buds. The blossoming artichoke flowerhead is an inflorescence, or grouping of multiple budding small flowers and numerous bracts on an edible base.
As the buds open, the structure takes on a strict, hardly edible form. Another kind of the same species that is perennial and native to the Mediterranean area is the cardoon. Both wild types and developed varieties (cultivars) exist.
This vegetable has long arching, deeply lobed, silvery, glaucous-green leaves that are 50–83 cm (19–2-32–12 in) and grows to a height of 1.4–2 m (4–7–6 ft 7 in).
A delicious bud with a diameter of 8 to 15 cm (3-6 in) and numerous triangular scales gives rise to a big head of purple flowers.
The bulk of immature florets in the center of the bud is referred to as the choke or beard, and the fleshy lower regions of the involucral bracts and the base, also known as the heart, make up the majority of the edible parts of the buds. Older, more giant flowers lack edible petals.
One of the earliest vegetables to be cultivated is the artichoke. Most historians concur that artichokes originated somewhere in the Mediterranean; some claim it was Sicily, while others assert that it was Northern Africa.
The smaller and thorny Cardoon is the basis for the better Artichoke. Although the Cardoon blooms were consumed, the stems were frequently preferred.
They first started growing in the fifth century BC. On their way up, they crossed Italy. The Dutch brought them to England. The French carried them to Louisiana and Italian immigrants to California.
The globe artichoke is primarily grown in the Americas and the nations bordering the Mediterranean basin. Italy and Spain are the top European manufacturers.
Types Of Artichokes
There are two main artichokes: elongated, tapering, like “Violetta ” and massive, round “Globe” artichokes. Both plants have similar growth traits, soil needs, and cultural requirements.
Most artichokes will survive the winter in Zones 7 and higher if thoroughly mulched with straw or fallen leaves.
For gardeners in chilly climates, choose artichoke varieties bred to produce in a single season. To grow artichokes in a container properly, you should know the best varieties that suit your climate.

1. Elongated Artichokes
The size and shape of elongated artichokes are tapered and long and have a similar nutritional profile to globe artichokes.
Due in part to their lengthy nature, elongated artichokes are not nearly as complete in size and shape as globe artichokes.
There isn't much difference between a globe and elongated artichokes when it comes to preparing them or the nourishment they offer because most of the variation is in their diameters.

2. Globe Artichokes
If you notice a round, fatty artichoke in your local supermarket, it's probably a globe artichoke. Globe artichokes can grow up to 5 inches in diameter and are typically reasonably heavy.
This plant belongs to the thistle family and is frequently called a “genuine” artichoke. Although globe artichokes are typically available year-round, their flavour is best from June to November, when they are bigger and less arid.

3. Siena Artichokes
The Siena artichoke stands out with its highly rectangular shape and wine-red tint. One of the last artichokes to develop during the growing season, its hearts are delicate enough to be eaten raw.

4. Violetta Artichokes
Artichokes from the Violetta family mature in around 100 days and are typically 3 inches wide and 5 inches long. They grow best in zones 6 and higher, with green foliage and violet undertones.
Italian heirloom Violetta artichokes yield 6 to 8 significant buds and dozens of young chokes during the growing season. Be careful not to harvest Violetta artichokes when they are too tight or young if you grow them.

5. Baby Anzio Artichokes
This kind of artichoke is tiny and red, as its name suggests. They are supposed to be a distant descendant of the Romanesco artichoke and typically have a diameter of no more than one inch.

6. Castel Artichokes
This artichoke variety is lovely and may be cooked by boiling or steaming. It is high in Vitamin B, calcium, potassium, and antioxidants.
Additionally, it has been demonstrated to reduce blood pressure and blood sugar and aid with various digestive issues. Buy and consume artichokes from May to October for the most incredible flavour.
Grow Artichokes In A Container
Artichokes, related to thistles, are incredibly delicious and high in dietary fiber, potassium, and magnesium. If you don't have enough room for an enormous artichoke in your garden, try planting it in a container.
If you follow these container-grown artichoke recommendations, growing potted artichokes is straightforward. Let’s get started to grow artichoke in a container.

1. Choose A Suitable Container To Grow Artichokes
As their roots spread and they produce about 26–44 artichokes per growing season, these plants will do best in a 14–16-inch deep and broad container. They can also be grown in wine barrels, which is fantastic!
With a similar spread, mature plants can grow to 3 to 5 feet. Keep them at least 3 feet apart if you are growing them together.
If you're planting artichokes as perennials, choose significantly larger pots. Artichokes should be grown in containers at least 24 inches deep and 38 inches wide so that their roots have room to spread out. An artichoke plant can produce between 30 and 50 artichokes in a growing season.
Because artichoke plants need full sun, planting them too close together may cause the larger plants to shade the smaller ones.
Your artichoke transplants should be spaced 4 to 6 feet apart when planted in a row. Rows should be spaced 6 to 8 feet apart to facilitate watering, fertilizing, and harvesting.

2. Soil To Grow Artichokes In A Container
Use rich, sandy-loamy, well-draining soil with a pH range of 6–8. Fill the container with a high-quality potting mix of organic compost or all-purpose granular fertilizer.
Excellent soil and enough water are essential for developing their enormous flower buds. To grow an artichoke plant, choose a pot at least 3 feet (1 m) wide and a foot (31 cm) deep. If you're gardening, use fertile, rich organic soil with a pH of 6 to 6.8.
And before sowing the seeds, mix the soil for a few days with aged manure and natural compost. Composting the soil will enhance the amount of nutrients present. Adding yucca extract to the soil will help it retain moisture for a long time.
Before placing the soil in the appropriate container, you may also mix all-purpose mild granular fertilizer into the soil for a few days.
Check the water content of the soil frequently; these plants do best with steady moisture levels. Choose high-quality, commercial potting soil rich with vermiculated organic matter rather than gardening dirt.
3. Location To Grow Artichokes In A Container
Finding a sunny garden bed with fertile, well-draining soil is ideal for producing artichokes. Although the plants may grow in various soil types, they are heavy feeders and perform best in light, nutrient-rich soils. Before planting, add 2 inches of aged manure or compost to the top of raised beds.
Artichokes grow best as perennials in zones 6 and lower and should be grown in a greenhouse, polytunnel, or other protected area.
Place the overwintered artichoke plants in a polytunnel. Annually, add compost and a slow-release organic vegetable fertilizer to the area around each plant.

4. Sunlight To Grow Artichokes In A Container
Despite being unable to withstand extreme heat, artichokes do well in direct sunlight, so they should receive 6 to 7 hours daily.
If it's scorching summer, put the container somewhere shaded around noon. The plants require sunlight, appropriate soil, and routine watering to grow huge, sensitive buds.
Plants can flourish in chilly and foggy coastal conditions as long as they receive two to three hours of morning sunlight. Place the seedlings in a sunny spot with at least 10 hours of sunshine daily and moisten them.
Add more artificial illumination as necessary. Give the seedlings gentle fertilization every few weeks. Give the plants over a week to harden off before transplanting.

5. Water Requirements To Grow Artichokes In A Container
Artichoke plants need much water to generate sensitive flower buds, so water them frequently. To keep the soil moist, apply a thick layer of mulch, as heated soil causes flowers to bloom more quickly.
More water is required for the artichoke plant to prosper. Additionally, container plants require more water than those planted directly in the soil.
Because the potting soil in the container dries out rapidly, it is recommended that artichoke plants be watered once a week. In an arid summer, keep watering them every day. In the winter, water intervals might be shortened.
Before watering, check the soil's moisture content; the buds will lose their flavour if the plant is overwatered or underwater.
6. Temperature & Humidity To Grow Artichokes In A Container
Artichokes thrive in the warm, dry climates of California and the Mediterranean. In other subtropical and tropical regions, you can plant them as perennials, but remember that too much heat causes early flowering. These plants do well in a temperature range of 50-77°F (10-25°C).

7. Fertilizing Artichokes
When the plant is one month old, start feeding it. Use all-purpose vegetable fertilizers. Artichokes require weekly or biweekly feedings as heavy feeders to maintain good growth.
Feeding should continue throughout the growing period until the first artichoke buds appear. Use a fertilizer in granule form with a nitrogen, phosphorus, and potassium ratio of 10:10:10 or 14:14:14.
During the growth stage, fertilize the plant monthly using a balanced liquid fertilizer diluted to half or quarter strength. When the first artichoke appears, feed the plant once more.
Before applying, give the plants plenty of water, but stay away from the leaves since they could catch fire. As an alternative, you can also feed the plants fish emulsion every 8 to 10 weeks.

8. Pruning And Mulching Artichokes
Mulching is necessary to maintain soil moisture during the growing season and to keep weeds out of the plants' way.
Additionally, it protects plant roots from freezing temperatures. Give the plants a thick layer of mulch made of organic materials, such as aged manure, straw, dry grass clippings, or a combination.
Artichoke plants should reach the soil level by the end of summer. When the plant's leaves start to turn yellow, prune it. Continuous pruning will enhance the plant's new growth in the spring.
9. Overwintering Artichokes
Trim the plant and add a thick layer of mulch throughout the bitter winter. Plastic or garden cloches can also protect the plants. You might also transfer the container inside or into a garage.
When the temperature returns to normal, take the container outside, where it will receive direct sunlight, water it thoroughly, and fertilize the plant with a granular, mildly balanced fertilizer. Trim the plants down to the dirt.
Create a pile of straws and leaves inside the pot. When it gets warmer in the spring, take the pot outside in the sun.

10. Pests & Diseases Of Artichokes
In moist weather, slugs might attack your artichokes. They primarily eat fragile, immature leaves. Another danger is aphids, which may be removed with a hose. Give the plant enough room so that air may circulate.
Flowers' bracts and leaves can become dark and grey due to botrytis, often known as gray mould. As soon as you see the ailment, remove the afflicted leaves. Try neem oil or use a fungicide designed for edible plants.
Crown rot is a disease that can harm artichokes and is most prevalent in the winter. To prevent plant rot, mulch before the soil temperature drops below 50°F (10°C).
When it becomes warm out, mulch should be removed. For container growth, use disease-resistant plant cultivars.
11. Harvesting Artichokes
You must examine the artichoke plant regularly every day. The optimal time for harvesting is when you notice flower buds emerging. The buds must be removed before the petals unfold.
If you wait too long, the buds can turn fibrous and stringy. If you choose to use the artichoke seeds, make sure the seeds are sitting on top of the adjusted soil. The plants must be placed at least 4 feet apart. After around 30 days, liquid fertilizer is always advised.
Verify that the artichoke beds are free of weeds. As was already said, you will need mulch at first. Anyhow, you must make sure that you are removing the mulch as you notice the buds starting to form.
You must use the 4-inch-thick compost layer surrounding the plant in this situation. When harvesting, you must adhere to a few guidelines. The buds should be picked when they are compact and firm.
Once you have harvested all of its buds, the stem must be cut to the ground. That is the entirety of an artichoke container or pot gardening. Continue to garden.
Conclusion
Artichokes are fun to grow and a healthy vegetable to eat. Here, we break down the nutrients and advantages of artichokes and offer some delectable ideas and vegan recipes for you to use in your next meal. Don’t miss to let us know if you need help growing artichokes in a container.
I trust you enjoyed this article on the Simple Steps To Grow Artichokes In A Container. Please stay tuned for more blog posts soon. Take care!
JeannetteZ
>>>Please click here to read my all-inclusive article about Container Gardening<<<
>>>Are you interested in homegrown herbs and medicine? Please click here to find out more about it!<<<
Your Opinion Is Important To Me
Do you have thoughts, ideas, or questions? I would love to hear from you. Please leave me your questions, experiences, and remarks about this article on the Simple Steps to Grow Artichokes In A Container in the comments section below. You can also email me at Jeannette@Close-To-Nature.org.
Disclosure
This post may contain affiliate links. As an Amazon Associate and other affiliate programs, I earn from qualifying purchases at no extra cost to you. Read my full affiliate disclosure.
You might also enjoy these blog posts:
Easy Steps To Grow Swiss Cheese Plants In A Container
Steps To Grow Fiddle Leaf Figs In A Container
Easy Steps To Grow Lavender In A Container
Easy Steps To Grow Ferns In A Container
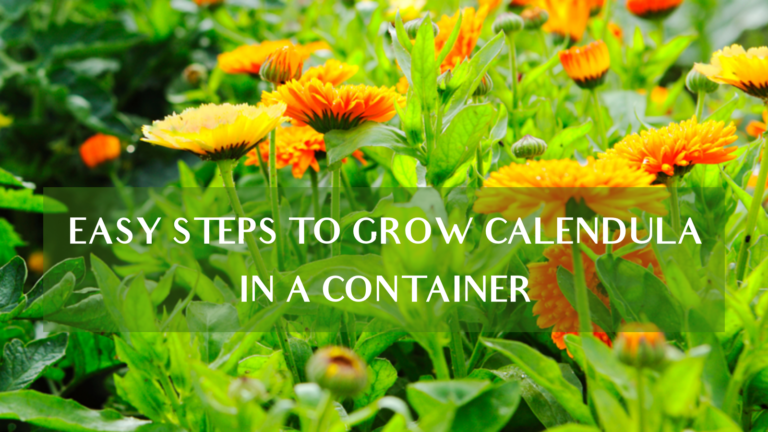
Easy Steps To Grow Calendula In A Container