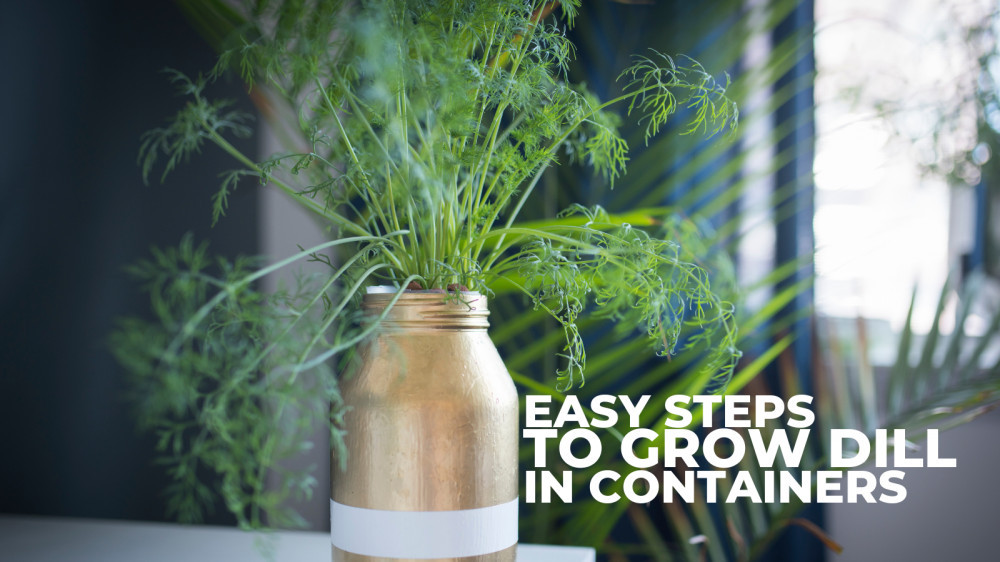
Easy Steps To Grow Dill In Containers
Easy Steps To Grow Dill In Containers
Those without a yard or garden can still enjoy the diverse variety of plants through container gardening.
Dill may be grown in containers for a simple introduction to herb growing, and you can use it to make homemade pickles, dill vegetable dip, and fresh fish dishes.
Dill is a great herb to grow in a container for several reasons. In addition to being a lovely and aromatic plant, every part of it is edible! Actually, it is simple to cultivate and may be regularly clipped to match the growing area.

History & Origin Of Dill
Anethum graveolens, a perennial aromatic herbaceous plant in the parsley family (Apiaceae), is known by the common name “dill.” It has thin stems, finely split leaves, and tiny white to yellow flowers in tiny umbles.
The only species of the genus Anethum is dill, while some botanists classify it as Peucedanum graveolens, a similar genus. Dill is a well-known commercial herb used medicinally and in cooking.
Dill seeds, its dried fruit, are used as a spice; its strong, intense, and bitter flavour is best utilized to flavour pickles (dill pickles), sauces, and dill vinegar.
Dill weed or dill leaves are used as herbs because of their distinct flavour; they are best when consumed fresh but can also be used dry.
Dill seed oil and dill leaf oil, two of the plant's essential oils, are used for various things, including scented soaps, medications, and food flavouring.
Dill has been used in medicine for more than 2,000 years, and it is especially well-recognized for calming the stomach after meals.
Dill, also known by its botanical name Anethum graveolens, is the only genus species related to celery and parsley.
It is indigenous to western Asia and the eastern Mediterranean. The old Norse term Dylla, which means to calm or lull, is where the word “dill” originates.
It first appeared in writing around 3000 B.C., when Egyptian medical writings referred to it.
Dill weed was regarded as a lucky plant in first-century Rome. The ancient Egyptians utilized it as an aphrodisiac and a witches' ward.
The Greeks associated riches with dill. It was grown in many cultures for its therapeutic benefits, especially its capacity to calm an upset stomach.
The Bible even refers to it. Dill seeds were given to kids by Puritans and Quakers as an appetite suppressant at church.
Dill seed is credited in contemporary wisdom with having antibacterial and breath-freshening properties. It is also thought to help colic and boost milk production in nursing mothers.
Types Of Dill
It's a good idea to keep dill on hand. Its flavour is unmatched, boasting aromatic, delicate foliage and vivid yellow blossoms.
Dill comes in a few distinct types, so choosing one to plant might not be simple. To grow dill in containers, you should know the best variety.

1. Bouquet Dill
Due to its tall stems and large, beautiful umbels of vibrant yellow flowers, this cultivar is frequently used in cut flower bouquets, which is how it got its name.
It has lovely dark-green foliage, making it the perfect choice for an edible ornamental plant for your garden.
Therefore, this item serves as a one-stop shop. It can be one of the most widely produced varieties for this reason.
Due to its plentiful seed supply, this is a superb choice if you want to create pickles. Tea that is calming is frequently brewed with it as well.

2. Compatto Dill
The small cultivar “Compatto” has blue-green foliage and a strong, aromatic flavour. It stands just 12 to 18 inches tall when fully grown and bolts slowly. Plants can withstand heat and drought to some extent.
In approximately 40 to 50 days, leaves will be ready for harvest. If you're searching for a container herb, this size is ideal.

3. Delikat
‘Delikat' features lush, substantial, and dense foliage. It is a consistent producer with higher leaf and seed yields than other dill types.
It reaches a height of 10 to 24 inches. Its seeds mature in 90 days, while the foliage can be harvested in around 40 days.

4. Dukat Dill
The Danish form of dill, known as “Dukat,” also called “Tetra,” bolts more slowly than other varieties.
It has a strong flavour and is a beautiful choice if your main objective is harvesting the leaves for cooking. Due to its high oil content, “Dukat” is fragrant and tasty.
This cultivar is perfect for growing in containers because it matures to a height of one to two feet.
In 40 to 50 days, the leaves are ready for harvest, and in 90 to 100 days, the seeds are ripe.

5. Elephant Dill
Elephant dill is a late-flowering variety that bolts slowly, allowing you to cut the dark green leaves for a more extended period.
The seeds are ripe around 110–140 days after the mildly flavoured leaves reach maturity, which takes 60–90 days.
‘Elephant' can be cultivated in borders or raised garden beds, reaching a mature height of four feet and a spread of two feet.
How To Grow Dill In Containers
Dill has fern-like, fluffy green leaves and a sweet, licorice- and anise-seed-like scent. This common kitchen herb serves two purposes: a spice and a herb.
Gather fresh fronds to make salads, vegetables, sauces, meat, seafood, fish, and curries. The seeds can be used to flavour pickles, stews, sauerkraut, rice, and bread. So let’s get started…
Time To Plant Dill
Dill seeds can be sown at any time of the year if cultivated indoors in pots. Put one seed in the prepared pot, moisten the soil, cover the container's top with plastic wrap, and set it somewhere warm and sunny. Remove the plastic cover once the seed has begun to sprout, and keep the soil damp.
Wait until spring to sow the seed in a ready pot when growing in a container outside. Keep the soil damp but not drenched during this initial period.
Put the pot in a spot with at least six hours of direct sunlight each day and sufficient airflow. It's a fantastic way to spice up containers and add fragrance!

Plant Dill Correctly
Dill grows best from seeds and has a long taproot. Compared to dill grown from seed, dill grown from transplant frequently bolts more quickly.
When planting transplants, pick immature transplants and handle roots with extreme caution.
- Dill seeds should be sown ⅛ to ¼ inch deep. Spread out seedlings 4 inches apart. Until the seeds sprout, keep the soil moist.
- Rich, loose soil and full sun are what dill prefers.
- Dill grows well with broccoli, kale, kohlrabi, and Swiss chard. Do not grow dill close to carrots.
- Plant 1 dill plant per square foot when using square-foot gardening.
- The seed heads and huge blossoms of bouquet dill. Fantastic for pickling.
- Dukat dill has larger seed heads and a darker green colour. Fantastic for pickling
- Fernleaf dill has a slow bolting rate and is suitable for container and indoor cultivation.

Choosing A Container
Dill grows long taproots, so pick a 5-gallon container at least 12 inches deep and 12 inches wide to accommodate this. One plant can be grown in such a pot. Choose a pot that is 10 inches deep for lesser kinds.
Purchase a considerably larger pot if you want to grow multiple dill weed plants side by side. Dill needs a deep container to grow in since it develops a long taproot.
Choose a pot at least 12 inches broad and 12 inches deep. Use a much larger pot if you wish to grow numerous dill plants together.
To ensure proper drainage, the bottom of the pot needs to have multiple drainage holes. If you locate a pot you like but doesn't have any holes, you can make them yourself.
Location To Grow Dill In Containers
Ensure the area has sufficient air circulation, full daylight, or at least 6-7 hours per day of direct sunshine. Dill can be grown in partial sunlight, but it won't get any bushier than in full sunlight.
When grown indoors, Dill grows best when placed in a window with a south or west orientation. Save this herb from the harsh afternoon sun in subtropical or tropical regions, especially in the summer.
Soil To Grow Dill In Containers
Although it can thrive in many soil conditions, dill favours well-drained, slightly acidic soil.
Sprinkle a few seeds over the area, then add a thin layer of potting soil. When growing dill in containers, use loamy, well-drained potting soil.
While it can survive in poor soil, adding 20% aged manure or compost to your growing medium at planting time is a good idea to give it a little more richness. When growing dill in containers, use loamy, well-drained potting soil.
This hardy annual may grow in poor soil and withstand it, but it will grow more effectively if you add a cup of compost to the soil before planting.
Furthermore, who wouldn't want to give your dill the best chance? Compost will maintain the plant.

Sunlight
Ensure the area has sufficient air circulation, full daylight, or at least 6-7 hours per day of direct sunlight.
Dill can be grown in partial sunlight, but it won't get as bushy as in full sunlight. Because the tall, hollow stalks can easily blow away if you do not stake them, pick a location protected from strong winds.
Dill is difficult to transplant. Though the plants won't become as tall in the shade, dill is one of the easiest herbs to grow.
Dill matures at a height of 2 to 3 feet in direct sunlight. However, Dill won't grow as tall if you grow it in the shadow.

Watering
The dill plant will dry out more quickly if grown in a clay container and in a bright, windy environment.
To prevent this, water the plant frequently. Keep the dill lightly watered. Dill prefers constant hydration, in contrast to many herbs that tend to dry out between watering. When the top inch of soil seems dry, water it.
Fertilizing
To fertilize a seedling, it can be broadcast (spread out over the ground) or applied as a side dressing (applied to the soil on or around the sides of the plant). Don't use the seed to apply it directly.
Typically, a mixture like 20-20-20 should be applied once in late spring at a rate of 0.70 pounds of fertilizer per 100 square feet.
Due to its accessibility at garden centers, “Triple 20” fertilizer is frequently utilized by gardeners.
Garden centers also carry 15-5-10, a healthier formulation that doesn't use too much phosphorus. Apply 1 pound of 15-5-10 for every 100 square feet.
Pruning
Although most types of dill only reach 3 feet, it can grow as high as 5 feet. Around the stalk of the plant, tiny, feathery-looking leaves develop.
The small tendrils, or feathery components, on the leaf are separate units that protrude from the stalk. The blossoms, up to 6 inches across, resemble groups of little yellow umbrellas.
Dill doesn't require trimming, but you might want to if you're growing it in a container. The plant's top can be pinched back to induce bushier growth instead of higher growth.
You should prune the flowers if you want the plant to grow more. The dill plant won't survive if it goes to seed.
Pinching back the blossoms will stop dill from pollinating other herbs, which is something you do not want to happen.
Regular harvesting will eliminate the need for pruning. You can cut off using your finger or a pair of scissors.
When pruning, you should consider what has to be removed, such as the bloom, which should be clipped above the joint on the stalk from which it is developing. You should use the cuttings even after pruning; throwing them away is unnecessary.
Pests & Diseases Of Dill
There are hardly many pests that bother dill. Although aphids are drawn to dill and enjoy feasting on the plant, dill's attraction to ladybugs, like aphids, is a problem.
Dill caterpillars are very fond of the plant; although they don't necessarily harm it, you still want them there. Simply remove the caterpillars by hand to get rid of them.
The cutworm, which will consume the stem at the soil line, is another dill problem. Use pointed things near the plant's base to cut cutworms for pest control. Diatomaceous earth and crushed eggshells are two instances of this.
Like any other crop, dill can be impacted by diseases. Some illnesses range from fungus to being brought on by insects infecting plants with viruses.
1. Carrot-Motley Dwarf Disease
This virus infects plants and is spread by carrots. Two distinct viruses cause this illness, and both must exist for the plant to get ill.
This illness inhibits plant growth and causes the leaves of the plants to become discoloured in red and yellow. You should avoid growing adjacent to carrots and apply an insecticidal soap to treat Carrot-Motley Dwarf Disease.
2. Damping Off
Damping Off is a fungal disease that develops when seeds are excessively damp and decay, preventing them from germinating.
You can use a fungicidal spray to help control this illness and grow in well-drained soil.
3. Cercospora Leaf Blight
Another fungus, this illness, develops necrotic tissue on the leaves, which spreads and kills the leaves.
Use disease-free seeds, rotate your crops, and care not to leave dead plants lying about if you want to treat this condition successfully.

Harvesting Dill
It is advised to wait until the plant has at least five leaves before harvesting. Always take produce from the top of the plant.
Take a pinch or the entire leaf at the point where the leaf meets the stalk if you only need a small amount of dill.
Avoid taking too much from your plant all at once since it could die. When harvesting, it's a good idea to leave at least 13 of the plants. When used fresh, dill has the most excellent flavour.
As it dries, part of the flavour is lost. Dill tastes best when harvested right before it begins to flower, but it will continue to have a decent flavour.
Wash and dry your dill after harvest to eliminate any dirt and insects. You should have plenty of dill herbs to utilize by the end of the season. There are a few solutions if you have an excess of dill and need to preserve it.
For one or two weeks, dill can remain fresh in the refrigerator. To keep the dill fresh, place it in a glass of water or wrap it in plastic and a damp paper towel. Dill should be kept in the vegetable crisper drawer.
Conclusion
Dill is a great herb to grow in pots because it is ideal for container gardening. It has a delicious flavour, lovely yellow flowers in the late summer, and all three qualities.
You can make the most of cooking with it by keeping it in a container nearby or even in your kitchen.
So don’t miss to add the herb to your small spaces. Feel free to comment to us if you face any problems growing dill in containers.
I trust you enjoyed this article on the Easy Steps To Grow Dill In Containers. Please stay tuned for more blog posts to come shortly. Take care!
JeannetteZ
>>>Please click here to read my all-inclusive article about Container Gardening<<<
>>>Are you interested in homegrown herbs and medicine? Please click here to find out more about it!<<<
Your Opinion Is Important To Me
Thoughts? Ideas? Questions? I would love to hear from you. Please leave me your questions, experience, and remarks about this article on the Easy Steps To Grow Dill In Containers in the comments section below. You can also reach me by email at Jeannette@Close-To-Nature.org.
Disclosure
This post may contain affiliate links. As an Amazon Associate and other affiliate programs, I earn from qualifying purchases at no extra cost to you. Read my full affiliate disclosure.
You might also enjoy these blog posts:
Easy Steps To Grow Fennel In Containers
Easy Steps To Grow Allium In Containers
Easy Steps To Grow African Daisy In Containers
Easy Steps To Grow Peace Lily In Containers
Easy Steps To Grow Stevia In Containers