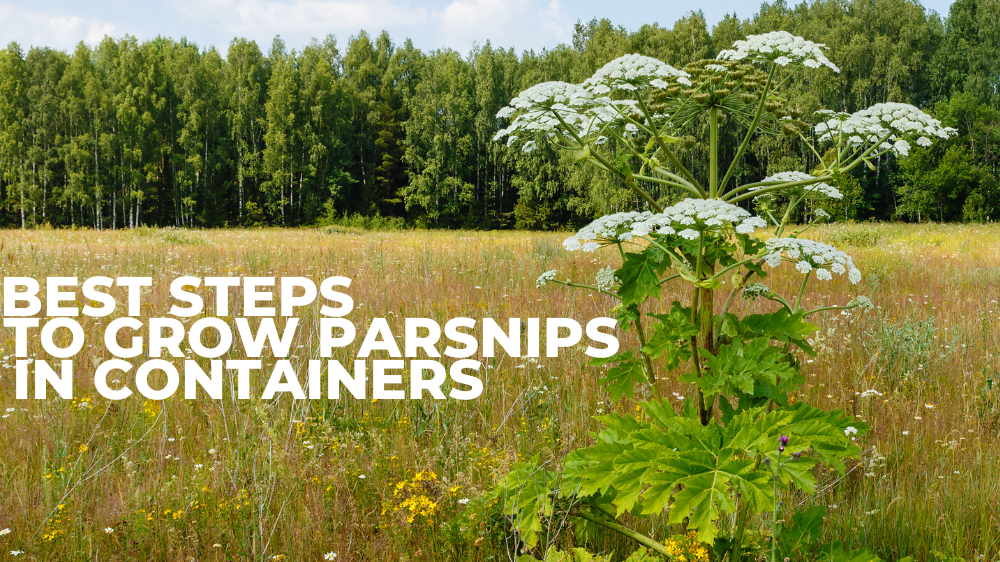
Best Steps To Grow Parsnips In Containers
Best Steps To Grow Parsnips In Containers
The popularity of root vegetables is on the rise. The most excellent place to grow parsnips is in a garden, but what if you don't have a garden plot?
Can parsnips be grown in containers? The answer is yes. Here, you will learn how to grow parsnips in containers and get helpful hints about growing parsnips in containers.
History & Origin Of Parsnips
Since ancient times, parsnips have been raised for their delicious roots. The veggies were widely grown by the Romans.
In reality, Emperor Tiberius loved parsnips and had them shipped from France yearly because of the country's colder climate, which caused the roots to grow sweeter.
Parsnips are a favorite food of the British people. The vegetable was brought to the New World by British colonists in 1609.
Parsnips are indigenous to Europe, but due to their widespread introduction and hardiness, they have already spread into the wild after escaping from many cultivated gardens.
The parsnip is a native of Europe. However, it has been noticed since 1848 as a vigorous Naturalizer.
It was brought here and has since wandered from the gardens and naturalized. There are three types, but only one is produced in Philadelphia; it is known as the “Sugar Parsnip” and is also known as the “Lisbonaise” abroad.
The extended growing season of the parsnip is necessary, but a harsh frost is necessary for the root to acquire its characteristic sweetness.
The parsnip is a favorite of gardeners in colder climates, even though it is typically grown in the southern section of the United States.
It is one of the most challenging vegetables. So, it may easily overwinter with good mulching.
Types Of Parsnip
Gardeners are well aware of the several variations of carrots, but parsnips also come in a wide range of varieties. To grow parsnips in containers, you should know about the best varieties. Let’s explore:
1. All American Parsnip
A faster-maturing type that takes only 95 days to reach maturity. It has a lot of disease resistance as well.
2. Hollow Crown Parsnip
An ancestral parsnip with lengthy roots is called the Hollow Crown. Slow to sprout.
3. Harris Model Parsnip
12-inch-long roots are produced by the Harris Model, one of the more popular kinds.
4. Turga Parsnip
It takes 110 days to reach maturity. Roots that are pretty wide at the top are produced. Uniformity of style.
5. Javelin Parsnip
Perfect for early-season harvests. Albion is variety-like in appearance but slightly thinner.
6. White Spear Parsnip
Albion-like white roots. White at the top and darker at the bottom.
7. Halblange Parsnips
Produces uniform, wedge-shaped roots that can reach 10 inches.
8. Lancer Parsnips
Grows tall roots with cream-coloured flesh that mature in 120 days.
Grow Parsnips In Containers
The main advantage of growing them in containers is that these root vegetables don't need to take up the garden area.
A container garden can be set up on your patio, deck, or apartment balcony if your yard is too small for a traditional garden.
Growing vegetables in containers makes it simple to manage the soil's composition. Parsnips do not thrive in compacted, clay, or rocky soil.
Therefore, you can be confident that your roots will develop straight in a container. They won't have to steer around obstacles like rocks or make a lot of sharp turns.
1. Choosing The Right Container To Grow Parsnips
Parsnips will do best in containers at least 15 to 20 inches deep because the taproots can grow up to 12 to 15 inches long or even longer with some types.
We advise choosing cultivars that grow to a maximum length of 15 inches. Parsnips will thrive in various planters, including stone, resin, and wood.
Your selection for style and weight will determine what you choose. Terra cotta planters are an option but tend to shatter when exposed to frost.
Besides the container's depth, the most crucial factor is that the pot you choose has drainage holes, which prevent the taproots from becoming wet and developing fungus.
Additionally, pick a broad container so that various roots have room to develop and spread out. You can grow the most plants in one container using square or rectangular planters.
For instance, 16 plants could be supported in a square container 20 inches by 20 inches. Make sure to give thicker cultivars more room.
2. When To Plant Parsnips
Although parsnips need a long growing season and taste best when grown in relatively cool months, parsnips thrive in most climates.
Parsnips can grow from seed to be harvested between 120 and 180 days. Thus, they are grown as a winter crop in some areas, planted in the middle of fall and harvested in the late winter or early spring.
Parsnips are planted as soon as the ground can be worked in the early spring in colder climates when the ground freezes solidly and is harvested in the fall.
3. Selecting A Planting Site For Parsnips
Choose a planting location with loose, porous soil. Ensure no weeds or pebbles can compete with roots for moisture and nutrients, hindering their growth.
Growing in a container is an alternative, but it is not advised because the roots cannot develop in the best conditions in a container.
4. Planting Of Parsnip
Although they can withstand temperatures as high as about 75°F, parsnips are cool-weather crops that outside temperatures range between 45 and 65°F.
Extreme heat will inhibit their growth and could produce tough, bitter parsnips. The soil must be between 59 and 77°F for the seeds to germinate. Each time you plant parsnips, use a fresh package of seeds because they only last for a year.
Parsnips are best planted in the spring after the risk of frost has gone for individuals in Zones 2 through 6. If you'd like, you can start them indoors before the typical last frost date.
Plant seeds outside in September or early October in Zones 7 through 9 for a harvest in late winter or early spring.
If you live in Zone 10 and sow the seeds outside in late November or early December, you might even be able to do this.
Ensure that the soil is pliable and free-draining. Put potting soil from a store or a combination of topsoil, well-rotted manure, and peat moss in your selected container.
The soil line and the top of your container should be separated by at least one inch. To plant the seeds, make four-inch-diameter holes in the potting medium half an inch deep and place two to three seeds inside each hole.
Due to their historically poor germination rates, parsnip seeds can increase your chances of success without taking up a lot of room in your container.
Alternatively, you can scatter seeds across the soil's surface and press them down approximately half an inch.
Later, you'll need to thin them to a distance of about four inches. Until they germinate, water them in and keep the soil equally moist.
Don't give up if you don't immediately notice any indications of life; these seeds can take a while to grow.
Up to three weeks may pass before seedlings emerge from the ground! If you haven't already, transfer the container into a location that receives full sun after the seedlings are up.
Thin the seedlings when they are four inches tall and have at least one set of true leaves, leaving three to four inches between each one.
If more than one seedling appeared from a single hole, remove the smaller, weaker seedling by pinching or pruning. Pulling it out could disturb the taproot as it is growing.
5. Support, Depth, and Spacing
Plant the seeds at a depth of about ½ inch. In rows 1½ to 2 feet apart, scatter two to three seeds per inch.
Thin the seedlings three to six inches apart after a few inches tall. Cut off the plants at ground level to prevent upsetting the nearby plants rather than pulling them. No support structure will be required.
6. Soil To Grow Parsnips In Containers
Deep, rich, loamy soil with sharp drainage is ideal. Parsnips prefer a neutral to slightly acidic soil pH. Before planting, thoroughly loosen the soil about a foot to promote healthy root development.
7. Light To Grow Parsnips
Parsnips prefer to grow in full sunlight or at least six to eight hours of direct sunshine daily. They can handle some shade, though.
8. Watering Requirements To Grow Parsnips
Continuous wetness of one inch of water per week promotes robust and consistent root growth. Water deeply and gradually.
Weak roots may come from frequent, shallow watering. Never let the soil around the plants become wet, though.
If the soil seems dry to the touch, you must moisten the potting soil until it drains out of the drainage holes at the bottom of the container.
Deep watering ensures the soil's bottom and the growing parsnips receive moisture. Use a watering can to hydrate the potting soil.
Set up a drip watering system with a timer if your container garden contains a lot of plants. This will make it easier for you to water the plants.
The morning is the ideal time to water your parsnip plants so that the potting soil can absorb the necessary moisture.
Once the sun is out, any extra water on the foliage will evaporate. By doing this, you may avoid giving your plant humid circumstances that could increase the likelihood of infecting fungi.
9. Temperature And Humidity To Grow Parsnips
Average temperatures between 45 and 70°F are ideal for parsnip growth. They can withstand freezing conditions at the start and end of the growing season. Parsnips have no preferences when it comes to atmospheric humidity.
10. Fertilizing Of Parsnip Plants
When preparing the container with the potting soil, adding compost is the best approach to fertilize parsnips.
As the parsnip plant develops, the compost supplies the necessary nutrients. During the growing season, you can add a batch of compost to the top of the potting soil every month.
When preparing the container, if you don't have compost, you can add a slow-release granular fertilizer to the potting soil.
As you water the area, this will release into the soil. And each month, you can keep incorporating it into the potting soil. An alternative to granular fertilizer is liquid fertilizer.
The benefit of applying liquid fertilizer is that it provides the plant with an immediate injection of nutrients. Every two weeks, you should spray the plant with a diluted solution of the liquid fertilizer.
No matter what kind of fertilizer you use, you must adhere to the manufacturer's recommendations for how much to use and how frequently.
As the plant develops, you can use a balanced fertilizer with an N-P-K ratio of 10-10-10.
11. Pruning Parsnip Plants
Pruning the parsnip plants after several inches of leaves may be advantageous. Pruning the foliage encourages the plant to concentrate on growing the parsnips underground.
Additionally, as the plant grows, you should clip any dead leaves and foliage that may appear. Sanitize the pruner before using it on the plant to prevent it from contracting bacterial or fungal illnesses.
Never remove more than one-third of the parsnip leaf at once. To continue producing food and to avoid stress, the plant needs a sufficient amount of leaf.
12. Propagating Parsnip Plants
Usually, parsnips are grown from seeds. And by letting some of your plants go to seed in their second year, you can double your plants. How to store seeds is as follows:
- Cut the ripe seed heads off the plant in the late summer.
- To ensure full drying, spread them out on a single layer in a warm, dry area with excellent airflow.
- Break open the seed heads once they have dried, then separate them.
- The seeds should be kept in an airtight container. It is advisable to plant them within a year of purchase because germination rates decline with time.
13. Potting And Re-potting Parsnips
For growing parsnips in containers, choose a loose potting mix rich in organic matter and has good drainage.
To prevent crowding the roots, add one plant per container. To avoid disrupting root development with repotting, use a container to hold the plant's mature size from the beginning.
14. Overwintering Of Parsnip Plants
If the soil is not frozen, you can continue to collect parsnips from the ground through the winter and into the first few weeks of spring.
Add a thick layer of mulch to assist in shielding them from soil that has frozen. The plants will get sweeter as they prepare to grow again in the spring.
But as soon as the tops sprout again, the flavour will wane, and the roots will get fibrous and tough.
15. Pests & Diseases Of Parsnips
Although there are a few offenders to watch out for, these vegetables are often unaffected by many pests or diseases.
First off, numerous members of the carrot family are favourites of swallowtail butterfly larvae (Papilionidae).
Caterpillars with brilliant green and black stripes are not easy to overlook. Fortunately, you don't have to kill them.
Hand-pick them out of the vegetation and relocate them to the opposite side of your yard or a nearby park.
The parsnip fly, Psila rosae, commonly called the “carrot rust fly,” is another pest to watch out for.
This frightening, blackish-orange creature is one-quarter of an inch long. It lays eggs in the soil around parsnip plants, and the little white larvae that emerge from them tunnel into the roots of the plants and leave behind gooey rust.
Spray the plants with this natural, ready-to-use Monterey Garden Insect Spray, available at Arbico Organics, to help manage populations of carrot rust flies if you see flies or detect the little maggots when you water or weed.
When it comes to illnesses, look for fungal leaf blights, which commonly appear on foliage that experiences frequent wetting or prolonged periods of moisture.
16. Harvesting And Preserving Parsnips
Wait until your vegetables have seen at least one light frost before harvesting them if you want them to have a sweet, robust flavour.
If you leave them in the planters through two or three frosts or a week or two of subfreezing conditions, it will be even better because the cold forces the starch in the roots to change to sugar for an even more delectable flavour.
Depending on the variety, they'll be ready for harvest 95 to 115 days following germination. This information can be found on your seed packet.
Remove the tops, leaving about an inch of greenery, and remove the leaves. Use your fingers or a garden knife to break up the earth surrounding each parsnip.
Grab the root's top and carefully pry it out of the ground. They will last for up to three weeks in your refrigerator's crisper drawer if you clean the dirt off each root and put it in a big plastic bag.
Alternately, you can flash boil the roots for three minutes, cut them into the proper form, shock them in an ice bath to stop the cooking process, and then freeze them.
After that, freeze them for three hours in a single layer on a cookie sheet. Fill zip-top freezer bags with the frozen pieces and keep them there for up to a year.
Conclusion
Along with vitamin C, potassium, which supports heart health, regulates blood pressure, and lessens the risk of kidney stones, is also abundant in parsnips.
One serving of parsnips provides about 10% of your potassium DRI. So don’t miss adding it to your garden. Here are some Parsnip Recipe Ideas on my Vegan website.
I trust you enjoyed this article on the Best Steps To Grow Parsnips In Containers. Please stay tuned for more blog posts to come shortly. Take care!
JeannetteZ
>>>Please click here to read my all-inclusive article about Container Gardening<<<
>>>Are you interested in homegrown herbs and medicine? Please click here to find out more about it!<<<
Your Opinion Is Important To Me
Do you have thoughts, ideas, or questions? I would love to hear from you. Please leave me your questions, experience, and remarks about this article on the Best Steps To Grow Parsnips In Containers in the comments section below. You can also reach me by email at Jeannette@Close-To-Nature.org.
Disclosure
This post may contain affiliate links. As an Amazon Associate and other affiliate programs, I earn from qualifying purchases at no extra cost to you. Read my full affiliate disclosure.
You might also enjoy these blog posts:
Best Steps To Grow Black-Eyed Susan In Containers
Best Steps To Grow Globe Amaranth In Containers
Best Steps To Grow Strawflowers In Containers
Best Steps To Grow Tansy In Containers
Best Steps To Grow Milkweed In Containers

