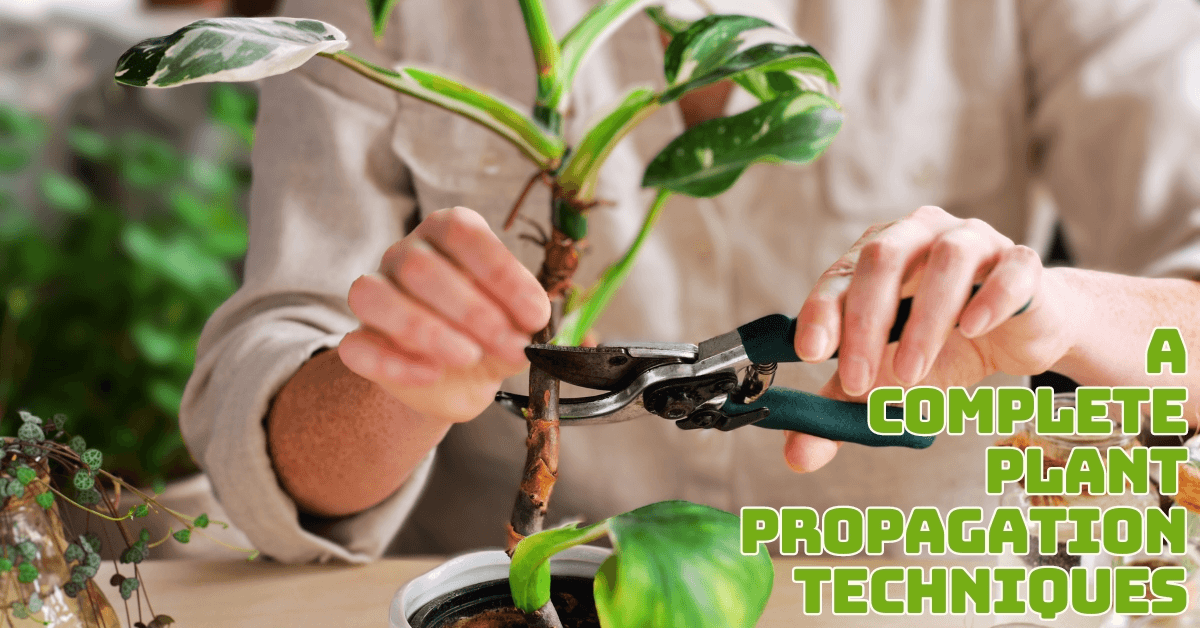
Plant Propagation Techniques – A Detailed Guide
Plant propagation is a crucial skill for gardeners and enthusiasts. It allows them to grow new plants from seeds, cuttings, or other plant parts.
Understanding methods such as seed propagation, division, and grafting boosts garden productivity and helps ensure plant diversity and health.
This article explores different plant propagation techniques, offering simple, practical tips for expanding their garden with new, healthy plants. Whether you're a beginner or a seasoned gardener, these methods can help your plants thrive.
What Do You Mean By Plant Propagation?
Plant propagation is the process of creating new plants from existing ones, either sexually or asexually. It’s a crucial technique in gardening, agriculture, and horticulture for expanding plant populations and maintaining plant health.
Sexual propagation involves growing new plants from seeds. This method combines genetic material from two parent plants, leading to offspring with diverse traits. It's suitable for many types of plants and can result in strong, vigorous plants.
Asexual propagation doesn’t involve seeds. Instead, new plants are produced from parts of an existing plant, such as stems, leaves, or roots.
Techniques include cuttings, where a segment of the plant is placed in water or soil to develop roots; layering, where a stem is encouraged to root while still attached to the parent plant; and division, where a plant is split into multiple sections, each capable of growing into a new plant.
This method ensures that the new plants are genetically identical to the parent, which is useful for preserving desirable traits.
Both methods allow gardeners and growers to multiply plants efficiently, ensuring the continuation and expansion of their favorite species.
Plant Propagation Techniques
One excellent method for growing new plants from old ones is plant propagation. These are a few typical methods:
1. Seed Sowing Plant Propagation Technique
Seed sowing is a simple and widely used method of plant propagation. Seeds are placed in soil or a growing medium at the appropriate depth, usually about twice their diameter, ensuring proper light and temperature conditions for germination.
Maintaining a continuously moist but not saturated soil is crucial. Once seeds sprout, they need adequate sunlight or grow lights to thrive. This technique is ideal for growing various plants with minimal tools or effort, from vegetables to flowers.
2. Use Cuttings For Plant Propagation
This involves taking a part of a plant (like a stem or leaf) and encouraging it to grow roots. Common cuttings include:
- Stem cuttings: Take a section of the stem and plant it in soil or water; it generally has a few leaves on it.
- Leaf cuttings: Some plants can be multiplied by planting a leaf in the ground or water.
3. Division Plant Propagation Technique
Division is a propagation technique in which a plant is split into smaller sections containing roots and shoots. It's commonly used for clump-forming plants such as lilies, hostas, and ornamental grasses.
Once the plant is dug up, it is carefully divided with a knife or by hand, and the new sections are replanted. This method encourages healthier growth, prevents overcrowding, and produces multiple new plants from one parent, making it an efficient way to expand your garden.

4. Layering Plant Propagation Technique
In the layering method of propagation, a stem is bent toward the ground and part of it is buried in the soil, but it remains linked to the parent plant.
Over time, the buried section develops roots. Once the new roots have formed, the stem is cut from the parent plant and transplanted as an independent plant. This technique is commonly used for shrubs, vines, and some perennials.
5. Grafting Plant Propagation Technique
Grafting is one of the more advanced plant propagation techniques. It combines a scion and rootstock to create a plant that benefits from both.
The two parts are carefully aligned and fused, growing as a single plant. Fruit trees and shrubs benefit greatly from this strategy, which enables the benefits of both plants—disease resistance from the rootstock and good fruit from the scion.
6. Tissue Culture Plant Propagation Technique
Tissue culture is a scientific plant propagation technique where small pieces of plant tissue, called explants, are grown in a sterile, controlled environment, typically in a nutrient-rich medium.
Creating disease-free plants, conserving rare species, and bulk manufacturing are major uses for this technique.
Through tissue culture, identical clones of the parent plant can be produced efficiently, making it ideal for commercial horticulture and conservation efforts.

7. Bulbs And Tubers Plant Propagation Technique
Bulbs and tubers are underground storage structures used by plants like daffodils and potatoes for growth and reproduction.
To propagate, bulbs or tubers are divided and planted individually. Each bulb or tuber section contains enough nutrients to sprout into a new plant.
This method efficiently grows multiple plants from a single parent and is commonly used for flowering plants and root vegetables. It ensures robust and healthy new growth.
How To Propagate Tomato Plants (Solanum lycopersicum)
Propagating tomato plants can be done using several methods, each suited to different circumstances. Here’s a guide to some effective techniques:
1. Seed Sowing
- Start seeds indoors: Start 6–8 weeks before the final frost date. Apply a seed-starting mix to small pots or seed trays.
- Plant seeds: Sow seeds about 1/4 inch deep. Keep them moist and warm (70-80°F or 21-27°C) until germination.
- Transplant seedlings: Transplant seedlings to their ultimate place once they have at least two sets of true leaves and the weather is acceptable (after the last frost).
2. Cuttings
- Select a healthy plant: Choose a robust, disease-free tomato plant.
- Take cuttings: Cut a healthy stem (about 4-6 inches long) just below a leaf node. Save a few leaves at the top and remove the lower ones.
- Rooting: To root a cutting, put it in a glass of water or directly into a container filled with moist potting mix. If you're using the water approach, replace the water frequently.
- Transplant: Once roots develop (about 2-3 weeks), transplant the new plant into the soil.
3. Tomato Suckers
- Identify suckers: Suckers are small shoots that appear in the leaf axils (the space where the leaf meets the stem).
- Remove suckers: Pinch off the suckers when they are about 2-4 inches long.
- Root suckers: Place the suckers in water or directly in the soil to root, as with cuttings.
4. Layering
- Select a stem: Choose a healthy, low-growing tomato stem.
- Prepare the stem: Gently scrape a small section of the stem’s outer layer (about 2 inches) to expose the cambium layer.
- Bury the stem: Bend the stem and bury the scraped section in the soil, exposing the tip. Secure it with a pin or small rock.
- Rooting: Once roots develop (usually in a few weeks), cut the new plant from the parent and transplant it.
Tips For Successful Propagation Of Tomato Plants
- Use clean tools: Always use sharp tools to avoid spreading diseases.
- Keep moist: Ensure the rooting medium stays consistently moist, not soggy.
- Provide light: Provide adequate light to prevent leggy growth if starting seeds or cuttings indoors.
")
How To Propagate Prayer Plant (Maranta leuconeura)
Propagating prayer plants (Maranta leuconeura) is simple and can be done using several methods, allowing you to expand your collection. Here’s a guide to effective propagation techniques:
1. Division
- Select a healthy plant: Choose a well-established prayer plant with several stems and roots.
- Remove from pot: Gently remove the plant from its pot and shake off excess soil.
- Divide the plant: When you divide the plant into smaller pieces, ensure each component has roots and stems.
- Replant: Divide the sections into new pots filled with fresh, well-drained potting mix. Water thoroughly.
2. Stem Cuttings
- Choose a healthy stem: Select a stem with at least one or two nodes (the area where leaves grow).
- Take cuttings: Trim a stem 4-6 inches below a node. Save a few leaves at the top and remove the lower ones.
- Rooting: Sow the cutting straight into wet potting soil or submerge it in water. Replace the water if you use it every few days.
- Transplant: Move the young plant into a container with new soil as soon as roots appear, which usually takes two to three weeks.
3. Water Propagation
- Take a cutting: Select a healthy stem with a node, then cut just below the node.
- Place in water: Submerge the node in water, ensuring the leaves remain above the waterline.
- Rooting: Change the water every few days to keep it fresh. Roots should begin to form in 2-4 weeks.
- Transplant: Once the roots are about 2 inches long, plant the seed in a pot with well-draining soil
4. Leaf Cuttings (Less Common)
- Select a leaf: Take a healthy leaf with a small section of the stem attached.
- Prepare the cutting: After trimming the stem, place it in a small pot with damp soil.
- Care: Keep the soil moist and place the cutting in indirect sunlight. This method can take longer and may not always be successful.
Tips For Successful Propagation Of Prayer Plant
- Use clean tools: Always use clean, sharp scissors or pruning shears to avoid spreading disease.
- Keep humidity high: Prayer plants thrive in humid environments. When propagating, use a humidity dome or mist regularly.
- Indirect light: Place cuttings in bright, indirect light to promote growth without scorching delicate leaves.
")
How To Propagate Mint Plants (Mentha)
Mint is a hardy herb that can be propagated through various plant propagation techniques for successful growth. Here’s a guide to the most effective propagation techniques:
1. Stem Cuttings
- Select a healthy stem: Choose a robust, healthy mint stem around 4-6 inches long.
- Take cuttings: Cut slightly below a leaf node to remove the lower leaves, leaving a couple at the top.
- Rooting in water: Place the stem in a glass of water, ensuring the lower nodes are submerged. Change the water every few days.
- Transplant: After 1-2 weeks, when the roots are about 2 inches long, transplant the cutting into a pot filled with moist soil.
2. Root Division
- Select a healthy plant: Find a mature mint plant with an extensive root system.
- Remove from the pot: Carefully remove the plant from the pot or the ground.
- Divide the roots: Using your hands or a sharp knife, divide the root ball into smaller portions, ensuring each contains roots and shoots.
- Replant: Plant each division into pots or garden areas with well-draining soil. Water thoroughly.
3. Layering
- Select a low-growing stem: Choose a healthy, trailing mint stem close to the ground.
- Bury part of the stem: Pin the middle section of the stem down into the soil, exposing the tip.
- Rooting: Roots will develop from the buried section after a few weeks. Once rooted, cut the stem from the parent plant.
- Transplant: Move the new mint plant to its own space or pot.
Tips For Successful Propagation Of Mint Plants
- Moist soil: Keep the soil consistently moist, especially during rooting.
- Plenty of sunlight: Mint grows best in partial to full sun, so ensure adequate light for new cuttings.
- Frequent pruning: Regular pruning encourages bushy growth and keeps the plant from becoming too leggy.
")
How To Propagate Arrowhead Plant (Syngonium)
Arrowhead plants can be propagated using a few easy methods. Here's a guide to help you grow new plants:
1. Stem Cuttings
- Choose a healthy stem: Choose a stem that is in good health and has one or more nodes (the area where the roots and leaves grow).
- Take cuttings: Cut a 4-6-inch piece just below a node, removing the lower leaves while keeping a few at the top.
- Rooting in water: Place the cutting in a jar of water, submerging the nodes. Change the water every few days.
- Transplant: Once roots develop (2-3 weeks), transplant the cutting into the soil with good drainage.
2. Root Division
- Select a mature plant: Choose an established plant with a strong root system and several stems.
- Remove from the pot: Shake off extra soil after carefully removing the plant from its pot.
- Divide the roots: Separate the root ball into smaller sections, ensuring each has roots and stems.
- Replant: Place the divided sections into separate pots thoroughly with fresh potting soil and water.
3. Soil Cuttings
- Take cuttings: Cut a healthy stem with at least one node.
- Plant in soil: Make sure the node is buried, then plant the cutting directly into a container filled with damp, well-drained soil.
- Care: Keep the soil moist and place the cutting in a warm, humid area with indirect light. Roots should form within a few weeks.
Tips For Successful Propagation Of Arrowhead Plant
- Keep humidity high: Arrowhead plants thrive in humid environments, so mist the cuttings regularly.
- Indirect light: Ensure the plant receives bright, indirect light for best growth.
- Water consistently: Keep the soil moist, but avoid waterlogging, which can cause rot.
")
How To Propagate Aloe Plants (Aloe vera)
Aloe plants are easy to propagate, mostly through pups (offsets) or cuttings. Here’s a step-by-step guide:
1. Propagating Through Pups (Offsets)
- Identify pups: Look for small offshoots or “pups” growing at the base of the parent aloe plant.
- Remove the parent plant: When you carefully remove the aloe from its pot and separate the pups from the parent plant, ensure every pup has its roots.
- Replant pups: Plant each pup in its pot with well-draining soil, such as cactus or succulent mix.
- Water sparingly: After planting, wait a few days before watering to allow the pups to settle and avoid root rot.
2. Leaf Cuttings (Less Reliable)
- Select a healthy leaf: Select a healthy, mature leaf from the aloe plant's base.
- Cut the leaf: Cut the leaf near the base and let it dry for a few days to form a callus over the cut.
- Plant in soil: Tuck the callused leaf end into a pot with soil that drains properly. The ideal soil moisture content is moderate.
- Rooting: Roots may take several weeks to form, and not all leaf cuttings will be successful.
Tips For Successful Propagation Of Aloe Plants
- Well-draining soil: Use a cactus or succulent soil mix to prevent waterlogging.
- Bright indirect light: Keep the newly propagated plants in bright, indirect light.
- Water lightly: Water sparingly, especially after replanting, as aloe plants are drought-tolerant and prone to root rot.
")
How To Propagate Spider Plants (Chlorophytum comosum)
Spider plants are among the easiest to propagate, utilizing plant propagation techniques such as division or their baby “siderites.” Here's how to propagate them:
1. Spiderettes (Plantlets)
- Identify spiderettes: Look for the small offshoots (spiderettes) growing from the parent plant’s long stems.
- Detach or keep attached: You can cut the spiderettes from the parent or leave them attached while rooting.
- Rooting In Water Or Soil:
- In water: Place the spinnerette in a glass of water, ensuring the base is submerged. Roots should appear in about 1-2 weeks.
- In soil: Plant the spinnerette directly in moist, well-draining potting soil. The soil should be constantly damp but not drenched.
- Transplant: Transfer the plantlet into a permanent pot once the roots are well-developed.
2. Division
- Select a healthy plant: Choose a mature, full spider plant.
- Remove from pot: Gently remove the plant from its pot and separate the root ball into smaller sections, ensuring each division has roots and leaves.
- Replant: Thoroughly replant each section into new pots filled with fresh soil, then water.
Tips For Successful Propagation Of Spider Plants
- Keep soil moist: Ensure the soil remains consistently moist during rooting.
- Bright sunlight: Provide bright sunlight to help spiderettes grow strong roots.
- Frequent watering: While rooting, water regularly, but avoid overwatering, which can cause rot.
")
How To Propagate ZZ Plants (Zamioculcas zamiifolia)
ZZ plants are slow-growing but can be propagated through stem cuttings, leaf cuttings, or division. Here’s how to propagate them:
1. Stem Cuttings
- Select a healthy stem: Choose a healthy stem with a few leaves.
- Take cuttings: Cut a 4-6 inch section from the stem below a node.
- Rooting in water or soil:
- In water: Place the cutting in a jar of water, ensuring the node is submerged. Change the water every few days.
- In soil: Plant the cutting directly in a pot with well-draining soil, keeping it moist.
- Transplant: Once roots and a tuber (rhizome) form, transplant it into a pot with cactus or succulent soil.
2. Leaf Cuttings
- Select a leaf: Choose a mature, healthy leaf and cut it off close to the stem.
- Plant the leaf: Place the cut end of the leaf in moist, well-drained soil and keep the soil lightly moist.
- Wait for rhizomes: This method is slow. Rhizomes and roots take several months to develop. Be patient!
3. Division
- Remove from the pot: Shake off any excess soil after carefully removing the adult ZZ plant from its pot.
- Divide the plant: Separate the root ball, ensuring each section has rhizomes and stems.
- Replant: Place each divided section in a separate pot filled with fresh soil, and water thoroughly.
Tips For Successful Propagation Of ZZ Plants
- Patience: ZZ plants are slow growers, so propagation can take time.
- Well-draining soil: Use a mixture of succulents or cacti to avoid waterlogging.
- Low light tolerance: ZZ plants thrive in low to medium light, making them easy to care for during propagation.
")
How To Propagate Rosemary Plants (Salvia rosmarinus)
Stem cuttings are an easy way to produce rosemary, a woody herb. Here's a detailed how-to:
1. Stem Cuttings
- Select a healthy stem: Choose a non-flowering stem about 4-6 inches long.
- Take cuttings: Cut slightly below a leaf node to remove the lower leaves, leaving a couple at the top.
- Rooting in water or soil
- In water: Place the cutting in a jar of water, submerging the leaf nodes. Change the water every few days.
- In soil: Plant the cutting in a well-draining potting mix or sand. Keep the soil moist.
- Transplant: After three to four weeks, when the roots have grown, move the cutting into a pot or garden bed with well-drained soil.
2. Layering
- Select a low-growing stem: Bend a healthy rosemary stem to the ground.
- Bury part of the stem: Bury is a section of the stem in the soil, leaving the tip exposed. Use a small rock or pin to keep it in place.
- Rooting: After several weeks, the buried section will develop roots. Once rooted, cut it from the parent plant and transplant it.
Tips For Successful Propagation Of Rosemary Plants
- Well-draining soil: Rosemary prefers sandy, well-draining soil to prevent root rot.
- Bright sunlight: Provide plenty of sunlight for healthy growth.
- Minimal watering: Water sparingly, as rosemary is drought-tolerant and thrives in dry conditions.
")
How To Propagate Lavender Plants (Lavendula)
Lavender can be propagated using various techniques, including stem cuttings, layering, or seeds. Here’s a step-by-step guide:
1. Stem Cuttings
- Select a healthy stem: Choose a softwood or semi-hardwood stem about 4-6 inches long from a mature lavender plant.
- Take cuttings: Cut slightly below a leaf node to remove the lower leaves, leaving a couple at the top.
- Rooting in water or soil
- In water: Place the cutting in a jar of water, submerging the leaf nodes. Change the water regularly.
- In soil: Insert the cutting into well-draining soil, such as a mixture of sand and compost. Water lightly to keep the soil moist.
- Transplant: After 3-6 weeks, when roots have developed, transplant the cutting into a larger pot or garden bed with well-draining soil.
2. Layering
- Select a low-growing stem: Bend a low-growing lavender stem towards the ground.
- Bury part of the stem: Bury is a section of the stem in the soil, leaving the tip exposed. Secure it with a small rock or pin.
- Rooting: The buried section will develop roots within a few weeks. Once rooted, cut the new plant from the parent and transplant it into its pot.
Tips For Successful Propagation Of Lavender Plants
- Well-draining soil: Lavender thrives in sandy or loamy soil with good drainage to prevent root rot.
- Full sunlight: Provide full sun for strong growth at least 6-8 hours daily.
- Minimal watering: Lavender prefers dry conditions, so water sparingly once established. Avoid overwatering to prevent fungal issues.
")
How To Propagate Bamboo Plants (Bambusa)
Bamboo can be propagated through cuttings, division, or seeds, though the most common methods are cuttings and division. Here’s how to propagate bamboo plants:
1. Propagating By Division
- Select a healthy clump: Choose a mature bamboo plant with several healthy culms (stems).
- Dig and divide: Carefully dig up a section of the bamboo clump, ensuring each division has at least one culm and a healthy portion of rhizomes and roots.
- Replant the division: Insert the segmented portion into a hole bigger than the root ball. After adding dirt, gently compact it and thoroughly water it.
- Water regularly: Keep the soil moist, but do not water it once it is only waterlogged, once the new bamboo is established.
2. Propagating By Stem Cuttings
- Select a healthy culm: Choose a young, healthy bamboo stem (about 1-2 years old) with several nodes.
- Take cuttings: Cut a culm section with at least 2-3 nodes.
- Prepare the cutting: Lay the cutting horizontally or vertically, ensuring that at least one node is buried under the soil.
- Plant in soil: Insert the cutting into well-draining, moist soil or a large pot.
- Water and care: Keep the soil moist and provide indirect light. New shoots should start to emerge in a few weeks.
3. Propagating By Seeds (Less Common)
- Sow seeds: Plant bamboo seeds in well-draining soil. Cover lightly with soil and water regularly.
- Germination: Place the seed tray in a warm area with indirect sunlight. Germination can take several weeks.
Tips For Successful Propagation Of Bamboo Plants
- Moist soil: Bamboo prefers consistently moist soil, but not soggy, during propagation.
- Bright indirect light: Provide bright, indirect sunlight to encourage healthy growth.
- Rhizome care: Bamboo spreads through rhizomes, so give it enough space to grow or use root barriers to control its spread if planting in the ground.
")
How To Propagate Hibiscus Plants
Hibiscus plants can be propagated using several methods, each suitable for different situations. Here’s a guide to some effective techniques:
1. Stem Cuttings
- Select a healthy stem: Choose a healthy, non-flowering stem about 4-6 inches long.
- Take cuttings: Cut slightly below a leaf node to remove the lower leaves, leaving a couple at the top.
- Rooting in water or soil:
- In water: Place the cutting in a jar of water, submerging the leaf nodes. Change the water every few days.
- In soil: Plant the cutting in a potting mix that drains well, like a perlite and peat mixture. Water lightly to keep the soil moist.
- Transplant: Once roots develop (in about 4-6 weeks), transplant the cutting into a larger pot or garden bed.
2. Propagating By Seeds
- Collect seeds: Harvest seeds from mature hibiscus pods or purchase from a nursery.
- Prepare seeds: Soak the seeds in warm water for a few hours to improve germination.
- Sow in soil: Plant seeds in a seed-starting mix, then lightly cover them with soil. Make sure the soil is always moist.
- Germination: Place the seed tray in a warm, bright location with indirect light. Germination usually occurs within 2-4 weeks.
3. Layering
- Select a low-growing stem: Choose a healthy, low-growing stem that can be bent to the ground.
- Prepare the stem: Scrape a small section of the stem’s outer layer to expose the cambium layer.
- Bury the stem: Bend the stem and bury the scraped section in the soil, exposing the tip. Secure with a small rock or pin.
- Rooting: Keep the soil moist. After several weeks, roots will form at the buried section. Once rooted, cut the new plant from the parent and transplant it.
Tips For Successful Propagation Of Hibiscus Plants
- Moist soil: Keep the soil moist but not waterlogged to encourage healthy root development.
- Bright sunlight: Provide plenty of bright sunlight to support strong growth.
- Warm temperature: Maintain a warm environment, as hibiscus thrives in warmer temperatures during propagation.

How To Propagate Jasmine Plants (Jasminum)
Propagating jasmine plants involves different plant propagation techniques, such as stem cuttings, layering, or seeds. Here’s a guide to each effective method:
1. Stem Cuttings
- Select a healthy stem: Choose a healthy, non-flowering stem about 4-6 inches long.
- Take cuttings: Cut slightly below a leaf node to remove the lower leaves, leaving a couple at the top.
- Rooting in water or soil:
- In water: Place the cutting in a jar of water, submerging the leaf nodes. Change the water every few days.
- In soil: Plant the cutting in a well-draining potting mix or a mix of perlite and peat. Keep the soil moist.
- Transplant: After 4-6 weeks, transplant the new plant into a pot or garden bed once the roots have developed.
2. Layering
- Select a low-growing stem: Choose a healthy, low-growing stem.
- Prepare the stem: Scrape a small section of the stem’s outer layer (about 2 inches) to expose the cambium layer.
- Bury the stem: Bend the stem to the ground and bury the scraped section in the soil, exposing the tip. Secure it with a rock or pin.
- Rooting: Keep the soil moist. After several weeks, the buried section will develop roots. Once rooted, cut the new plant from the parent and transplant it.
3. Seeds
- Collect the seeds: Harvest or purchase jasmine seeds.
- Prepare the seeds: Soak them in warm water for 24 hours to improve germination.
- Sow in soil: Plant the seeds in a well-drained seed-starting mix, then lightly cover with soil. Keep the soil moist.
- Germination: Place the seed tray in a warm area with indirect, bright light. Germination can take 2-4 weeks.
Tips For Successful Propagation Of Jasmine Plants
- Well-draining soil: Choose a potting mix that drains efficiently to prevent waterlogging.
- High humidity: Maintain high humidity for cuttings and seedlings to encourage healthy growth.
- Bright indirect light: Provide plenty of bright, indirect light for cuttings and seedlings.
- Warm temperature: Jasmine prefers a warm environment, so keep it warm during propagation.
")
How To Propagate Snake Plants (Dracaena trifasciata)
Propagating snake plants (Sansevieria) is straightforward and can be done through leaf cuttings or division. Here’s a guide to some effective techniques:
1. Propagating By Leaf Cuttings
- Select a healthy leaf: Choose a mature, healthy leaf from the plant.
- Take cuttings: Use a clean, sharp knife to cut the leaf at the base. Cut the leaf into 4-6-inch sections, making sure to note the orientation of each piece (so the bottom end stays at the bottom).
- Dry cuttings: Allow the cut ends to dry and callus over for 1-2 days to prevent rot.
- Plant in soil: Insert the cut end of each section into a well-drained potting mix, such as perlite and potting soil, and lightly water.
- Rooting: Place the pot in a bright, indirect light. Roots should develop in 4-6 weeks. Avoid overwatering to prevent rot.
2. Propagating By Division
- Select a healthy plant: Choose a mature, healthy snake plant with multiple rosettes.
- Remove from the pot: Do not harm the roots when you carefully remove the plant from its pot.
- Divide the plant: Separate the plant into smaller sections, ensuring each has roots and at least one rosette.
- Replant: Plant each divided section in its pot with well-draining soil. Water lightly and place in bright, indirect light.
- Care: Allow the plants to establish in their new pots. Water sparingly and avoid overwatering.
Tips For Successful Propagation Of Snake Plants
- Well-draining soil: Use a mix that allows excess water to drain easily to prevent root rot.
- Bright indirect light: Provide bright, indirect light to promote healthy growth.
- Minimal watering: Water sparingly, only when the soil is dry, to prevent rot.
")
Common Propagation Mistakes
Common propagation mistakes can impact the success of growing new plants from cuttings, seeds, or other methods. Here are some frequent issues and how to avoid them:
1. Incorrect Timing
Propagating plants at the wrong time can hinder growth. For example, many plants propagate best in spring or early summer, when they are actively growing.
Winter or fall may not provide optimal conditions for rooting or seed germination. Research each plant’s ideal propagation season to ensure successful results and robust plant development.
2. Poor Medium
Using regular soil for propagation can lead to waterlogging and root rot. Instead, opt for a sterile, well-draining medium such as perlite, vermiculite, or a commercial seed-starting mix.
This helps prevent fungal infections and ensures proper aeration, giving roots the best chance to develop and thrive. Adjust the medium according to the plant's specific needs.
3. Overwatering Or Underwatering
Overwatering can suffocate roots and cause root rot, while underwatering can lead to dehydration. Use a well-draining medium and monitor moisture levels carefully.
Ensure the soil remains moist but not soggy, and adjust watering frequency based on the plant's needs and environmental conditions. Consistent moisture is key to successful propagation and healthy root development.
4. Lack Of Cleanliness
Using unclean tools or containers can introduce harmful pathogens, leading to plant diseases or failures. Sterilize tools with rubbing alcohol or a bleach solution, and wash containers thoroughly before use.
This prevents contamination and promotes a healthier propagation environment, ensuring plants have the best chance for successful growth and development.
5. Improper Temperature And Light
Each plant species has unique temperature and light needs for optimal propagation. Some require warm, bright conditions, while others thrive in cooler or shaded environments.
Research your plant's specific requirements and provide appropriate conditions. Maintaining the right temperature and light levels helps ensure successful rooting and healthy growth during propagation.
6. Not Using Rooting Hormone
Rooting hormones can enhance root development and increase success rates for certain plants. They help stimulate root growth by mimicking natural plant hormones.
Check if your plant species benefits from rooting hormone, and apply it to the cut ends of stems or seeds as directed. This can improve the likelihood of successful rooting and faster establishment.
7. Neglecting To Prune
Neglecting to trim cuttings can lead to weak growth, as excess foliage diverts energy away from root development. Remove any unnecessary leaves or branches from cuttings to focus the plant's energy on forming roots.
This helps establish a stronger root system and improves the chances of successful propagation and overall plant health.
8. Ignoring Plant Health
Starting with unhealthy or diseased plants can lead to propagation failures and the spread of diseases. Ensure you use only healthy, disease-free plant stock for propagation.
Before taking cuttings or seeds, inspect the parent plant carefully for signs of pests or diseases. Healthy starting material increases the likelihood of successful rooting and robust plant growth.
9. Not Providing Humidity
Many plants need high humidity for successful propagation. To maintain adequate moisture, use a humidity dome or regularly mist the cuttings or seeds.
This prevents the plants from drying out and encourages root development. Consistent humidity levels help create an ideal environment for healthy growth and increase the chances of successful propagation.
10. Not Labelling
Failing to label cuttings or seeds when propagating multiple plant types can lead to confusion about their specific care requirements.
Properly label each container or cutting with the plant type and date to keep track of their progress and needs. This ensures you provide the appropriate care and avoid mixing up different plant species, improving overall success.
Conclusion
Plant propagation techniques are essential for gardeners and enthusiasts, offering a rewarding way to grow new plants and fostering a deeper connection with the plants you nurture. It provides a rewarding way to grow new plants from existing ones.
Each method has its own benefits and challenges, making it important to choose the right technique for each plant. Mastering these techniques will foster a deeper connection to the plants you grow and nurture.
I trust you enjoyed this article on the Plant Propagation Techniques – A Detailed Guide. Please stay tuned for more inspiring guides, helpful tips, and ideas to help you live closer to nature every day.
Take care!
— JeannetteZ🌿
💬 Your Opinion Is Important To Me
Do you have thoughts, ideas, or questions? I’d love to hear from you. Please leave your comments below or email me directly at Jeannette@Close-To-Nature.org.
📚 More Nature-Inspired Reads
Explore more ways to connect with nature, nurture your pets, and live in harmony with the world around you 🌿