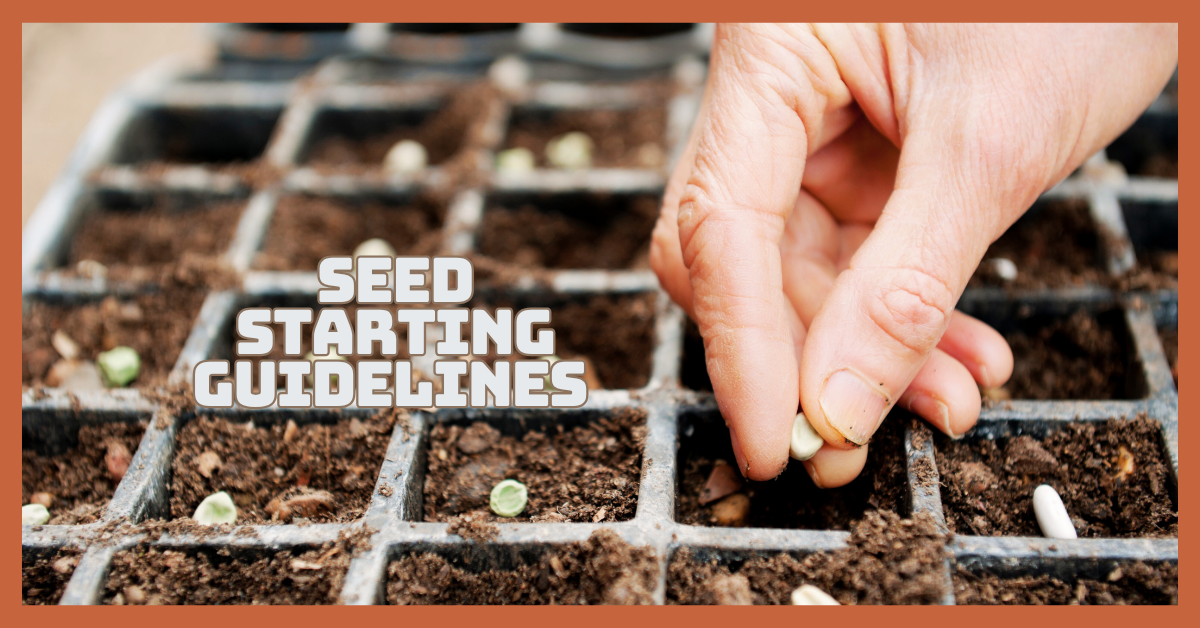
Seed Starting Guidelines For Thriving Gardens
Growing healthy, colourful plants from seed is a satisfying way to start your garden. With the right approach, you can enjoy a thriving garden full of vegetables, herbs, or flowers.
These Seed Starting Guidelines will walk you through the essential steps to ensure strong germination, proper care, and successful transplanting.
Whether you're a beginner or an experienced gardener, following these tips can make all the difference in your gardening success.
The Ultimate Guide To Seed Starting Success
You have more control over the growth of your plants and can start seeds indoors or in a controlled environment to get a head start on the growing season. Here are some essential guidelines to help your seeds thrive from the very beginning.
1. Understanding Your Growing Zone
Your USDA hardiness zone determines planting and transplanting timing. First, identify your zone and the average last frost date for your area.
This date helps you decide when to start seeds indoors—typically 6 to 10 weeks before the last frost. Your zone also tells you which crops will thrive.
Warm-weather crops like tomatoes and peppers need long seasons, while cool-season vegetables like lettuce prefer chillier temperatures.
Understanding your zone is essential for choosing appropriate varieties and ensuring success when transitioning seedlings outdoors. It minimizes risk and maximizes yield by aligning plant needs with local climate patterns.
2. Choosing The Right Seeds
Select seeds based on your climate, soil, and garden conditions. Read seed packets for germination time, spacing, and light needs. For beginners, easy options include tomatoes, lettuce, basil, cucumbers, and zinnias.
Choose vegetables and herbs if you want a food garden, or flowers for ornamental beauty. Check sunlight requirements and consider your space limitations.
Online seed reviews offer insights into germination rates and plant performance. Match plant selection to your goals—whether it’s sustainability, high yields, or visual appeal. Picking the right seeds lays the groundwork for a productive, satisfying garden experience with fewer surprises.

3. Types Of Seeds To Consider
Understanding the different seed types is an integral part of seed starting guidelines, helping you choose the best seeds for your gardening goals and conditions.
Hybrid seeds (F1) are bred for disease resistance and uniformity, but aren’t viable for saving. For organic gardening, organic seeds are appropriate since they are produced without the use of artificial chemicals.
Treated seeds are coated with fungicides or pesticides, which is practical but not ideal for organic practices. Each type has pros and cons: heirlooms for tradition, hybrids for performance, and organics for purity.
Choose based on gardening goals, budget, and growing conditions. Understanding these differences ensures you make informed, goal-aligned decisions when shopping for seeds. At the end of this guide, I’ve shared some Popular Seed Varieties for Every Garden to help you get started.
4. Gathering Your Seed Starting Supplies
Successful seed starting requires key tools. Use seed trays or cell flats for individual seedlings. A humidity dome keeps moisture high during germination.
A seed starting mix supports root growth and is disease-free. Labels help track varieties and sowing dates. A spray bottle or watering can offers gentle hydration.
Optional items include a heat mat for faster germination and grow lights for strong seedling development. Investing in quality tools boosts seedling survival and health.
Avoid shortcuts—proper supplies make a big difference in overall success and reduce common problems like damping off or uneven growth.
5. Preparing The Seed Starting Mix
Avoid using garden soil—it’s too heavy and may carry pathogens. Instead, use a sterile, lightweight seed starting mix. Additionally, you can create your own with one part compost (optional), one part perlite or vermiculite.
Pre-moisten the mix until it feels like a wrung-out sponge—damp, not soggy. Fill trays or cells loosely and tap to settle without compacting. This ensures good airflow and root development.
A quality mix provides the perfect environment for seeds to sprout and supports healthy, vigorous seedling growth from the very beginning.
6. Sowing The Seeds
Follow seed packet instructions for depth and spacing—generally, plant seeds two to three times their width. Sow small seeds, such as basil or lettuce, on the top and gently press them into the ground.
Sow 1–2 seeds per cell to ensure germination, thinning later to the strongest seedling. Always label your trays clearly. After sowing, mist gently with water to settle seeds without displacing them.
Maintain consistent moisture and warmth for best results. Precise sowing techniques prevent overcrowding, encourage healthy development, and set the stage for a successful germination process across all plant types.

7. Creating The Perfect Germination Environment
Creating the perfect germination environment is a key part of seed starting guidelines to ensure healthy, successful sprouting. Most germinate best at 65°F–75°F (18°C–24°C). Use a heat mat if your space is cooler.
To retain moisture, place plastic wrap or a humidity dome over trays. Monitor daily and remove covers once seedlings emerge. Keep the mix consistently moist but never soggy—overwatering can cause mould or disease.
Proper ventilation prevents damping off. Germination is a delicate stage; maintaining the right environment boosts success.
Regular checks ensure seeds receive the warmth and hydration needed to sprout quickly and healthily in your indoor setup.
8. Light Requirements For Seedlings
After germination, seedlings need plenty of light, at least 12–16 hours daily. Without enough, they become leggy and weak. If natural sunlight is limited, use LED grow lights that offer a full light spectrum.
Place lights 2-4 inches above the seedlings, and as they become bigger, change the height. Use a timer to keep lighting consistent. Intense lighting helps develop sturdy stems and healthy leaves.
South-facing windows can work if light is sufficient, but artificial lighting often gives more reliable results. Light is critical for converting energy into growth, so don’t skimp on this essential resource.
9. Watering Your Seedlings Properly
Water seedlings from the bottom to promote deep roots and prevent disease. Place trays in a shallow container of water, allowing moisture to soak up through drainage holes.
Avoid top watering—it can disturb roots or invite fungal issues. In between waterings, let the surface dry a little, but never let the soil completely dry out. Watch for signs of trouble—yellow leaves or mould suggest overwatering.
Consistency is key: aim for moist, not soggy, soil. As seedlings grow, they’ll need more water, but gentle care is vital. Proper watering ensures healthy root systems and reduces seedling stress.
10. Feeding And Fertilizing Seedlings
Proper feeding and fertilizing practices are essential seed starting guidelines to help seedlings grow strong and healthy before transplanting. Once true leaves appear, feed with a diluted liquid fertilizer at ¼ strength weekly.
Use a balanced organic option like fish emulsion or a 10-10-10 blend. Water before feeding to prevent root burn. Avoid over-fertilizing—it can lead to salt buildup, weak stems, or burnt roots.
Proper feeding promotes vigorous growth and prepares seedlings for outdoor transplant. Monitor for nutrient deficiencies, such as pale leaves or stunted growth.
Gentle, consistent feeding supports healthy development and ensures seedlings are robust by the time they’re garden-ready.

11. Thinning And Transplanting Seedlings
When multiple seeds sprout in one cell, thin to one strong seedling by snipping extras at the soil level—never pull them out. Competition for light, water, and nutrients is lessened through thinning.
As seedlings grow, they may outgrow their original containers. Potting up into larger containers gives roots space and prevents crowding. Use fresh potting mix and handle seedlings by their leaves, not stems, to avoid damage.
Transplanting strengthens root systems and helps prepare plants for the outdoor garden. Keeping up with thinning and potting ensures better growth and reduces transplant shock later.
12. Hardening Off Seedlings
Before planting outdoors, seedlings need to adjust to wind, sun, and fluctuating temperatures. This process, called hardening off, takes 7–10 days. Start by placing trays outside in a sheltered spot for 1–2 hours a day.
Gradually increase time and sun exposure daily. Bring them in at night or if temperatures drop. This step strengthens plants and reduces the risk of transplant shock.
Skipping hardening off can result in stunted or damaged plants. It’s essential for a smooth transition from indoor conditions to the open garden, ensuring your plants thrive after transplanting.
13. Transplanting Seedlings To The Garden
Once frost danger has passed and seedlings are hardened off, transplant them outdoors. To lessen stress, pick an overcast day or do the transplant in the evening.
Carefully remove seedlings while preserving the soil by digging holes that are just a little bit larger than the root balls—plant at the same depth, except for tomatoes, which can be buried deeper.
Water immediately to settle roots and eliminate air pockets. Plants should be spaced in accordance with their mature size and row spacing requirements.
Transplanting properly helps seedlings adjust quickly, minimizing stress and promoting strong early growth in your garden beds.

Popular Seed Varieties For Every Garden
Choosing popular seed varieties is an essential step in seed starting guidelines to ensure a successful and rewarding garden.
Whether you love veggies, herbs, or flowers, these popular seed varieties offer beauty, flavour and success for gardeners of all levels.
1. Tomatoes
Tomatoes are a garden favourite, known for their rich flavour and variety. Use seed trays with moist potting mix, placing seeds ¼ inch deep. Keep them warm and well-lit.
Transplant outdoors after hardening off and once the soil warms. Stake or cage plants for support. Use a balanced fertilizer and give it regular watering. Choose from cherry, beefsteak, or heirloom varieties depending on your taste and garden space.
2. Carrots
Root crops like carrots do well in loose, sandy soil. Two to four weeks before the last frost, sow seeds directly outside. Plant them ¼ inch deep in rows spaced 12 inches apart—thin seedlings to allow proper root development.
Keep soil consistently moist, especially during germination. Steer clear of excessive nitrogen fertilization, as this may result in twisted roots.
Varieties like ‘Danvers’ or ‘Nantes’ offer sweet, crisp flavours. Harvest when roots reach the desired size, usually around 60–75 days.
Turn Your Passion for Nature Into Income
🌿 Whether you love gardening, caring for animals, or exploring holistic living,
You can share your knowledge online and earn from it.
Discover how nature lovers are growing their passions into meaningful, income-generating blogs. 👇
3. Lettuce
Lettuce grows quickly and does best in cool weather. Start seeds indoors or sow directly outdoors 2–4 weeks before the last frost. To trim seedlings to 6–12 inches apart, plant seeds ¼ inch deep.
Choose types such as “Romaine” or “Buttercrunch.” Provide regular water and partial shade during warmer months to prevent bolting.
Harvest outer leaves when they reach usable size, or cut entire heads when mature. Successive plantings every 2 weeks extend the harvest season.
4. Peppers
Peppers prefer warm conditions and full sun. Seeds should be started inside 8–10 weeks before the final frost. For optimal germination, plant seeds ¼ inch deep in seed trays covered with a heat mat.
Transplant outdoors after nighttime temperatures stay above 55°F. Rich, well-draining soil should have plants spaced 18 to 24 inches apart.
Use mulch to retain moisture and support steady growth. Pick from fiery bell peppers like “Cayenne” and “Jalapeño” or sweet bell peppers. Harvest when fruits reach full colour and size.
5. Zinnias
Including zinnias in your seed starting guidelines offers a vibrant, easy-to-grow option that brightens any garden while attracting pollinators. Start indoors 4–6 weeks early or immediately outside after the last frost.
In whole light and well-drained soil, plant seeds 1 inch deep. Depending on the type, plants should be spaced 6–18 inches apart. Water regularly, but avoid overhead watering to reduce mildew risk.
Deadhead spent blooms to encourage more flowers. Varieties such as “California Giant” yield big, vibrant flowers that draw bees and butterflies to your garden.

6. Basil
Basil is a fragrant herb ideal for culinary use. Sow seeds inside six weeks before the last frost or as soon as the risk of frost has passed. Plant seeds ¼ inch deep in warm, well-draining soil. Thin or transplant seedlings to a distance of 12 inches.
Basil loves the sun and needs regular watering. To avoid flowering and promote bushy growth, pinch back the tips. Harvest leaves often for the best flavour. Varieties like ‘Genovese’ and ‘Thai Basil’ are popular kitchen staples.
7. Cucumbers
Cucumbers are vining plants that love warmth and sunshine. When the soil reaches 70°F, plant 1 inch deep, with bush or trellis vining varieties spaced 12 inches apart.
For moisture retention, mulch and water frequently. Feed with compost or balanced fertilizer. —Harvest cucumbers when they’re firm and green. Try ‘Marketmore’ for slicing or ‘Lemon Cucumber’ for a unique, round fruit with a mild taste.
8. Beans
Beans are easy to grow and great for beginners. Plant seeds directly into the warm soil after the last frost has passed. Plant 1 inch deep, spacing bush beans 3–6 inches apart or pole beans 4–6 inches apart with trellis support.
Beans fix nitrogen, enriching soil naturally. Water regularly, but avoid waterlogged soil. Varieties like ‘Blue Lake’ and ‘Kentucky Wonder’ offer high yields. Harvest pods when firm and smooth for the best flavour, usually 50–70 days after sowing.
9. Marigolds
Marigolds are a valuable addition to seed starting guidelines due to their ease of growth and natural pest-repelling properties. Sow seeds directly outdoors after frost danger passes or start indoors 4–6 weeks early.
Plant seeds ¼ inch deep and space 6–12 inches apart, depending on variety. Average soil and full sun are ideal for them. Water moderately and deadhead regularly to extend blooming.
Marigolds—especially ‘French’ and ‘African’ types—make excellent garden borders. Their strong scent helps repel nematodes and aphids, making them a beneficial companion for vegetable plants.
10. Pumpkins
Pumpkins need plenty of space and a long growing season. Direct sow seeds outdoors when soil reaches 70°F, planting 1 inch deep in hills or rows. Space hills 4–6 feet apart. Provide full sun and rich soil with compost.
Keep soil moist, especially during fruit set. Large varieties may need 100+ days to mature. ‘Jack O’Lantern’ is ideal for carving, while ‘Sugar Pie’ is best for baking. Harvest when the rind is hard and uniformly colored.
11. Spinach
Spinach is a fast-growing leafy green rich in nutrients. Sow seeds directly into cool soil 4–6 weeks before the last frost. Plant ½ inch deep and 2 inches apart in rows. Thin seedlings to 4–6 inches.
Water consistently and mulch to retain moisture. Spinach prefers partial shade in hot climates. Harvest leaves when they’re young and tender.
Popular varieties include ‘Bloomsdale’ and ‘Baby Leaf’. A continual harvest throughout the spring and fall can be achieved by replanting every few weeks.
12. Corn
Corn needs space, warmth, and pollination from nearby plants. Sow seeds directly in blocks, not rows, after frost danger passes and soil warms to 60°F. Plant 1–2 inches deep, 8–12 inches apart. Water consistently and apply compost at planting.
‘Sweet Corn’, like ‘Golden Bantam’ or ‘Peaches and Cream’, grows best with full sun and rich soil. For good pollination, plant at least 4 short rows together. Harvest when silks brown and ears feel full and plump.
13. Sunflowers
Including sunflowers in your seed starting guidelines adds a cheerful, pollinator-friendly option that’s easy to grow and harvest. Sow seeds directly in full sunlight following the last frost.
Depending on the cultivar, place the seeds 6–12 inches apart and 1 inch deep. Thin seedlings to prevent crowding. For deep roots to be encouraged, water deeply but sparingly.
Support tall varieties as they grow. Try ‘Mammoth’ for giant heads or ‘Autumn Beauty’ for colourful petals. Harvest seeds when flower heads droop and backs turn yellow, then dry thoroughly for storage.
14. Beets
Beets are dual-purpose plants grown for roots and greens. Plant the seeds outside two to four weeks before the final frost. Plant ½ inch deep and 2 inches apart in rows spaced 12 inches apart.
Thin seedlings early to allow root development. Keep soil moist and weed-free. Harvest roots when they’re 1–3 inches wide. ‘Detroit Dark Red’ is a classic, sweet variety. Beet greens are also edible and nutritious, perfect for sautés or salads, so don’t discard them.

Conclusion
By following these Seed Starting Guidelines, you will set the stage for a successful and productive garden season. The development of your plants depends on every stage, from selecting the best seeds to making sure they receive the necessary care and transplanting them.
With a bit of planning and attention, your seedlings will grow into vigorous, thriving plants. Start today, and enjoy the satisfaction of nurturing your garden from the very first sprout to full bloom or harvest.
I trust you enjoyed this article on the Seed Starting Guidelines For Thriving Gardens. Please stay tuned for more inspiring guides, helpful tips, and ideas to help you live closer to nature every day.
Take care!
— JeannetteZ
💬 Your Opinion Is Important To Me
Do you have thoughts, ideas, or questions? I’d love to hear from you. Please leave your comments below or email me directly at Jeannette@Close-To-Nature.org.
📚 More Nature-Inspired Reads
Explore more ways to connect with nature, nurture your pets, and live in harmony with the world around you 🌿