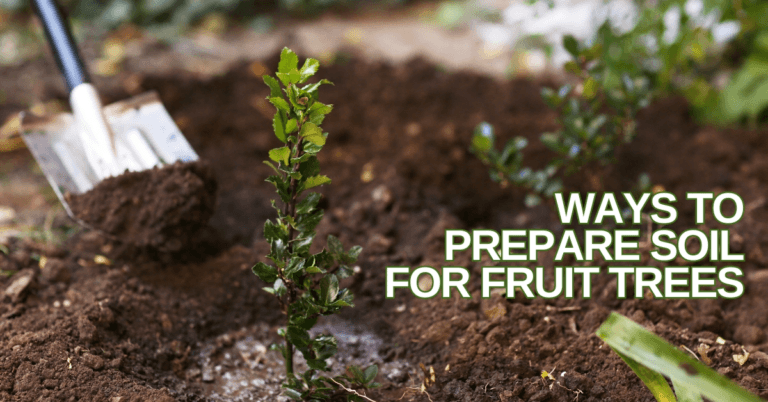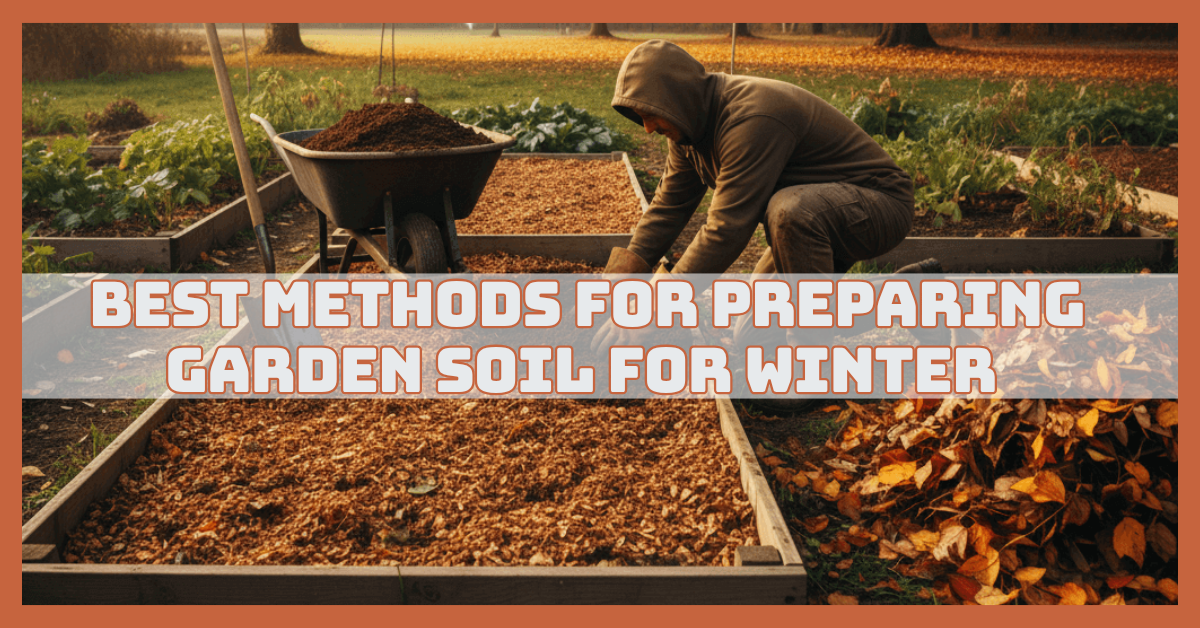
Best Methods For Preparing Garden Soil For Winter
Preparing garden soil for winter ensures your plants rest well, retain nutrients, and are ready to flourish when spring arrives. Many gardeners think winter means the work stops. But here’s a secret—this is when the groundwork for spring success truly begins.
In this guide, we’ll walk through simple, effective, and nature-friendly methods to protect and feed your soil all winter long. No complicated steps. No fancy tools. Just real techniques that make your garden thrive.
Why Winter Soil Prep Matters
Winter soil prep really matters, and it’s so much more than a seasonal chore. It’s like giving your garden a deep, nourishing spa session before it rests.
When we take time to prepare the soil, we help the earth reset after months of growth and activity. Cold weather, rain, wind, and snow can compact soil, wash away nutrients, and slow down the life happening underground.
Beneficial microbes and worms still need care, even if plants above the surface go quiet. With the proper steps, you protect these tiny garden helpers and keep the soil structure strong.
You also lock in nutrients, prevent erosion, and create a cozy environment that stays moist and rich through winter. Then spring arrives, and your soil wakes up energized.
Plants root faster, seeds germinate better, and everything grows greener and more vigorous. Think of it like your nighttime skincare routine—cleanse, nourish, protect, rest.
Healthy routines now mean glowing results later. Your soil deserves that gentle winter care so it can reward you with a vibrant, thriving garden when the warmth returns.
Steps To Preparing Garden Soil For Winter
Step 1: Clean Up the Garden Beds
Cleaning up your garden beds is the first and easiest step, and it sets the tone for a healthy winter rest. Start by removing dead plants, weeds, and old vines—these can hide pests and diseases waiting to strike in spring.
Shake the soil off the roots so you keep every bit of goodness in the bed. Healthy plant scraps? Compost them. Anything diseased? Toss it, no exceptions.
This simple cleanup prevents future problems, keeps soil tidy, and creates space for winter nutrients to settle in. Think of it as clearing clutter before a peaceful season. Clean beds equal a thriving garden later.
Pro Tips
- Shake roots, save soil
- Keep the compost pile balanced
- Avoid composting infected plants
- Remove weeds before seeding
Step 2: Test Your Soil
Testing your soil is like giving it a health check before winter. Instead of guessing what it needs, a quick test tells you exactly how to support it.
Use a simple home soil kit or send a sample to your local extension office for a detailed report. You’ll learn about pH levels, nutrient balance, and how much organic matter your soil holds.
With this info, you can add the right amendments over winter, letting them break down slowly and enrich the soil by spring. It’s like knowing which vitamins to give your garden so it grows strong and happy.
Pro Tips
- Take soil from multiple spots
- Label samples for clarity
- Follow the kit instructions closely
- Retest the soil every growing season

Step 3: Add Compost Generously
Adding compost is a key step in preparing garden soil for winter, enriching it naturally and keeping it healthy for spring growth. Spread 2–4 inches over your garden beds. You don’t need to dig deeply—just a light fork-in will do.
Over time, rain and snow will help pull nutrients down, feeding the soil slowly and naturally. Compost warms the soil, improves texture, and keeps it from drying out in cold winds.
It’s like giving your garden a nourishing blanket that works all season. Microbes and worms love it, too. By winter’s end, your beds will be rich, healthy, and ready for spring growth.
Pro Tips
- Use well-rotted compost only
- Spread evenly for consistent nutrition
- Avoid piling near plant stems
- Replenish yearly for best results
Step 4: Mulch Thickly
Mulching is like giving your soil a cozy winter coat. It holds moisture, prevents erosion, and keeps soil temperatures stable.
Good mulch options include straw, shredded leaves, pine needles, wood chips for trees, and thin layers of grass clippings for veggie beds.
To avoid rot, especially on perennials, allow a tiny space around plant stems while spreading 3–6 inches evenly throughout garden beds.
Mulch also suppresses weeds, feeds earthworms, and gradually builds rich topsoil. With a simple layer of mulch, your soil stays protected, nourished, and ready for spring growth. It’s one of the most manageable winter prep steps.
Pro Tips
- Apply mulch after moistening the soil.
- Avoid piling directly on stems..
- Use varied organic materials..
- Replenish mulch as needed.
Step 5: Plant Cover Crops
Planting cover crops is like giving your soil a living winter blanket. They protect against erosion, hold nutrients in place, and add organic matter naturally.
Great options for winter include rye, clover, winter wheat, hairy vetch, field peas, and mustard greens. Broadcast seeds over cleared beds, water lightly, and let them grow. These crops keep soil alive through the cold months.
Clover and peas also fix nitrogen, enriching the soil for spring. When spring comes, chop and drop them into the soil. This provides instant fertilizer and boosts soil health. Live roots mean healthy, thriving soil.
Pro Tips
- Sow seeds evenly across beds
- Water lightly after sowing
- Choose crops suited locally
- Chop crops before flowering
Step 6: Add Organic Amendments
Using organic amendments is an essential part of preparing garden soil for winter, building fertility and supporting healthy spring growth. Alongside compost, these slow-release nutrients feed soil gently over time.
Great options include bone meal for phosphorus, blood meal for nitrogen, rock phosphate, greensand, kelp meal, crushed eggshells for calcium, and garden lime for acidic soils.
Spread them lightly over your beds and let winter rains wash them in. Avoid chemical fertilizers—they work too fast and can leach away.
Organic amendments enrich soil gradually, improve structure, and support microbes. With these additions, your soil will be strong, fertile, and ready to support healthy, vibrant plants come spring.
Pro Tips
- Apply amendments before heavy frost
- Measure doses according to instructions
- Mix lightly into the topsoil
- Avoid chemical fertilizers in winter

Step 7: Loosely Turn and Aerate Soil
You don’t need to till your garden for winter. Deep tilling can damage soil structure and harm beneficial microbes. Instead, use a garden fork to lift and loosen the soil gently.
Break up clumps lightly to create air pockets, which help roots grow stronger and allow microbes to breathe. This light touch keeps the soil ecosystem intact while improving drainage and aeration.
By handling the soil gently, you maintain its natural balance. Over winter, these small pockets of air prevent compaction and support healthy microbes. Come spring, your soil will be fluffy, alive, and ready for planting.
Pro Tips
- Loosen the soil after adding compost
- Avoid deep digging near roots
- Work in small sections only
- Aerate before heavy winter rains
Step 8: Water Before Freezing Weather
Watering your garden before freezing weather is simple but powerful. Moist soil holds warmth better than dry soil, protecting roots and soil structure from harsh frost.
Give your beds a thorough drink before temperatures drop. This also helps mulch settle evenly over the soil, locking in nutrients and preventing wind erosion.
Moist soil keeps beneficial microbes active longer, so your garden stays alive even during winter. Think of it as giving your soil a cozy, hydrating blanket.
Healthy, slightly damp soil will bounce back faster in spring, supporting strong roots and vigorous plant growth once the weather warms up.
Pro Tips
- Water deeply, not just surface lightly
- Best done in early morning hours
- Avoid overwatering near plant crowns
- Check soil moisture before freezing nights
Step 9: Protect Raised Beds
Raised beds need extra winter attention because they dry out and freeze faster than in-ground soil. Start by adding extra compost to keep nutrients available over the cold months. Mulch more generously to protect roots and retain moisture.
Consider covering beds with burlap or garden fabric for added insulation against harsh winds and frost. Raised beds are perfect for planting garlic now; the winter cold helps bulbs develop large, healthy cloves.
With these simple steps, your raised beds stay productive and protected all winter long. Healthy soil now means more vigorous plants and easier spring planting.
Pro Tips
- Apply thicker mulch in corners
- Secure covers against strong winds
- Water before heavy frost arrives
- Add compost around garlic cloves
Turn Your Passion for Nature Into Income
🌿 Whether you love gardening, caring for animals, or exploring holistic living,
You can share your knowledge online and earn from it.
Discover how nature lovers are growing their passions into meaningful, income-generating blogs. 👇
Step 10: Use Winter Composting Methods
Continuing composting is a smart strategy when preparing garden soil for winter, ensuring nutrients steadily enrich the soil for spring growth. Even in cold months, organic matter slowly breaks down, feeding your soil for spring.
To accelerate decomposition, chop kitchen leftovers into tiny pieces. Add plenty of browns, like leaves or straw, to balance nitrogen-rich scraps.
To keep your compost pile warm and moist, cover it with a tarp. Keep it damp but not soggy so that microbes can do their work. Short on space?
Try trench composting—dig small trenches in empty garden beds and bury scraps. Soil life will feast all winter. By spring, you’ll have nutrient-rich soil ready to support healthy plants.
Pro Tips
- Chop scraps for faster breakdown
- Layer browns and greens evenly
- Avoid wetting the pile excessively
- Use trenches for small spaces
Step 11: Edge Your Garden Beds
Edging your garden beds is a simple step that makes a big difference in winter. By trimming and defining the borders, you keep soil from washing away during heavy rains. Mulch stays in place, protecting roots and preserving nutrients.
Clean, well-defined edges also make spring planting faster and more organized. You can use a spade or edging tool to create smooth, consistent borders.
Removing weeds along the edges adds another layer of protection. Even a small effort now prevents messy soil loss later. Think of it as giving your garden a neat, protective frame for winter.
Pro Tips
- Use a spade for clean edges
- Remove weeds along borders
- Edge before applying mulch
- Keep edges slightly raised
Step 12: Protect Soil From Heavy Rain
Managing water flow is crucial when preparing garden soil for winter, helping prevent erosion, retain nutrients, and protect soil structure for spring.
Heavy storms wash away topsoil, taking nutrients with them and leaving puddles that damage plants. A straightforward solution is to create small berms or raised edges along your beds.
These act as barriers, guiding water away from vulnerable areas. You can also dig shallow drainage paths to channel excess water safely. Mulch helps slow runoff and protects the soil surface.
Even slight adjustments make a big difference. By managing water flow, you preserve nutrients, prevent erosion, and keep soil structure intact. Your garden remains robust and prepared for spring development.
Pro Tips
- Build berms around beds
- Avoid compacting soil paths
- Mulch to reduce runoff
- Check water flow direction

Step 13: Add Mycorrhizal Fungi
Adding mycorrhizal fungi is a brilliant winter soil strategy. These beneficial fungi form natural partnerships with plant roots, helping them absorb nutrients and water more efficiently.
Applying them during winter gives your soil a head start for spring growth. Simply sprinkle the spores over compost or bare soil, then lightly water to help them settle in.
The fungi colonize the root zone gradually, improving soil health and plant resilience. They also support beneficial microbes and create a stronger soil ecosystem. Even though it’s winter, these tiny helpers are busy preparing your garden for a productive, vibrant spring season.
Pro Tips
- Apply before the mulch layer
- Use high-quality fungal spores
- Avoid chemical fertilizers nearby
- Lightly water after application
Step 14: Protect Soil Life With Logs or Stones
Providing shelters for soil life is an essential part of preparing garden soil for winter, ensuring a vibrant, nutrient-rich ecosystem for spring growth.
Adding logs, stones, or small brush piles gives worms, insects, and other beneficial creatures safe shelters from cold and frost.
These natural hiding spots help soil life survive harsh conditions, keeping the ecosystem alive and active. As these creatures move and decompose organic material, they improve soil structure, aeration, and nutrient cycling.
Even simple additions like a few logs or stones make a noticeable difference. By supporting these tiny helpers, you ensure your soil remains vibrant, diverse, and ready to nurture vigorous plants when spring arrives.
Pro Tips
- Place near compost or beds
- Avoid blocking plant roots
- Move debris each year
- Keep some open spaces
Step 15: Plan Crop Rotation For Next Season
Winter is the ideal time to plan next season’s crops. Crop rotation helps prevent soil depletion and reduces pest and disease problems. By rotating plant families, you give the soil a chance to recover nutrients and maintain balance.
Take notes on where each crop grew this year. This record makes it easier to plan rotations, avoiding planting the same family in the same spot consecutively. Including legumes like peas or beans adds nitrogen naturally.
Thoughtful planning now saves work and improves harvests later. A simple rotation strategy ensures healthier soil, more vigorous plants, and more productive gardens in the coming season.
Pro Tips
- Write down crop placement
- Rotate leafy, root, and fruit crops
- Avoid repeating the same family consecutively
- Include legumes for nitrogen.
Step 16: Apply Slow-Release Fertilizers if Needed
If your soil test reveals nutrient deficiencies, winter is the perfect time to apply slow-release organic fertilizers. These fertilizers work gradually, allowing rain and snow to carry nutrients into the soil slowly.
This steady feeding supports soil life and strengthens the ground for spring planting. Spread the fertilizer evenly over beds, avoiding clumps that could burn plants or create nutrient imbalances.
Organic slow-release types are safer than chemical fertilizers, which can leach away quickly in winter. By taking this step, you ensure that when spring arrives, your soil is rich, balanced, and ready to support healthy, vigorous plant growth.
Pro Tips
- Apply in a thin, even layer
- Avoid chemical fast-release types
- Water lightly after application
- Repeat yearly for best results
Step 17: Cover Soil With Lightweight Fabric
Covering soil with lightweight fabric is a simple but effective winter strategy. Using row covers and frost blankets is an innovative method when preparing garden soil for winter, protecting soil and plants from cold and erosion.
They act as a barrier, keeping soil warmer and reducing erosion from heavy rain or snow. Breathable materials protect while allowing moisture and air to pass through.
To keep the coverings from being lifted by the wind, fasten the edges. Check occasionally to ensure moisture isn’t trapped underneath.
By using lightweight fabric, you create a stable microclimate for soil and plants, helping them survive winter and emerge strong and healthy in spring.
Pro Tips
- Secure edges against wind
- Use breathable fabric
- Remove the spring gradually.
- Check for trapped moisture.

Step 18: Incorporate Organic Mulch Between Rows
Adding a layer of organic mulch between garden rows is a simple way to protect soil during winter. Mulch, which can be grass clippings, straw, or shredded leaves, reduces soil erosion from heavy rains or snow, absorbs moisture, and inhibits the growth of weeds.
It also encourages beneficial insects and microbes to stay active under the cover. Spread about 2–4 inches between rows, leaving some space around plant bases to avoid rot.
This layer acts as a buffer, maintaining soil structure and temperature. By winter’s end, the mulch has partially decomposed, enriching the soil for spring planting.
Pro Tips
- Use coarse mulch for better drainage
- Replenish as it decomposes slowly
- Keep mulch away from stems
- Apply after soil moisture check
Conclusion
Preparing your garden soil for winter is an investment in a thriving spring garden. Taking steps like testing soil, adding organic amendments, and covering beds are key practices in preparing garden soil for winter.
Winter care keeps soil healthy, prevents erosion, and boosts fertility. Your garden will be ready to grow robust, colourful, and fruitful come springtime, repaying your winter labour with bountiful crops.
I trust you enjoyed this article on the Best Methods for Preparing Garden Soil for Winter. Please stay tuned for more inspiring guides, helpful tips, and ideas to help you live closer to nature every day.
Take care!
— JeannetteZ
💬 Your Opinion Is Important To Me
Do you have thoughts, ideas, or questions? I’d love to hear from you. Please leave your comments below or email me directly at Jeannette@Close-To-Nature.org.
📚 More Nature-Inspired Reads
Explore more ways to connect with nature, nurture your pets, and live in harmony with the world around you 🌿