Ultimate Guide To The Kratky Hydroponics Method
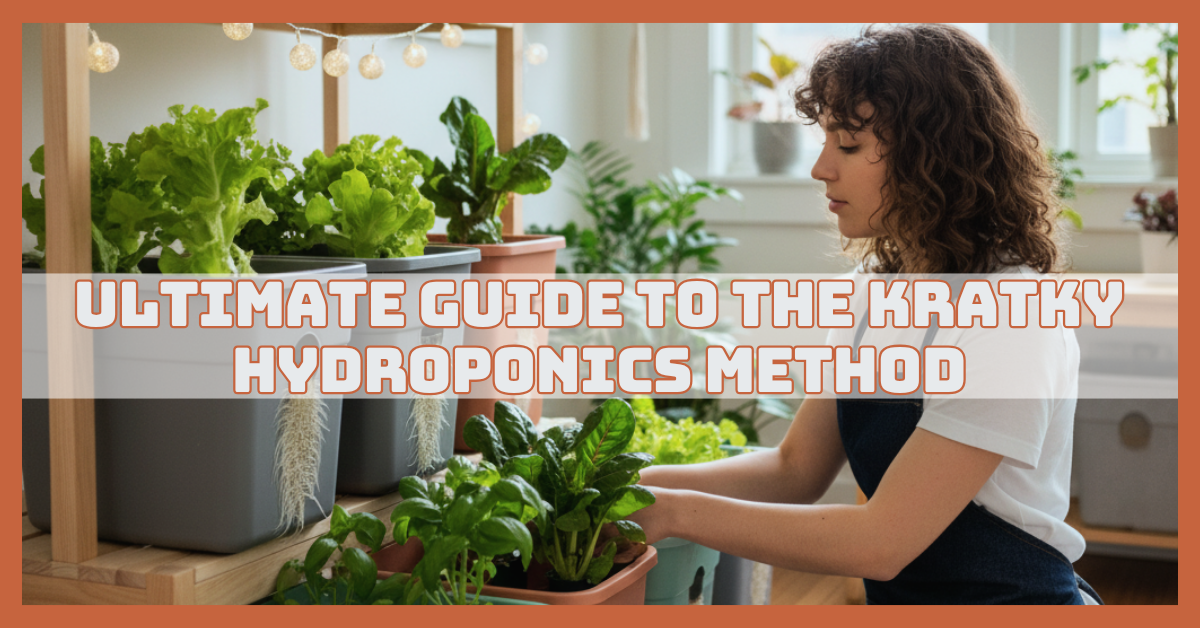
The Kratky Hydroponics Method is a simple, efficient way to grow plants without soil. Perfect for beginners and home gardeners, this method saves time, space, and water while delivering healthy, thriving crops.
This guide will cover detailed directions, advice, and techniques to help you get outstanding outcomes. Whether you want fresh herbs, vegetables, or greens, the Kratky Hydroponics Method makes gardening effortless and rewarding.
What Is Kratky Hydroponics?
Kratky hydroponics is a passive method of growing plants in nutrient-rich water. Named after its inventor, Dr. Bernard Kratky, this system requires no pumps, electricity, or complicated setups.
The idea is simple: the plants grow in a container with water and dissolved nutrients, and as they consume water, an air gap forms for oxygen intake. This method works best for leafy greens, herbs, and small vegetables.
Because it’s low-maintenance, it’s perfect for beginners and urban gardeners. You can use jars, buckets, or even plastic containers to get started at home.
Types Of Kratky Hydroponics
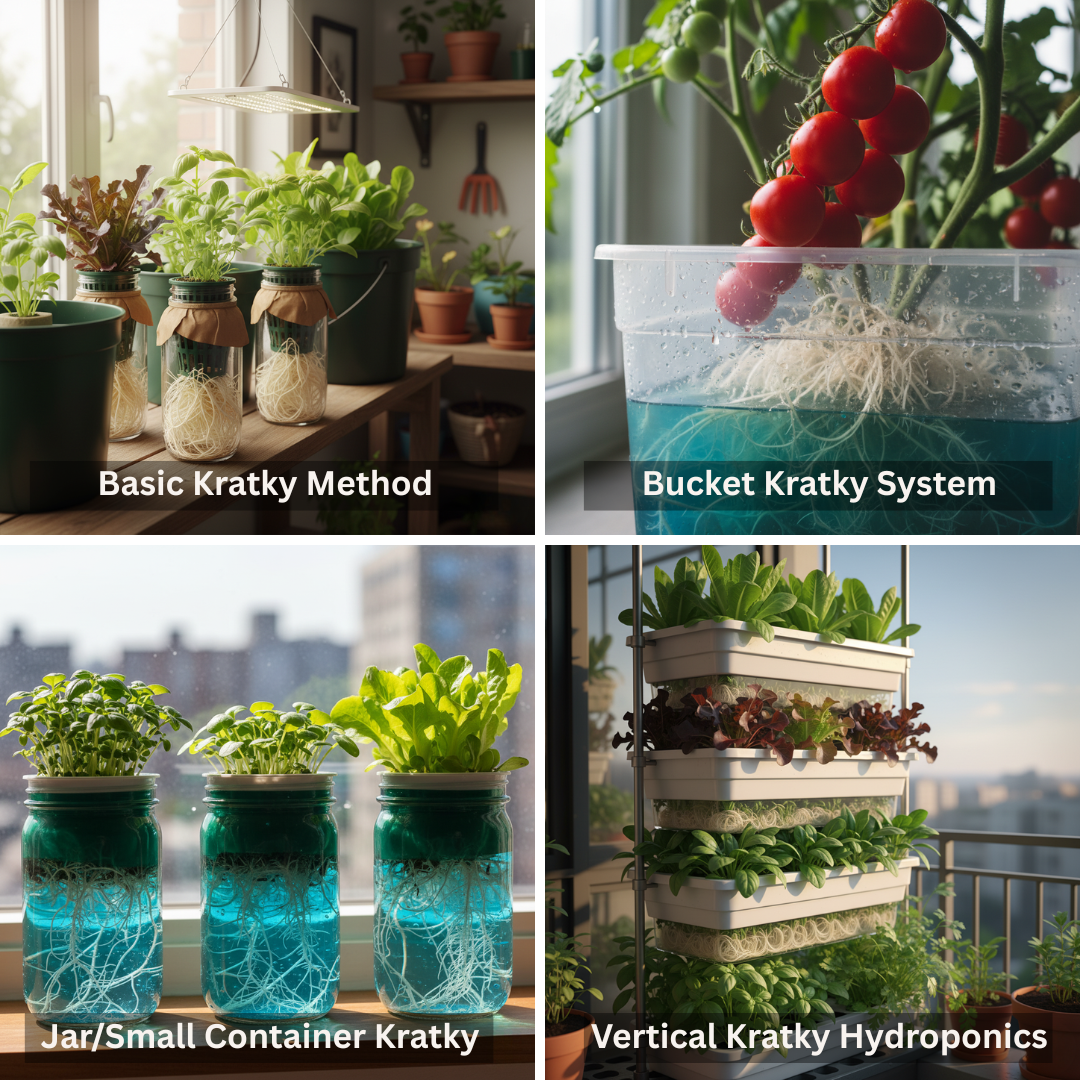
1. Basic Kratky Method
The Basic Kratky Method is the traditional passive hydroponic system. Plants grow in nutrient-rich water without pumps or electricity.
Best suited for small to medium leafy greens, herbs, and microgreens. Ideal for USDA zones 3–10. Low startup cost (~$10–$30) makes it perfect for beginners seeking hands-off gardening.
Setup Process
Select a small container, jar, or opaque bucket to prevent algae growth. Fill it with a hydroponic nutrient solution, ensuring pH is 5.5–6.5. Place seedlings or seeds in a growing medium like rockwool or coconut coir inside a net pot.
The pot should float or rest on the water's surface. Position the container in a bright spot with 12–16 hours of light per day, or use grow lights indoors.
No pumps or electricity are needed. Check water levels periodically, but do not refill, allowing a natural air gap to form as plants grow.
Growing Process
As the plant consumes water and nutrients, the water level drops, creating an oxygen gap for roots. Herbs like cilantro or basil, as well as leafy greens like lettuce, spinach, and arugula, grow quickly.
Maintain consistent light and monitor for yellowing leaves, which indicate nutrient deficiency. Avoid covering the container fully; roots need air exposure.
Harvest leaves as they mature for continuous growth or pull out the entire plant after 4–6 weeks. Minimal maintenance and low cost make this method ideal for small-scale home gardeners seeking fresh, pesticide-free produce.
2. Bucket Kratky System
The Bucket Kratky System uses large buckets or containers to grow bigger plants like tomatoes, peppers, and cucumbers. It’s suitable for home gardeners in USDA zones 5–10. Startup cost is moderate (~$20–$50).
This system allows longer growing periods and supports plants with deeper root structures, making it ideal for heavier vegetables.
Setup Process
Choose a 5–10 gallon bucket or larger container. For a net pot, drill a hole in the cover. Make a hydroponic nutrient solution and get the pH down to 5.5 to 6.5. Place seedlings or young plants in rockwool or coco coir inside the net pot.
Position the pot over the water so the roots partially touch the solution. Place the bucket in a sunny outdoor spot or under grow lights indoors.
No pumps are needed. Monitor water levels as the plant consumes nutrients, allowing the natural air gap to form for oxygen. Supports can be added for tall plants.
Growing Process
Plants like cherry tomatoes, bell peppers, cucumbers, and leafy greens grow best. As water levels drop, the air gap provides oxygen for roots. Check plants weekly for nutrient deficiencies or pests.
Prune excess leaves to improve airflow. Leafy greens can be harvested continuously, while fruits like tomatoes and peppers take 8–12 weeks to mature.
Ensure adequate light and maintain moderate temperatures (65–80°F). This system works well for gardeners wanting higher yields with larger vegetables, combining simplicity with support for heavier plants.
3. Jar Or Small Container Kratky
The jar or small container Kratky is ideal for windowsill gardening or limited spaces. It’s perfect for microgreens, herbs, and small leafy vegetables.
Works in USDA zones 3–10. Cost is very low (~$5–$15 per jar). This method is beginner-friendly and visually appealing for indoor gardening enthusiasts.
Setup Process
Select mason jars or small plastic containers, ensuring they are opaque or covered to prevent algae. Prepare a hydroponic nutrient solution with a pH of 5.5–6.5. Place seedlings or seeds in rockwool or coconut coir inside a net pot.
Position the net pot to float on top of the nutrient solution. Place jars in a sunny windowsill or under small grow lights for 12–16 hours daily.
No pumps or complex equipment are needed. Monitor water levels and allow a natural air gap to form as plants grow. This system is simple, clean, and ideal for indoor microgreens.
Growing Process
Suitable plants include lettuce, spinach, basil, cilantro, arugula, and other microgreens. As the water decreases, roots access oxygen through the air gap. Maintain light exposure and check for yellow leaves indicating nutrient deficiency.
Harvest leaves continuously as they reach maturity, or trim microgreens when ready. Jars are easy to rotate for light exposure, keeping plants healthy. Regular monitoring ensures steady growth.
This method allows city dwellers or apartment gardeners to enjoy fresh herbs and greens year-round without soil, pumps, or large containers, making it a low-maintenance, cost-effective solution for small indoor gardens.
4. Vertical Kratky Hydroponics
Vertical Kratky systems stack multiple containers to save space while growing leafy greens and herbs. Suitable for small patios, balconies, or indoor setups in USDA zones 3–10.
Startup cost is moderate (~$50–$100). This type is ideal for urban gardeners wanting to maximize production in minimal space.
Setup Process
Construct a vertical structure with stacked containers or bottles—drill holes for net pots in each container. Fill containers with hydroponic nutrient solution, adjusting pH to 5.5–6.5. Place seedlings in rockwool or coco coir inside net pots.
Position containers so that water levels drop naturally as plants grow, forming an oxygen gap. Ensure the top layer receives adequate light, or use grow lights for all layers. Monitor water and nutrient levels regularly.
Supports may be needed for taller plants. This compact system allows multiple plants in a small footprint, making it efficient for urban gardening.
Growing Process
Grow leafy greens like lettuce, spinach, and kale, plus herbs like basil, parsley, and mint. Water level drops gradually, creating the essential oxygen gap. Monitor for nutrient deficiencies, yellowing leaves, or overcrowding.
Rotate containers for even light exposure if sunlight is uneven. Harvest leaves continuously to promote new growth. Vertical Kratky allows multiple crops in a limited area and maximizes yield without increasing garden footprint.
It’s particularly effective for city dwellers or balcony gardeners who want fresh produce year-round without large-scale hydroponic systems.
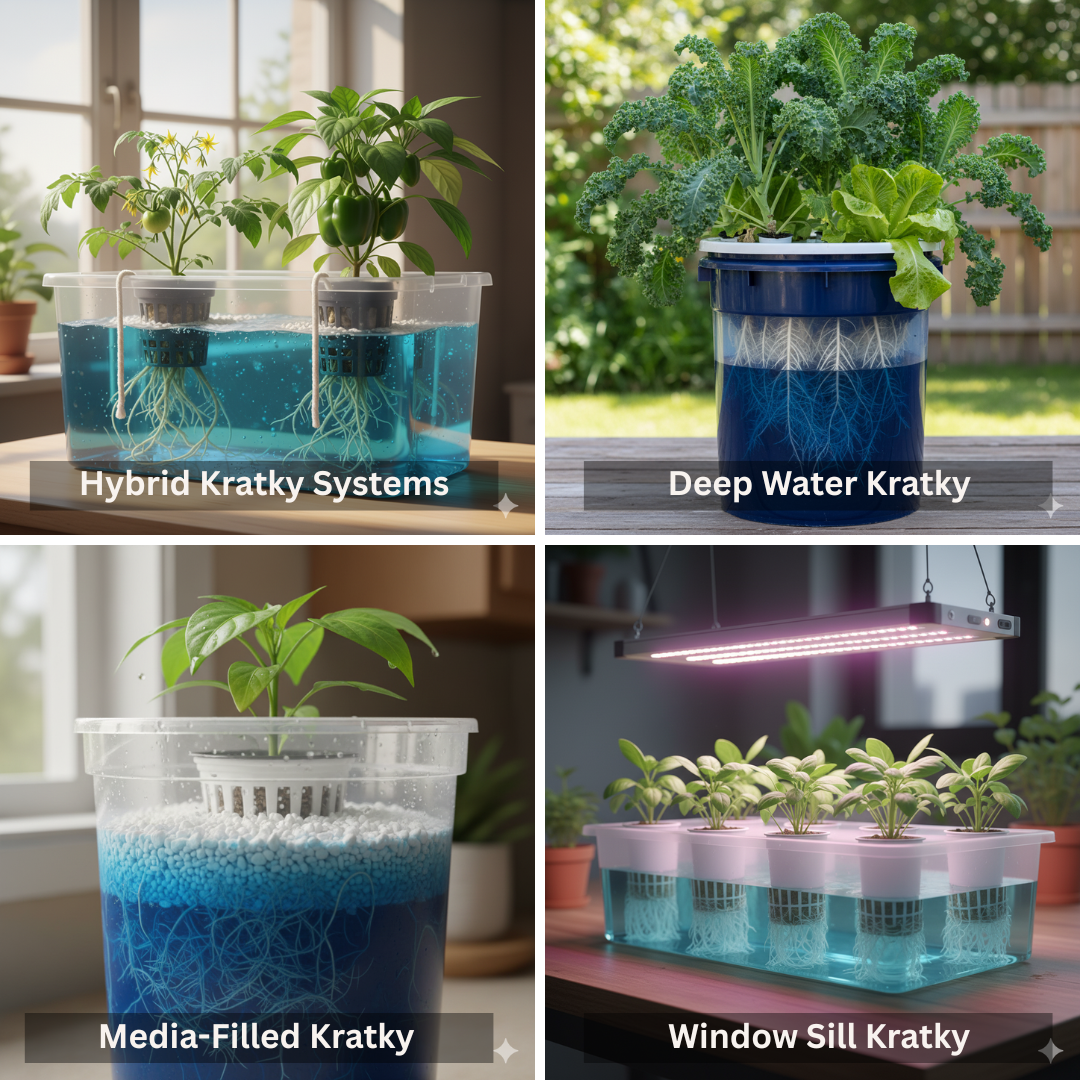
5. Hybrid Kratky Systems
Hybrid Kratky combines the passive method with other hydroponic techniques like wick or NFT. Suitable for advanced gardeners in USDA zones 4–10. Startup cost is higher (~$75–$150).
It allows more oxygen or nutrient delivery for larger plants or longer-growing crops, providing increased yield while maintaining simplicity.
Setup Process
Build a system where Kratky containers are supplemented with wicks or gentle nutrient circulation. Use large containers for plants requiring extra nutrients or oxygen—place seedlings in rockwool or coco coir inside net pots.
Maintain nutrient solution with pH 5.5–6.5. Ensure water and oxygen supply meet plant needs as they grow. Provide 12–16 hours of light daily indoors, or full sun outdoors.
Supports may be needed for taller crops. Monitor water, nutrients, and root health regularly. This hybrid system boosts growth potential while keeping the passive Kratky principle intact.
Growing Process
Grow larger plants such as tomatoes, peppers, cucumbers, and herbs. The added oxygen or wick support helps roots absorb nutrients efficiently. Monitor nutrient levels and pH weekly.
Prune excess leaves or branches to encourage airflow and reduce overcrowding. Harvest leafy greens continuously, while fruits mature over 8–12 weeks.
This system allows more demanding plants to thrive using a mostly passive hydroponic approach. It’s perfect for home gardeners wanting higher yields or experimenting with different crops while maintaining low-maintenance hydroponics.
Turn Your Passion for Nature Into Income
🌿 Whether you love gardening, caring for animals, or exploring holistic living,
You can share your knowledge online and earn from it.
Discover how nature lovers are growing their passions into meaningful, income-generating blogs. 👇
6. Deep Water Kratky
Deep Water Kratky is an adaptation using taller containers to support longer roots and larger plants. Ideal for bigger leafy greens, dwarf tomatoes, and peppers. Suitable for USDA zones 4–10.
Moderate startup cost (~$30–$60). This method increases root space, allowing larger crops while maintaining the passive Kratky principle.
Setup Process
Choose a deep bucket, tank, or container that can hold a large nutrient solution. Drill a hole in the lid for a net pot. Fill with hydroponic nutrient solution, adjusting pH to 5.5–6.5.
Place seedlings in rockwool or coco coir inside the net pot, allowing roots to reach deep into the solution. Position the container in full sun or under grow lights.
No pumps or circulation are needed. As water is consumed, a natural air gap forms, providing oxygen for roots. Monitor nutrient concentration and water levels weekly to ensure healthy plant growth.
Growing Process
Deep Water Kratky is excellent for lettuce, kale, spinach, dwarf tomatoes, and peppers. As roots extend into the deep water, plants have constant nutrient access.
The gradually dropping water level creates an oxygen gap for root respiration. Monitor for yellowing leaves, indicating nutrient deficiencies, and adjust the solution if needed.
Harvest leafy greens continuously, and allow fruits like tomatoes and peppers to mature over 8–12 weeks. The larger root volume supports bigger plants, reduces stress, and improves yield.
Minimal maintenance and passive operation make this method perfect for home gardeners wanting larger crops in a simple setup.
7. Media-Filled Kratky
Media-filled Kratky combines the passive hydroponic system with solid media like expanded clay, perlite, or vermiculite. This stabilizes roots and supports taller or heavier plants.
Suitable for USDA zones 3–10. Startup cost is moderate (~$20–$50). Ideal for gardeners growing medium-sized crops that need extra root support.
Setup Process
Select a container and fill it partially with media such as clay pebbles or perlite. Mix a hydroponic nutrient solution with a pH of 5.5–6.5 and pour it into the container.
Place seedlings or young plants in net pots with rockwool or coco coir, setting them on top of the media so roots can reach the water below. Position in a sunny outdoor spot or under grow lights indoors.
The media holds moisture and provides stability, reducing root damage. As plants grow, the water level drops naturally, creating an air gap for oxygen. Minimal maintenance is needed.
Growing Process
Media-filled Kratky works well for peppers, cherry tomatoes, herbs, and leafy greens. The growing medium retains moisture and nutrients, helping roots stay healthy. As water drops, an oxygen gap forms for proper root respiration.
Monitor nutrient levels, light exposure, and prune leaves to prevent overcrowding. Harvest leafy greens continuously, while fruiting crops like tomatoes or peppers take 8–12 weeks to mature.
Media provides extra support, preventing top-heavy plants from tipping. This method is excellent for gardeners who want a balance between stability, yield, and low-maintenance hydroponics.
8. Window Sill Or Tabletop Mini-Kratky
The Window Sill Mini-Kratky is a compact, indoor version of the passive system. Ideal for apartments, offices, or small spaces, it grows microgreens, herbs, and small leafy vegetables.
Suitable for USDA zones 3–10. Low cost (~$5–$20) makes it perfect for beginners or urban gardeners seeking fresh produce year-round.
Setup Process
Use mason jars, small containers, or shallow trays. Fill with hydroponic nutrient solution and adjust pH to 5.5–6.5. Place seedlings or seeds in rockwool, coco coir, or sponge inside net pots.
Position the containers on a sunny windowsill or under small grow lights for 12–16 hours daily. Water naturally forms an oxygen gap as plants consume nutrients. Minimal maintenance is required, making it perfect for indoor spaces.
Rotate containers occasionally to ensure even light exposure. Harvest small amounts regularly to encourage continuous growth and prevent overcrowding. This system is clean, simple, and beginner-friendly.
Growing Process
Suitable plants include basil, cilantro, arugula, lettuce, and other microgreens. Roots gradually grow into the nutrient solution while the air gap provides oxygen. Monitor for yellowing leaves and maintain consistent light.
Harvest leaves continuously or cut microgreens when they reach optimal size. Indoor Mini-Kratky allows urban gardeners to enjoy fresh herbs or greens without soil, pumps, or large equipment.
Containers are easy to manage and clean. The compact system fits on desks, tables, or shelves, making it perfect for small homes. This method ensures fresh, pesticide-free produce year-round with minimal effort.
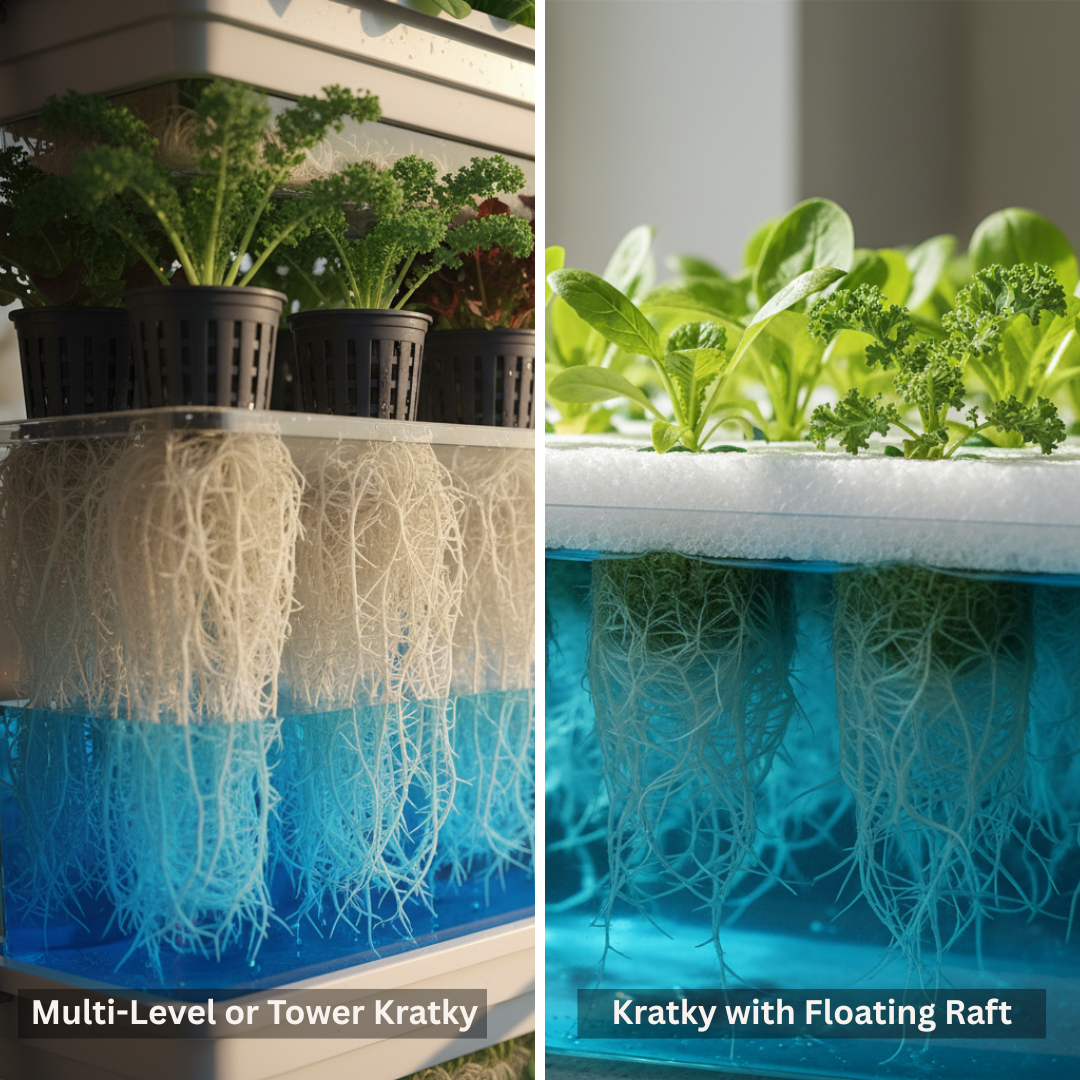
9. Multi-Level Or Tower Kratky
The Multi-Level Kratky system stacks containers vertically to maximize space efficiency. Ideal for balconies, patios, or miniature indoor gardens.
Suitable for USDA zones 3–10. Startup cost is moderate (~$50–$100). This method allows growing multiple plants in a compact footprint, making it perfect for urban gardeners seeking high yields in limited space.
Setup Process
Construct a vertical structure using stacked containers, bottles, or trays. Drill holes for net pots in each container layer. Fill each container with hydroponic nutrient solution and adjust pH to 5.5–6.5.
Place seedlings in rockwool or coco coir inside net pots, allowing roots to reach the solution. Ensure the top layer receives adequate light or provide grow lights for all levels.
Water drops naturally in each container, forming oxygen gaps for roots. Supports may be needed for taller crops. Monitor water and nutrient levels regularly, ensuring all layers maintain healthy plant growth.
Growing Process
Grow leafy greens like lettuce, spinach, and kale, plus herbs like basil, parsley, and mint. Roots access nutrients from the solution, while the oxygen gap supports respiration. Rotate containers or adjust light for even exposure.
Harvest leaves continuously to promote new growth. Multi-Level Kratky maximizes production without expanding garden space, making it ideal for small patios or indoor areas.
Monitor nutrient levels and prune plants to prevent overcrowding. This method allows urban gardeners to cultivate multiple crops simultaneously while keeping maintenance simple, combining efficiency with the passive Kratky principle.
10. Kratky With Floating Raft
The Floating Raft Kratky method uses a large tray or shallow container with plants supported on a floating raft. Perfect for leafy greens such as kale, spinach, and lettuce. USDA zones 3–10 are served. Moderate startup cost (~$40–$80). Perfect for maximizing yield in small backyard ponds or indoor water trays.
Setup Process
Select a shallow tray or container and fill it with hydroponic nutrient solution. Cut holes in a floating raft made from foam, polystyrene, or similar buoyant material.
Place seedlings in rockwool or coco coir inside net pots and insert them into the raft holes. Ensure roots dangle into the nutrient solution, but leaves remain above water.
Position the tray in a sunny location or under grow lights indoors. As plants consume water, the level drops, naturally forming an oxygen gap for roots. Regularly monitor nutrient levels and pH to maintain healthy growth.
Growing Process
Ideal plants include lettuce, spinach, arugula, kale, and herbs like basil or cilantro. Roots grow into the water while the air gap provides essential oxygen.
Maintain consistent light and check for yellowing leaves, which signal nutrient deficiencies. Harvest leaves continuously for ongoing production, or remove mature plants entirely after several weeks.
The floating raft supports multiple plants simultaneously, maximizing yield per container. This method is perfect for home gardeners with small spaces, ponds, or shallow trays.
Minimal maintenance, no pumps, and passive oxygenation make the Floating Raft Kratky a highly productive, beginner-friendly hydroponic system.
Conclusion
Using the Kratky Hydroponics Method, anyone can enjoy a bountiful home garden with minimal effort. You'll experience quicker development, more vigorous plants, and more delectable harvests if you adhere to the straightforward instructions and advice in this guide.
Start your hydroponic journey today and experience the joy of growing your own fresh produce. Embrace the Kratky Hydroponics Method and transform your gardening experience into something easy, sustainable, and highly satisfying.
I trust you enjoyed this article on the Ultimate Guide To The Kratky Hydroponics Method. Please stay tuned for more inspiring guides, helpful tips, and ideas to help you live closer to nature every day.
Take care!
— JeannetteZ
💬 Your Opinion Is Important To Me
Do you have thoughts, ideas, or questions? I’d love to hear from you. Please leave your comments below or email me directly at Jeannette@Close-To-Nature.org.
📚 More Nature-Inspired Reads
Explore more ways to connect with nature, nurture your pets, and live in harmony with the world around you 🌿

