Easy Indoor Seed Starting Setup That Works
Starting your garden indoors is a rewarding way to get a jump on the growing season. With the right Indoor Seed Starting Setup, you can grow vigorous, healthy seedlings right from your kitchen or basement.
Whether you're a beginner or a seasoned gardener, creating a simple, efficient setup will set you up for success. Let’s explore how to build the perfect environment for your seeds to thrive indoors.
Benefits Of Starting Seeds Indoors
Starting seeds indoors offers gardeners a head start on the season, greater plant variety, and more vigorous seedlings. It’s an innovative, cost-effective way to boost garden success from the very beginning.
1. Extended Growing Season
Gardeners can start the growing season early by starting seeds indoors. By beginning seeds weeks before the last frost date, plants can mature earlier and produce crops sooner.
This is especially beneficial in regions with short summers or unpredictable spring weather. Early indoor seed starting ensures that plants are strong and ready to thrive once transplanted outdoors, giving them more time to grow, bloom, and bear fruit.
As a result, gardeners can enjoy earlier harvests and a more extended production period, increasing overall yields and garden satisfaction throughout the season.
2. Greater Variety Of Plants
When you start seeds indoors, you gain access to a much wider range of plant varieties. Garden centers often carry only a limited selection of transplants, but seed catalogues and online retailers offer hundreds of unique options.
This includes heirlooms, rare cultivars, and specialty plants not commonly found in stores. Growing from seed opens up the opportunity to experiment with colours, flavours, and types best suited to your specific garden goals.
With indoor seed starting, you’re not restricted by retail availability, giving you complete control over your garden's diversity and character from the very beginning.
3. Cost-Effective Gardening
Starting seeds indoors is a budget-friendly alternative to purchasing mature plants from nurseries. A single seed packet often contains dozens or even hundreds of seeds for the price of one or two nursery plants.
With proper care, you can grow many more plants for a fraction of the cost. Additionally, indoor seed starting allows you to reuse materials like trays, pots, and lighting systems year after year.
This sustainable practice reduces overall gardening expenses and ensures a steady supply of new plants without frequent trips to the store, making it ideal for gardeners who want to save money long-term.
4. Stronger And Healthier Plants
An effective indoor seed starting setup provides precise control over growing conditions, resulting in more vigorous, healthier plants with better chances of thriving after transplanting.
This controlled environment helps produce stronger, healthier seedlings compared to those started outdoors, where conditions are less predictable. Gardeners can monitor for pests and diseases more effectively and adjust care as needed for optimal growth.
Plants started indoors are often more resilient when transplanted because they have developed robust root systems and are already acclimated to consistent care.
This early advantage reduces transplant shock and increases the likelihood of successful establishment once seedlings are moved to the garden.
5. Earlier Harvests
Gardeners can harvest their crops sooner by beginning seeds indoors rather than waiting to plant them in the ground. Indoor seedlings get a head start, developing roots and foliage weeks ahead of outdoor sowings.
This is especially advantageous for vegetables with long growing periods, such as tomatoes, peppers, and eggplants. With indoor starting, these plants are well-established by the time outdoor conditions become favourable, leading to earlier flowering and fruiting.
Early harvests not only extend the eating season but also reduce the pressure from mid- and late-season pests, helping produce stay healthier and more abundant.

6. Improved Germination Rates
Starting seeds indoors offers optimal conditions for germination, including consistent warmth, moisture, and lighting. This improves germination rates significantly compared to outdoor sowing, where fluctuating weather can delay or hinder sprouting.
Indoors, gardeners can use heat mats and humidity domes to create the perfect environment for seedling success. By closely monitoring conditions, you ensure that seeds sprout more reliably and uniformly.
This means less seed waste and more predictable results. With improved germination rates, you can better plan your planting schedule and spacing, ensuring your garden layout is efficient and productive from the start.
7. Protection From Pests And Weather
Indoor seed starting shields young seedlings from the harsh realities of outdoor environments. Delicate seedlings can be harmed by pests like slugs, cutworms, and birds, as well as by extreme weather conditions like persistent rain, strong winds, or sudden frosts.
>>> You might also want to read my other blog post on Plant Propagation Techniques <<<
Indoors, you can safeguard seedlings from these threats during their most fragile stage. This protection ensures healthier development and reduces the need for pest control later on.
Once transplanted, these well-established plants are better equipped to withstand garden challenges. This early protection is especially valuable in regions with unpredictable spring weather or heavy insect pressure.
8. Better Garden Planning
Using an indoor seed starting setup helps you better plan your garden by giving you early insight into seedling growth and allowing for efficient garden layout and succession planting. As seedlings grow indoors, you can assess which ones are thriving and plan your beds accordingly.
You’ll know in advance how many plants you have and can arrange companion plantings more effectively. Early seed starting also helps you stagger plantings, creating a succession plan for continual harvests.
With seedlings ready to go when outdoor conditions improve, you can fill garden spaces immediately and avoid gaps. This efficiency improves garden productivity and reduces downtime between planting and harvesting cycles.
9. Skill Building And Educational Value
Indoor seed starting is a valuable learning experience for gardeners of all levels. It teaches essential skills like timing, plant care, soil management, and troubleshooting.
Watching seeds sprout and grow helps deepen your understanding of plant biology and gardening techniques. It’s also a fantastic hands-on activity for children and families, promoting curiosity and responsibility.
Each step—from sowing to transplanting—builds confidence and improves your ability to grow healthy, productive gardens year after year.
As you refine your indoor seed-starting process, you become a more skilled and resourceful gardener with greater control over your results.
10. Continuous Supply Of Plants
By starting seeds indoors in batches, you can maintain a steady supply of seedlings throughout the growing season. This is especially useful for crops with short lifespans, like lettuce or herbs, which benefit from frequent succession planting.
With an indoor setup, you can start new seeds every few weeks, ensuring fresh plants are always ready to replace harvested or spent ones.
This approach keeps your garden productive and minimizes downtime. It’s also ideal for replacing any plants lost to pests, disease, or weather, giving you flexibility and resilience in maintaining a lush, thriving garden.

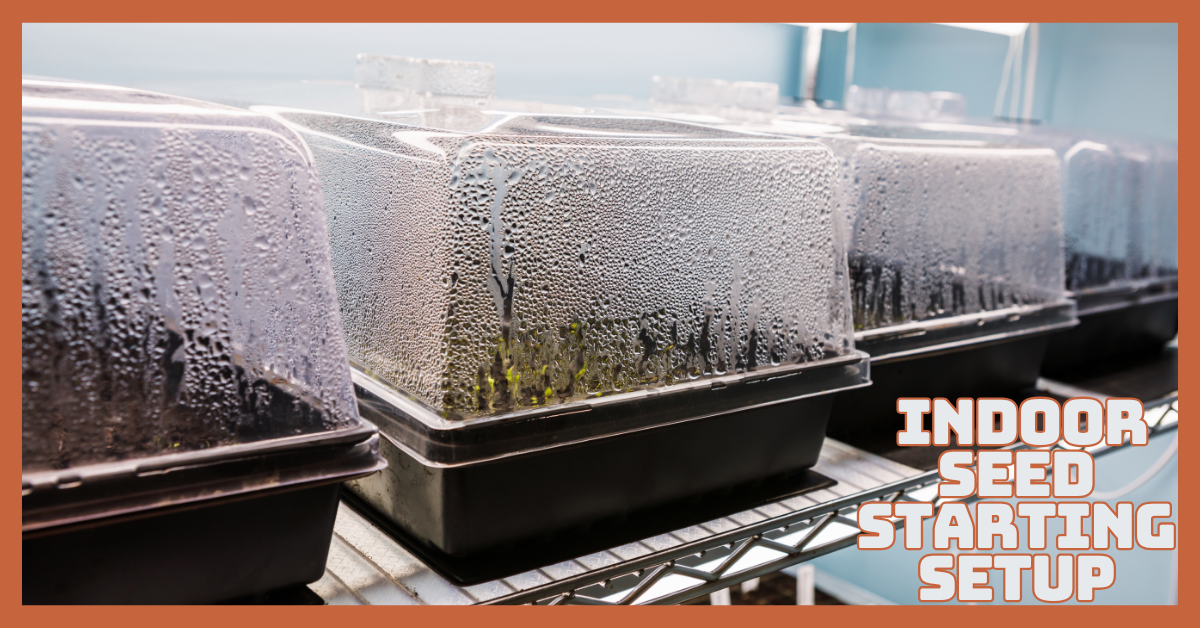
Indoor Seed Starting Setup
Here are the essential steps for setting up an indoor seed starting system. These steps are structured to help beginners and experienced gardeners alike create a reliable and productive indoor growing environment.
Step 1: Choose The Right Location
Pick a spot in your home with good airflow and access to electricity. A basement, sunroom, or unused room can work well. The area should be free from drafts and sudden temperature changes.
Even though natural sunlight is helpful, it's not essential since grow lights can provide what seeds need. Ensure the space is easy to clean and manage water spills.
Shelving units or tables with space for lights and trays are ideal. Prioritize convenience—choosing a place near water access and where you can check seedlings daily makes a big difference in success.
Step 2: Select The Seeds
An indoor seed starting setup helps you choose and manage seeds suited to your climate and season, ensuring successful germination and timely transplanting.
Start with vegetables like tomatoes, peppers, and herbs, or flowers like zinnias and marigolds. Read seed packets for ideal start dates and planting depth. Look for terms like “start indoors” or “transplant outside” to know which varieties benefit from indoor germination.
For first-time gardeners, opt for easy-to-grow seeds with a high germination rate. Consider how much space the mature plants will need outdoors and plan your seed selection accordingly. Also, stagger your starts to avoid having all your plants ready to transplant at once.
Step 3: Gather Your Supplies
You’ll need seed trays or containers, a high-quality seed starting mix, labels, a spray bottle, a heat mat (optional), and grow lights. Avoid garden soil, as it's too heavy and may carry pathogens.
Use a waterproof tray underneath containers that have drainage holes in them. A dome lid helps retain moisture during germination. Labels or popsicle sticks are essential for tracking varieties.
A misting bottle prevents overwatering delicate seeds. A heat mat can speed up germination for heat-loving plants like tomatoes and peppers. Having all your tools ready before you begin ensures a smoother, more organized setup process.
Turn Your Passion for Nature Into Income
🌿 Whether you love gardening, caring for animals, or exploring holistic living,
You can share your knowledge online and earn from it.
Discover how nature lovers are growing their passions into meaningful, income-generating blogs. 👇
Step 4: Prepare The Growing Medium
Use a light, sterile seed starting mix that retains moisture and allows for airflow. Avoid regular potting soil, which can suffocate seeds and harbour disease.
Moisten the mix slightly before planting so it holds shape without dripping water. Fill your trays or containers evenly, leaving a small gap at the top. Lightly press the soil to eliminate large air pockets.
Pre-moistening the mix reduces the chance of disturbing seeds after planting. If using biodegradable pots, ensure they’re fully saturated to prevent moisture from wicking away from the soil. Your growing medium is the foundation of seed success.
Step 5: Plant The Seeds
Follow the depth guidelines on each seed packet. A good rule of thumb is to plant seeds at a depth twice their diameter. Gently place the seeds into the soil and cover lightly.
Some seeds need light to germinate and shouldn’t be covered—check instructions carefully. Use a misting bottle to water the seeds without displacing them. Label each row or container immediately.
After planting, cover the trays with a plastic dome or wrap to retain humidity. Place them in a warm area—65 to 75°F is ideal. Use a heat mat if your indoor temperatures are lower than recommended.
Step 6: Provide Proper Lighting
A well-designed indoor seed starting setup includes proper grow lighting to ensure seedlings receive the light they need for strong, healthy growth. Use fluorescent or LED grow lights suspended a few inches above the seedlings.
Lights should be on for 14–16 hours a day to mimic natural daylight. Raise the lights as seedlings grow to maintain the proper distance. Without sufficient light, seedlings become leggy and weak.
Full-spectrum grow lights simulate sunlight and are best for healthy growth. Position lights close enough to provide intense illumination without overheating the plants. Regularly rotate trays to ensure even light exposure on all sides.

Step 7: Maintain Optimal Moisture
Consistent moisture is key, but overwatering is a common mistake. Keep the soil moist but not soggy. Water gently using a spray bottle or bottom-watering method to avoid disturbing roots.
If using domes, remove them once most seeds have germinated to prevent fungal issues. Check daily for dry spots or excess water pooling. Too much dry soil can prevent seeds from sprouting.
If too wet, damping-off disease can occur, killing seedlings. As plants grow, their water needs increase. Use room-temperature water to avoid shocking young roots. Proper moisture management is essential for developing vigorous, healthy seedlings.
Step 8: Ensure Proper Air Circulation
Good airflow helps prevent disease and promotes strong stem development. Use a small fan on a low setting to gently circulate air around your plants. This simulates outdoor breezes and encourages sturdier growth.
Keep the fan running for a few hours each day to maintain ventilation. Avoid overcrowding trays to ensure space between plants. Poor airflow can lead to mould, damping-off, and other fungal issues.
Proper air movement also helps maintain even temperature and humidity levels. If you're growing in a confined space like a closet, open it daily to let fresh air in and stale air out.
Step 9: Feed Your Seedlings
Select containers that have holes for drainage, and place a waterproof tray underneath. Use a diluted, balanced liquid fertilizer—about one-quarter strength—once a week.
Young plants might be burned by too much fertilizer, so be cautious. Choose an organic option if possible to support soil health. Monitor how your seedlings respond and adjust as needed.
The fertilizer's strength can be gradually increased as the plants get bigger. Your seedlings will flourish as they get ready for the outdoor garden with regular feeding, which encourages healthy leaf and root development.
Step 10: Pot Up When Needed
An effective indoor seed starting setup includes timely transplanting of seedlings to larger containers to promote healthy root growth and more vigorous plants. Use a slightly bigger container and fresh seed starting mix.
Handle seedlings gently by their leaves, not stems, to avoid damage. Water the new container well and place it back under the grow lights. Potting up gives plants more room to expand their roots and strengthens them for the transition outdoors.
To lessen stress during transplanting, try not to disturb the roots too much. This step helps produce vigorous plants ready for the garden.
Step 11: Harden Off Seedlings
Before planting outdoors, seedlings need to adjust gradually to sun, wind, and outdoor temperatures—a process called hardening off. For the first hour or two of the day, put them outside in a protected, shaded area.
Gradually increase exposure over 7–10 days, moving them into more sun and more extended periods each day. Protect from strong winds and nighttime cold. This step is crucial for avoiding transplant shock.
Skipping hardening off can result in sunburned or stunted plants. Once seedlings are acclimated, they’re ready to be planted in the garden, where they’ll continue growing into vigorous, productive adult plants.
Step 12: Clean And Store Supplies
The success of your garden can be fully controlled by beginning seeds indoors, whether you're planting flowers, veggies, or herbs. Let everything dry completely before storing.
Organize leftover seeds in a cool, dry place—label them clearly with the year and type: store lights, mats, and fans safely for next season.
Keeping everything clean and in good condition extends the life of your setup and helps ensure healthy plants in future seasons.
Doing this final step also prepares you for a smoother and more efficient experience the next time you start seeds indoors.

FAQs
1. What Is An Indoor Seed Starting Setup?
An Indoor Seed Starting Setup is a controlled environment used to grow seeds indoors before transplanting them outside.
It typically includes trays, seed-starting mix, grow lights, and a heat source to create the ideal conditions for germination and early growth.
2. Why Should I Start Seeds Indoors?
You may advance the growth season, increase germination rates, and have more control over temperature, moisture, and light by starting seeds indoors. It’s beneficial in cooler climates with shorter growing periods.
Conclusion
You can produce colourful, robust plants from the comfort of your home if you have the proper indoor seed starting setup.
You may take complete control of the growth of your garden by beginning seeds indoors, whether you're producing flowers, veggies, or herbs. Now that you know how to set it up, it’s time to plant, nurture, and watch your garden dreams grow!
I trust you enjoyed this article on the Easy Indoor Seed Starting Setup That Works. Please stay tuned for more inspiring guides, helpful tips, and ideas to help you live closer to nature every day.
Take care!
— JeannetteZ
💬 Your Opinion Is Important To Me
Do you have thoughts, ideas, or questions? I’d love to hear from you. Please leave your comments below or email me directly at Jeannette@Close-To-Nature.org.
📚 More Nature-Inspired Reads
Explore more ways to connect with nature, nurture your pets, and live in harmony with the world around you 🌿