How To Grow Nasturtium Flowers In Containers
How To Grow Nasturtium Flowers In Containers
Nasturtiums contain many vitamins and minerals. However, many people regard them as weeds because they are overly zealous and spread quickly.
Planting nasturtium flowers in a container will keep them fresh for culinary use and protect your garden from their infamous spread. Let's look at how to grow nasturtium flowers in containers.
History Of Nasturtiums (Tropaeolum minus)
Dwarf nasturtium (Tropaeolum, minus) seeds were among the loot brought back to Spain by the conquistadors in the 16th and 17th centuries.
The attractive, aromatic, and quick-growing plants were used for culinary and aesthetic purposes. In the 1700s, a Dutch priest named Pater Beverning introduced the taller Tropaeolum majus, which immediately became popular throughout Europe.
Nasturtiums were imported to North America in the early 1800s and immediately became popular due to their attractive blossoms, rapid growth, and climbing camouflaging behaviour, just as they had in Europe.

Is It Possible To Grow Nasturtium Flowers In Containers?
‘Nasturtiums grow wonderfully in pots,' Monty explains. Bush nasturtiums are excellent for containers since they stay smaller, whereas trailing nasturtiums are better for window boxes or hanging baskets.
If you're planting them in containers, combine the compost with fine gravel or grit to aid drainage and reduce nutrient levels, as they prefer poor soil.
Sow one or two nasturtium seeds per pot to prevent them from outgrowing it. If you're growing nasturtiums in pots, you can put them in a little shadier area to prevent them from overexposure and the drying effects of the sun.
Nasturtium Varieties
Before starting to grow nasturtium flowers in containers, you need to know the best varieties of nasturtium.

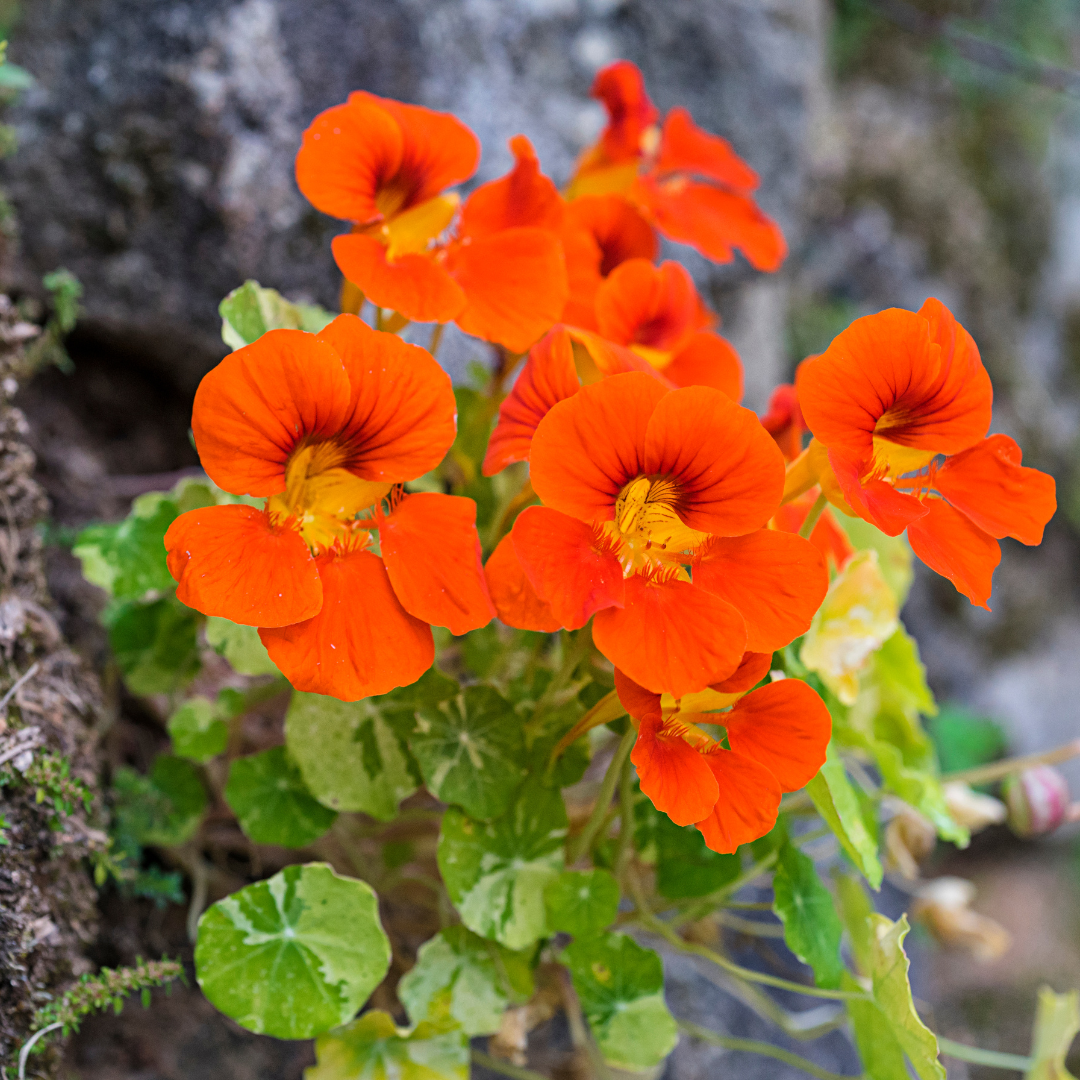
1. Black Velvet Nasturtium
These blossoms are so dark red that they almost appear black, making them a magical and one-of-a-kind pick. The sharp contrast between the flowers' midnight-hued petals and bright yellow throats adds to their impact.
Another reason to choose this plant is that it blooms profusely, allowing you to enjoy ‘Black Velvet' throughout the spring and summer. This trailing variety can reach a height of 12 inches and matures 75 days after seeding.

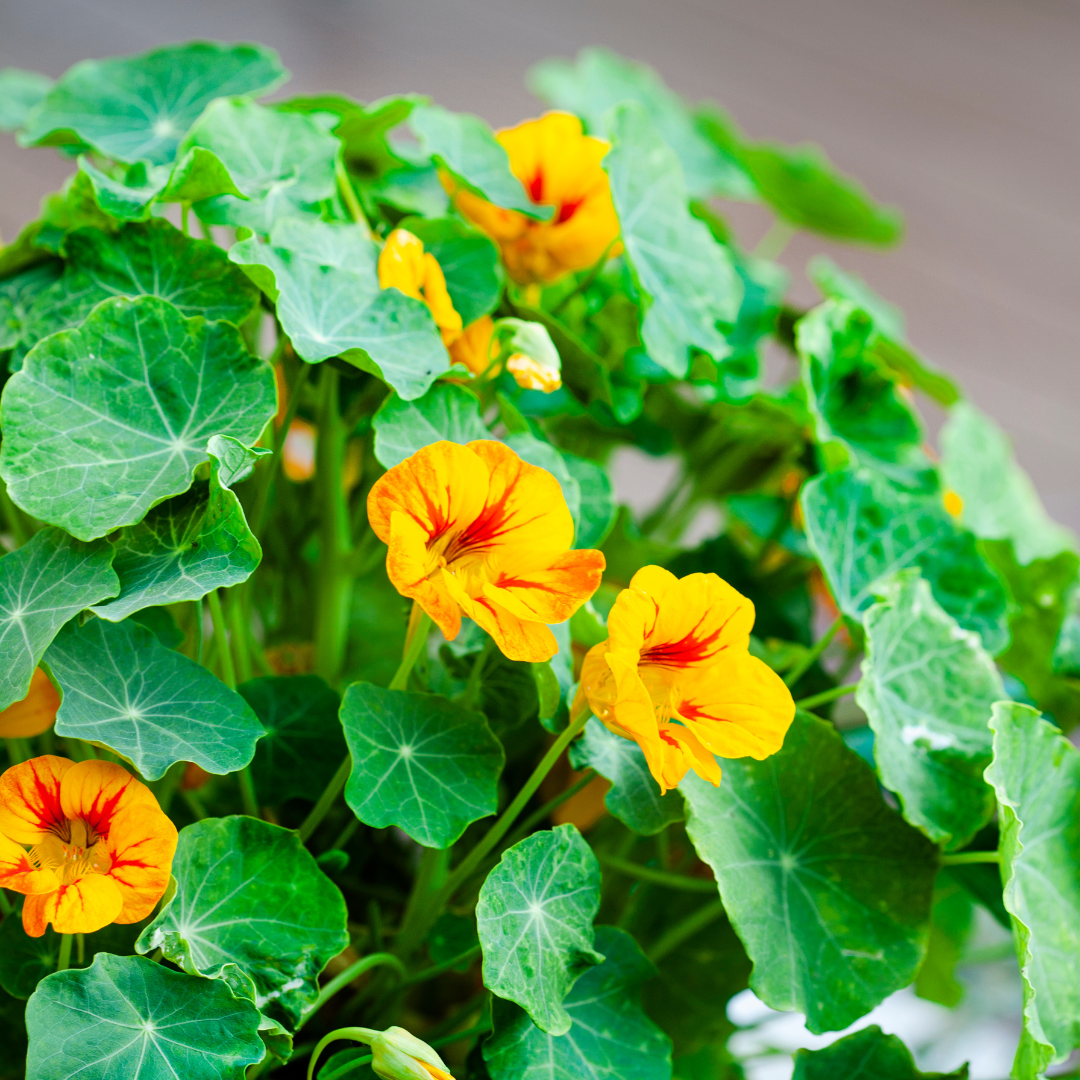
2. Alaska Nasturtium
This heirloom cultivar is a visual delight, whether it's in bloom or not, with its green and white variegated foliage.
‘Alaska' produces edible blooms in various colours, including yellow, cherry, salmon, and crimson, which are ready to eat after 55 to 60 days.
This compact, bushy cultivar thrives in full sun and light shade, reaching a mature height of 12-14 inches. This cultivar is versatile and easy to grow.

3. Empress Of India Nasturtium
The regal ‘Empress of India' is a bushy, dwarf heirloom cultivar that grows 16 inches tall at maturity.
This type produces tall, spurred, 2 1/2-inch delicious scarlet flowers set against dark blue-green foliage and matures in 55-65 days.

4. Apricot Nasturtium
‘Apricot' produces plants that hoist their joyful and distinctively apricot-coloured flowers above bright green foliage, making it ideal for gardening in borders or window boxes.
This dwarf variety is compact and bushy, and it matures in 55-65 days, making it a beautiful addition to any garden bed or container.

5. Fiery Festival Nasturtium
‘Fiery Festival' is sure to turn your yard into a colourful carnival! This cultivar is so much joy to look at because of the vibrant red blooms with their dazzling yellow centers and the bright green leaves.
It makes me happy simply looking at it! This trailing, low-growing cultivar enjoys whole light and can grow to 60 inches in length, making it suitable for use as a ground cover or hanging baskets.

6. Orchid Flame Nasturtium
With a mature height of 12 inches, ‘Orchid Flame' has a bushy, mounding habit. The lovely 2-inch bicolored flowers, golden yellow with brilliant crimson splashes, change colour throughout the season, eventually turning utterly red in late summer.
‘Orchid Flame' is a lovely addition to beds and borders, but it's also great in containers on the patio, where the vibrant colours can be appreciated. For the most outstanding results, plant in full sun.

7. Peach Melba Nasturtium
It's easy to see how this cultivar got its name. The dainty, delicate blossoms are a lovely creamy yellow colour with vivid crimson centers, which reminds me of the inside of a clingstone peach right away.
This heritage is ideal for life in a garden bed or a container because it is compact and bushy. I particularly adore its leaf, which has a subtle blue-gray tint that is both attractive and distinctive.
Unlike other nasturtiums, this species may grow up to 12 inches tall and tolerates moderate shade – but bear in mind that it prefers to grow in the sun, and full exposure is essential to optimize the number of blooms.
Grow Nasturtium Flowers In Containers
Follow the steps that will help you grow nasturtium flowers in containers perfectly!
1. Time To Plant Nasturtium
Plant nasturtiums four to six weeks before the latest frost date to grow them in containers. Because they flower early in the spring, the plant will have plenty of time to flourish.
When it's cold outside, or there's a lot of wind, bring the container inside. After the last frost has passed, move the pot to where the plant will get enough light.
You can grow them as annuals if you reside in a mild summer environment. Keep them out of the sun for as long as possible. They do, however, only grow in the absence of frost.

2. Container Requirements For Nasturtium Flowers
Nasturtiums should be grown in pots 10-12 inches in diameter. They can also be grown in window boxes because they are good runners.

3. Soil Requirements For Nasturtium Flowers
This incredible plant thrives in poor soil. Plant them in loose, well-drained soil with plenty of organic materials. Planting should not be done in heavy, moist, clayey soil. Before putting them in containers, you can use a balanced organic fertilizer.
4. Location To Grow Nasturtium Flowers
Nasturtiums need direct sunshine to grow properly. However, keep them out of the hot sun in the afternoon. If you're growing them as houseplants, make sure they are near an east-facing window so they get plenty of light.

5. Watering Nasturtium Flowers
When the soil becomes dry, water the nasturtiums. Scrape off the topsoil with your nails to see if this is true. It's usually adequate to water the nasturtium flowers once a week and water them twice a week during the hot summer months. If the soil remains moist for an extended time, the nasturtium can grow mould.

6. Propagate Nasturtium Plants From Seeds
Seeds are the most popular and straightforward technique to propagate nasturtiums. Seeds can be obtained from a nearby nursery. Nasturtiums come in various shapes and sizes, including bushy, trailing, and climbers.
Although all kinds can be grown in containers, trailing plants are the most suitable. You're set to go once you've planted a few seeds in the container.
It's that simple! The nasturtium seeds will germinate on their own because it thrives on neglect. Germination is aided by soaking nasturtium seeds overnight before planting.
The seeds are difficult to get by. Once you've gotten your hands on this plant, save the seeds so you may replant them in the spring.
7. Propagate Nasturtium Plants From Stem Cuttings
Spring is the optimum time to collect stem cuttings for propagation because the weather is mild.
Here's how to do it:
- Snip a four- to six-inch stem section, cutting one to two inches below a leaf node (where the leaf joins the stem).
- Remove the lower two-thirds of the stem's leaves.
- If desired, dip the stem in the rooting compound up to the leaf node.
- Fill small biodegradable pots with a mild potting soil mix, two to four inches in diameter.
- Insert one or two cuttings per container and gently firm dirt around the stems.
- Place the pots in a safe area that receives morning and afternoon sun. When new leaves develop in two to three weeks, roots have formed.
- Transplant the plants into the garden in their biodegradable pots to avoid root damage.
8. Pruning & Maintenance Of Nasturtium Plants
The grooming or deadheading of flowers regularly encourages the formation of new blossoms.
- If plants get strung out or lanky, cut them back to half their original volume, and they will immediately develop new growth.
- Give plants a modest trim in late spring or early summer to restore shape and encourage new flower production.
- Provide climbing kinds with trellis or pea netting for support. To get the climbers started, you may need to point them in the appropriate direction.
- When grown in containers, they need to be trimmed now and then to keep their shape and flower output up. Cut plants down by half if their vigour wanes in the summer heat. As soon as the evening temps calm down, they'll regenerate with fresh vigour.
- Allow seed pods to develop on the vine before collecting seed for stock comprehensively. They will turn from green to a light tan tone.
- Allow seeds to fall to the ground independently, then gather them afterwards. Remove any filth with a gentle brush.
Allow drying for another two to four weeks in a warm, dry location, spread out on a plate or tray. Before storing seeds, they must be scorched. When the seeds have dried and become brown, store them in glass jars or paper envelopes in a cold, dark place.
Remove any remaining debris after plants are felled by frost in cooler zones to avoid unfriendly bugs from overwintering.

9. Pests & Diseases Of Nasturtium Flowers
Although disease-free, there are a few pests and issues to be aware of.
Aphids are little black, green, or reddish sapsuckers that feed on flowers, leaves, and stems, spreading illness. A powerful garden hose spray can kill aphids on the undersides of stems, flowers, and leaves.
Cabbage loopers are green worms that devour the leaves of cabbage plants and lay their eggs on them. Pick them out by hand and throw them away.
Leafhoppers are minor, sap-sucking, disease-spreading bugs with solid back legs that bounce from leaf to leaf. Use insecticidal soap to get rid of leafhopper infestations.
Leafhoppers spread this bacteria-like infection. Infected plants should be removed and destroyed as soon as possible. Control leafhopper populations and weeds, which may serve as hosts for the illness.
Leafminers are tiny black or gray insects that dig into leaves to lay their eggs, leaving bleached, serpentine patterns on the leaves. Remove and destroy diseased leaves and spray with neem oil to control adults.
Slugs and snails chew leaves, leaving uneven notches or completely devouring them. They should be hand-picked and disposed of.
Stunting or witches' brooms — excessive leafy growth on the green, malformed flower petals – is caused by Aster yellows, which is caused by a microscopic organism known as phytoplasma.
Clubroot is a fungal disease caused by Plasmodiophora brassicae. It is ubiquitous in acidic soil or areas where Brassica species have previously flourished. The damaged roots are strongly clubbed or twisted, and the leaves can be stunted or wilted.
If you notice symptoms of this illness, remove and kill the plants. Lime acidic soils, and avoid replanting in the same spot.
A variety of bacterial diseases can infect the mosaic virus. It causes leaf spotting or mottling ranging from light to dark green and deformed or splotchy blooms.
Aphids and leafhoppers are vectors for mosaic viruses. Infected plants should be removed and destroyed, and insect infestations should be treated as needed.
Wilt is a bacterial infection produced by Pseudomonas solanacearum, which dwells in plant waste and invades roots from the soil.
Plants turn yellow and wilt before dying, and damaged locations may develop black streaks or seeping slime.
Remove diseased plants and sanitize any instruments that have come into touch with them using a 10% bleach-to-water solution.
Also, avoid watering from above because spilling water can spread this bacteria. Before winter arrives, make sure the plant beds are free of debris.

9. Harvesting Nasturtium Flowers And Leaves
Harvesting leaves and flowers is achievable at any time. The seedpods should be picked before the seeds have had an opportunity to grow and harden.
Snip off leaves, blooms, and seedpods using scissors to prevent injuring the plant. If you let the seedpods mature, you may preserve the nasturtium's chickpea–size seeds and replant them in the spring.
Allow the seeds to dry on the vine until they fall off. Collect them, brush off the soil, dry them, and keep them in a cold, dark place in a paper envelope.
10. Preserving Nasturtium Pods
When pickled, the immature green pods are excellent. They're also known as “poor man's capers,” They're a great alternative for the real thing.
To do so, collect the pods, gently wash them to eliminate dirt, and set them in a jar. Pour enough white vinegar to cover the pods into a pot with a bay leaf and a teaspoon of salt for every cup of vinegar.
Bring to a boil, remove from heat, and pour over the pods, ensuring they are well covered in the vinegar and salt solution. After sealing the jar and allowing it to cool, refrigerate. They will be ready to use in two to three months.
Uses For Ornamental Purposes
Nasturtium types provide incredible vertical growth and fantastic colour when climbing up arbours, fences, and trellises or pouring down from hanging baskets and window boxes.
Compact varieties make stunning spillers in pots or topple over the edges of low foundation walls and rock garden pockets, and they add flair to raised beds and borders.
Thanks to their fast-growing, abundant leaves, nasturtiums create a decorative and valuable scrambling ground cover for concealing stumps or unsightly locations. They also act as a weed barrier to prevent encroachment of the garden or lawn.
The profuse foliage works well as a filler or seasonal screen in challenging situations, such as beneath decks or stairs, poor soil sites, and shady spots.
Nasturtiums are excellent aphid trap crops when grown as companion plants. Plant them near the crops you want to protect as a trap, then hose off aphids as needed.
Many caterpillars, cucumber beetles, squash bugs, and whiteflies are deterred, whereas predatory insects such as ladybugs, lacewings, and parasitic wasps are attracted. The Tropaeolum genus can be grown alongside Brassicas, cucumbers, melons, radishes, and tomatoes.
Nasturtiums are always an excellent choice for children's gardens because of their numerous exceptional traits and rapid growth.

Recipe For Nasturtium Tea
Ingredients
- Nasturtium flowers: 1 cup
- Boiling water: 1 litre
Method
- Fill a jug halfway with boiling water and add the flowers, leaves, and buds.
- Cover and steep for 15 minutes. Strain and drink, or use as a hair rinse or toner. This is also an excellent spray on plants to keep bugs away.

Recipe For Nasturtium Salad
Ingredients For The Salad
- Large green oak-leaf lettuce: 1
- Young and tender nasturtium leaves: 8
- Sliced Lebanese cucumbers: 2
- Sliced Green capsicum: 1
- Celery stick: 1
- Young nasturtium flowers: 4–6
Ingredients For The Dressing
- Olive oil: 2 tablespoons
- Sunflower oil: 2 tablespoons
- Crushed Garlic: 1 clove
- Cider vinegar: 2 tablespoons
- Honey: 3 teaspoons (Note: if you are vegan, you can use maple syrup instead)
- Finely chopped mint: 1 tablespoon
Method
- Tear the lettuce and nasturtium leaves into small pieces and place them on a serving plate. Sprinkle the cucumber, capsicum, and celery pieces over the leaves. Tear the nasturtium flowers into tiny pieces, leaving a few intact flowers for adornment. Arrange the flower pieces on top of the salad.
- To make the dressing, whisk together the oils, garlic, vinegar, and honey in a small mixing dish. Stir in the mint and season with salt and black pepper.
- Drizzle the dressing over the salad before serving, and top with the reserved flowers.
Conclusion
I hope that all of my tips for growing nasturtium flowers in containers will be helpful. Feel free to comment here if you have any questions.
Don’t miss trying Nasturtium Tea and Nasturtium Salad. If you would love more recipes for nasturtium flowers, you can share your opinion; I will share more recipe ideas.
I trust you enjoyed this article on How To Grow Nasturtium Flowers In Containers. Please stay tuned for more blog posts soon. Take care!
JeannetteZ
>>>Please click here to read my all-inclusive article about Container Gardening<<<
Are you interested in homegrown herbs and medicine? Please click here to find out more about it!
Your Opinion Is Important To Me
Do you have thoughts, ideas, or questions? I would love to hear from you. Please leave me your questions, experience, and remarks about this article on How To Grow Nasturtium Flowers In Containers in the comments section below. You can also email me at Jeannette@Close-To-Nature.org.
You might also enjoy these blog posts:
Steps To Grow Coral Bells In Containers
Best Decorating Ideas For LED Lights In Your Room
The Best LED Lights For Your Bedroom
Fall In Love With Growing Cineraria