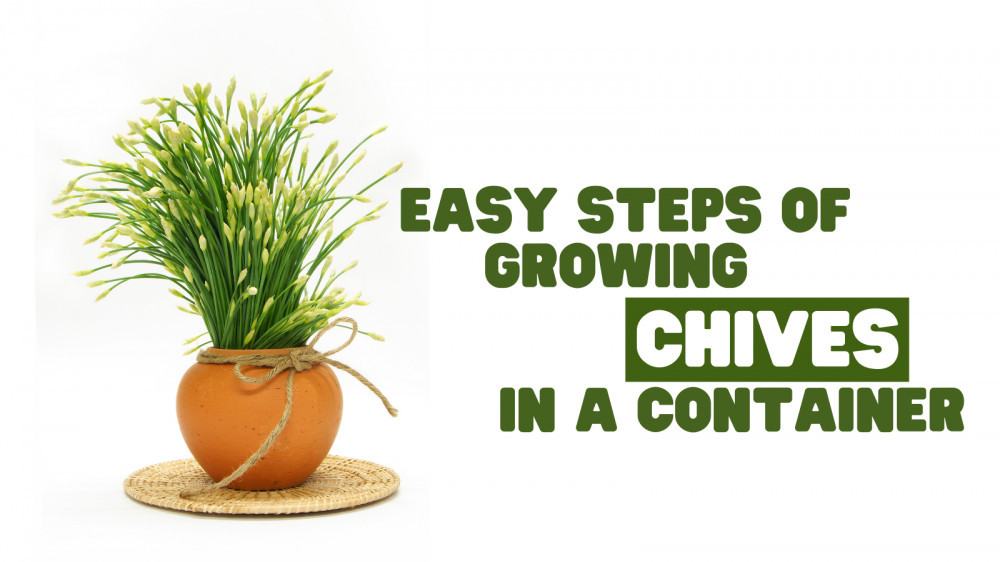
Easy Steps Of Growing Chives In A Container
Easy Steps Of Growing Chives In A Container
Fresh herbs in containers provide fresh flavour while also exciting and functional ornamentals.
Growing chives in a container on the porch, patio, or right on the kitchen windowsill ensure this tender green herb is always available. I hope the blog will help you grow chives, ideally in a container.
Origin Of Chives
Chives, scientifically known as Allium schoenoprasum, are a flowering plant in the Amaryllidaceae family that produces edible leaves and blossoms.
Common onions, garlic, shallot, leek, scallion, and Chinese onion are close relatives. It is a perennial plant that grows throughout Europe, Asia, and North America.
Allium schoenoprasum is the only species growing in the New and Old Worlds. Chives are a popular herb that can be bought in supermarkets or cultivated in backyard gardens.
Green stalks (scapes) and unopened, immature flower buds are chopped and used as an element in omelettes, salmon, potatoes, soups, and various other cuisines.
Edible blooms can also be used in salads. Chives contain natural insect-repellent qualities.
Chives are perennial herbaceous bulb-forming plants that grow 30–50 cm (12–20 in) tall. The bulbs are thin and conical and develop in dense clusters from the roots.
They are 2–3 cm (¾–1¼) long and 1 cm (½ in) wide. The scapes (or stems) are hollow and tubular, up to 50 cm (20 in) long and 2–3 mm (1/16 to ⅛ in) in diameter, having a delicate feel.
However, they may appear stiffer than typical before the emergence of a flower. The grass-like leaves are hollow and tubular, or terete (round in cross-section), distinguishing it from garlic chives at a glance (Allium tuberosum).
The blooms are pale purple and star-shaped, with six petals about 1–2 cm (12–34 in) in diameter. They are produced in a dense inflorescence with 10–30 flowers per inflorescence.
A papery bract wraps the inflorescence before opening it. The seeds are generated in a three-valved, tiny capsule that matures in the summer.
The herb blooms in the southern sections of its habitat zones in April and May and the northern parts in June.
Chives are the only Allium species growing in the New and Old Worlds[citation required]. Although this is controversial, the plants in North America are sometimes categorized as A. schoenoprasum var. sibiricum.
Substantial differences exist between specimens. One example was discovered in northern Maine, growing alone rather than in bunches with dingy grey blooms.
Although chives generally repel insects, their blossoms attract bees due to sulphur compounds. Therefore, they are sometimes preserved to boost the life of desirable insects.
Types Of Chives
Chives are hardy perennials belonging to the lily (Liliaceae) family. They are commonly used as flower bed borders and in herb and vegetable gardens.
Unlike onions and other alliums, chives are grown for their savoury leaves rather than bulbs, although they originate from bulbous roots.
They give raw or cooked meals a garlicky kick. According to the National Gardening Association, their lavender or white blossoms attract helpful insects that consume garden pests while pollinating crops.
Before growing chives in a container, you should find the best variety for your zone.

1. Garlic Chives (Allium tuberosum)
Although the crushed flat leaves of garlic chives (Allium tuberosum) have a garlic flavour, the white blooms offer a surprising violet aroma.
Deadheading the wasted flowers of garlic chives is especially necessary for zones 1 through 24 because their seeds can self-sow invasively otherwise.
The blooms, also known as Chinese chives, are edible in the bud stage and are frequently used in stir-fries.

2. Giant Siberian Chives (Allium ledebourianum)
Giant chives (Allium ledebourianum) are taller than ordinary ones and are used as a flower bed border. Despite its unique name, some plant specialists feel it is a bigger version of regular chives.
Some gardeners believe it is a Siberian native with the richest chive flavour. It is distinguished from other alliums by its blue-green tubular leaf.
")
3. Siberian Garlic Chives (Blue Chives)
Garlic Siberian Chives blend onion and garlic flavours, similar to garlic chives. In midsummer, they produce pinkish blooms with teal or blue-green leaves. If given enough light, they thrive inside.

4. Common Chives
The most common herb, common chives (Allium schoenoprasum), grows in zones 1 through 24.
Its leaves resemble grass but are hollow tubes that release a delicate onion-like flavour and aroma when crushed. In spring, rose-purple flower clusters are delivered, which can also be used in cooking.
Combine the full blooms with white vinegar to make herb vinegar appealing to flavour salads.
5. Hybrid Varieties
- ‘Monstrosum‘ is a huge chive type produced largely for decorative purposes but is also tasty.
- ‘Profusion' is a sterile hybrid chive that flowers for a long time and is good for ornamental purposes.
- “Curly Mauve' chives are another hybrid.
This cultivar produces vine-like whips that coil as they develop towards all compass points, unlike nearly all chives that grow erect.
They bloom in a profusion of light lavender blooms. ‘Snowcap' is a small white-flowered cultivar that grows only 1.5 feet tall. ‘Forescate' chives grow 12 to 20 inches tall and feature brilliant purple blossoms.
Growing Chives In A Container
Growing chives in pots is straightforward, so you can have this herb even if you live in an apartment.
You can grow chives indoors because they don't mind being in the shade. It would be good on a windowsill that receives direct sunlight. Fresh herbs in containers provide immediate flavour and serve as attractive and useful ornamentals.
Growing chives (Allium schoenoprasum) in pots on the porch, patio, or even on the kitchen windowsill will ensure that this sensitive green herb is always available. Chives are perennials that thrive in USDA plant hardiness zones 3 through 9. Chives can be grown in full sun or partial shade.

1. Container Requirements For Chive Plants
Choose a pot with a width and depth of at least 8 inches. One pot can accommodate several chive plants, usually 5 to 6 young plants.
They will grow into a tiny clump that will eventually get bushier. If your pot becomes overloaded, split the plants to increase their numbers.
Grow chives in 3-4 pots to rotate harvests and keep this herb fresh and tasty. For container growing, plant individual chives in a 6—to 8-inch pot or numerous plants 6 inches apart in a bigger pot. Use pots with holes at the bottom to ensure proper drainage.
Seeds, transplants, and divisions can all be used to grow chives. Chives should be planted as soon as possible in the spring.
After emergence, seeds should be planted 14 inches deep and trimmed to 4-6 inches in all directions. Transplants must grow for 6-8 weeks before planting in the garden.
Plastic, clay/terracotta, and even fabric pots are suitable for chives. However, clay and fabric pots may require more frequent watering.
Chives thrive in rich, well-draining potting mix, regardless of the container. Also, make sure your container has enough drainage holes on the bottom.
You can grow chives in large yogurt containers or other food containers, such as those for margarine or cottage cheese because they thrive in small containers.

2. Soil Requirements For Growing Chives In A Container
Pots with holes in the bottom should be used to guarantee proper drainage. To increase drainage, use a light, high-quality potting mix or supplement with perlite.
Plant your chive transplants at the same depth as in their nursery pots. Chives grow best in full sun and well-drained, organic-rich soil. Get your soil examined.
The ideal pH range is 6.0-7.0. They tolerate soft shade, but direct sunlight for six to eight hours is perfect.
Chives are shallow-rooted plants, with the deepest roots measuring no more than 12 to 18 inches (30 to 46 cm) deep. However, most chive roots will only grow to 3 inches (7.6 cm). You can cultivate chives successfully.
Chives are hardy plants that may grow in various conditions, including poor, damp, or dry soil. However, they thrive in slightly acidic soil with a pH of 6.0 to 7.0.
Choose organically rich, well-draining soils to ensure thicker chives. Grow the plant in sandy-loam soils, which do not hold much water in the root zone. Sand, clay, and silt combine to form loam soils.

3. Sunlight Requirements For Growing Chives In A Pot
For best results, give it at least six hours of sun per day. If you're growing chives indoors, keep them in a south-facing window.
Chives thrive in part-sun conditions, with 4-5 hours of direct sunlight, especially in hot tropical climes. They grow best in full light in organically rich, well-drained soil.
Test the soil in your home. It's recommended that the pH be kept between 6.0 and 7.0. Although they can handle some shade, direct sunlight for six to eight hours is ideal.
Chives generate grass-like clumps that can be trimmed and used for salads, stews, and other foods. Though chives prefer whole light, they may take some shade, particularly in hotter areas.
4. Growing Chives From Seeds
Growing chives from seeds is not difficult, but if you're new to gardening, it's best to start with ready-to-plant seedlings from a local nursery:
- Sow seeds indoors one month before the last projected frost date, or wait for warmer weather to start seeds outside.
- Grow chives after the summer if you live in a hot climate.
- 60-70c24°F temperatures are ideal for seed germination (15-21°C). However, seeds can be grown at 50 to 85° F (10-30°C).
- Sow the seeds ¼ inch deep into the seed mix in a pot and store them in a warm, indirect light location.
- Seedlings usually appear in 1 to 2 weeks (depending on weather conditions) and are ready to transplant in 3-4 weeks or 2-3 inches tall.
5. Growing Chives From Division
This form of propagation is more common, simple, and necessitates clump division:
- Find an established plant, a clump of chives growing together.
- Give it plenty of water to soften the soil around your chive plant.
- Dig around the clump's edges to avoid injuring the delicate root structure and bulbs.
- Gently separate young tiny plants from the main clump to generate new clumps.
- Each new clump can contain 3-5 plants planted in an 8-inch-wide, deep pot.
- Spring, late summer, and fall are good times to split chives (autumn). Fall is the optimum time to do this after flowering.

6. Watering Of Chive Plants
Water the soil regularly to keep it moist. The golden rule of thumb for avoiding overwatering is to verify if the topsoil is dry before watering.
To get the best harvests, water chives regularly throughout the growing season. If the plants are cultivated in pots, moisten the soil thoroughly and allow it to drain well.
Water your newly planted chives thoroughly and place the container in a location that receives at least six hours of direct sunlight daily.
Water the pot well every day or so until the seeds germinate, maintaining a high degree of surface moisture. Thin out the chive sprouts once they reach approximately an inch in height to at least three inches.
Chives should be watered thoroughly once or twice a week. After that, wait for the soil around the herb to completely dry before watering it again.
Maintain moisture in the soil. Chives thrive when they are watered frequently and have good soil drainage. When fully grown, chives grow to about 12 inches tall and 12 inches broad. A lot of water will quickly kill your chives.
Overwatering is worse than underwatering your plant. There isn't enough light. Apart from the germination process, where darkness is required, chives require a lot of light—ideally, six to eight hours daily, but no less than six.
7. Fertilizing Chive Plants
Chives are not heavy feeders, but because almost all of their roots are in the top 3 inches of soil, you should ensure that this layer of soil or potting mix has enough nutrients.
Any all-purpose fertilizer will suffice, but nitrogen is the most crucial nutrient for leafy green development. Therefore, an optimal fertilizer with somewhat more nitrogen is used. Fertilizers for lettuce also work well for chives.
Lawn fertilizer can be used in a pinch, but it's not balanced for chives' nutrient requirements. Lawn fertilizers are generally heavy in nitrogen, lack minerals such as magnesium and iron, and can easily burn your chives if applied incorrectly.
Suppose you mixed compost when you planted and side-dressed your plants again in the middle of the season.
If the plant requires a boost, use organic fish emulsion fertilizer at the suggested dose. If you're not using organic fertilizer, use a half-strength complete liquid fertilizer, such as 20-20-20, every 2 to 4 weeks, depending on how well your chives plant is doing.
From spring to late summer, fertilize every two weeks using a balanced, granular fertilizer such as a 3-3-3 recipe.
Use 1 tablespoon for pots with a 6 to 8-inch diameter and 2 tablespoons for larger pots (10-12 inches). Apply the fertilizer to the soil around the plant's base.
Water is used after each fertilizer application to release the nutrients. The amount of fertilizer applied varies depending on the product, such as if the package label specifies a certain amount.
8. Pruning Chive Plants
Start by watering the area where you'll be digging up the chives. This softens the earth, making digging simpler.
Trimming back chives helps to promote new growth on the plant. The tender young growth has the finest flavour. If you don't prune your chives, they can become overgrown, woody, and flop to the ground.
Do not clip the chives until they have reached a height of 6 to 10 inches (15-25 cm). Sharp scissors or pruners can be used to cut to the base.
When starting chives from seeds, wait 60 days before cutting them. Chives take at least 60 days from seed to maturity.
Cut all the scapes on the chive plant down to 1 or 2 inches above the ground using sharp scissors or a knife. When they are full, harvest the chives mature, which should be at least 60 days after sowing seeds or 30 days after transplanting young plants.
To avoid picking up individual leaves after cutting, gather many or all scapes in one hand and cut with the other.
Clip off the largest leaves with sharp scissors approximately 2 or 3 inches above the ground to cut fresh chives. This will prevent new leaves from developing and harming the delicate bulb. Clip carefully to avoid injuring new growth on younger plants.
9. Pests & Diseases Of Chives
Spider mites, mealybugs, scales, aphids, and whiteflies are common horticultural pests that can harm this herb.
If this happens, treat the chives with insecticidal soap every week until the problem disappears.
Root rot is also possible but easily avoided with correct watering techniques. Chives have no severe insect or disease concerns. However, clumps grown in deep, poorly drained soil may suffer from root rot.
Botrytis Blight
This causes the plant's older leaves and heart to decay. It may begin with irregular yellowish-brown patches on the leaves or water-soaked areas on the stems. When touched, the fungus turns a fuzzy gray and releases a cloud of spores.
To prevent the disease from spreading, remove affected plants and plant debris and ensure that plants have adequate air circulation.
Because spores can dwell in organic mulch, keep it away from the plants. Pea gravel can be used as a mulch to help reduce humidity around plants.
Damping Off
This is one of the most typical challenges when starting plants from seed. The seedling looks healthy initially, but then it wilts and dies for no apparent cause. Damping-off is caused by a fungus that thrives in moist soils and warm air temperatures.
This usually means the soil is overly damp or has too much nitrogen fertilizer. Keep seedlings moist but not soggy; avoid overfertilizing; thin out seedlings to avoid overcrowding.
Ensure the plants have adequate air circulation; if you plant in containers, properly wash them in soapy water and rinse in a ten percent bleach solution after each use.
Downy Mildew
Pale patches with a gray-purple fuzzy growth emerge on the leaves. The leaves turn a pale green before turning yellow and collapsing at the tips.
Make sure the soil is well-drained before planting. Also, avoid crowding your plants. Rotate crops with other onion family members and avoid planting in the same spot for at least four years.
Plant debris should be removed and destroyed. For fungicide recommendations, contact your local Cooperative Extension Service.
Pink Root Rot
A fungus affects roots, turning them pale pink, crimson, purple-brown, and eventually shrivelling them.
Infected plants show nutrient shortages and drought indicators because the roots cannot absorb water and nutrients, and they have become stunted.
The illness can survive for years in the soil and flourish in warm temperatures. Rotate chives with other onion family members.
10. Harvesting Chives
Chives are the quintessential cut-and-come-again herb. Cutting back your chives regularly is strongly suggested since old leaves will turn yellow and die back.
When picking chives, leave around 1 inch (2.5 cm) of the base of the stalks so they can regenerate. If you don't plan to use them immediately, you can freeze or dehydrate them to make chive powder.
Chives are ready to harvest when they reach a height of six inches or more. Use sharp scissors to snip the leaves from the top and use them fresh in your cooking.
Make sure the bottom of the plant is at least two inches intact. You can also freeze the leaves by putting them in a plastic bag.
It's ideal to gather chives before they bloom because the herb loses much of its flavour once it blooms. Chives are best used fresh in recipes because they lose almost all their flavour when dried. If you have more than you need, you can freeze them in oil or butter to use later.
The herb grows relatively quickly. Chives will be ready to harvest 30 days after transplanting or 60 days after starting from seed.
You may begin picking chives as soon as the leaves are large enough to cut and use in recipes. Cut ½ inch above the soil level. Mine is clipped from the plant's exterior. They will grow back.
Leave a portion of the leaf on the plant to ensure its future growth. If you cut it down to the ground, it may not grow back this year, but it should the following year.
Conclusion
Chives are excellent for sprucing up or starting an herb garden. They add a mild onion flavour to any dish, and their small size allows them to fit into any garden, including a balcony or indoor herb garden.
Feel free to comment here if you have any questions about growing chives in a container. You can also read my blog post on the 6 Most Popular Vegan Recipes Using Chives.
I trust you enjoyed this article on the Easy Steps Of Growing Chives In A Container. Please stay tuned for more blog posts to come soon. Take care!
JeannetteZ
>>>Please click here to read my all-inclusive article about Container Gardening<<<
>>>Are you interested in homegrown herbs and medicine? Please click here to find out more about it!<<<

Your Opinion Is Important To Me
Do you have thoughts, ideas, or questions? I would love to hear from you. Please leave me your questions, experiences, and remarks about this article on the Easy Steps Of Growing Chives In A Container in the comments section below. You can also email me at Jeannette@Close-To-Nature.org.
Disclosure
This post may contain affiliate links. I earn from qualifying purchases as an Amazon Associate and other affiliate programs. Please read my full affiliate disclosure.
You might also enjoy these blog posts:
Most Important Steps Of Growing Oregano In A Container
Easy Steps Of Growing Basil In A Container
Perfect Tips Of Growing Rosemary In A Container
Best Tips For Growing Rhubarb In Containers
Easy Steps Of Growing Mint In A Container