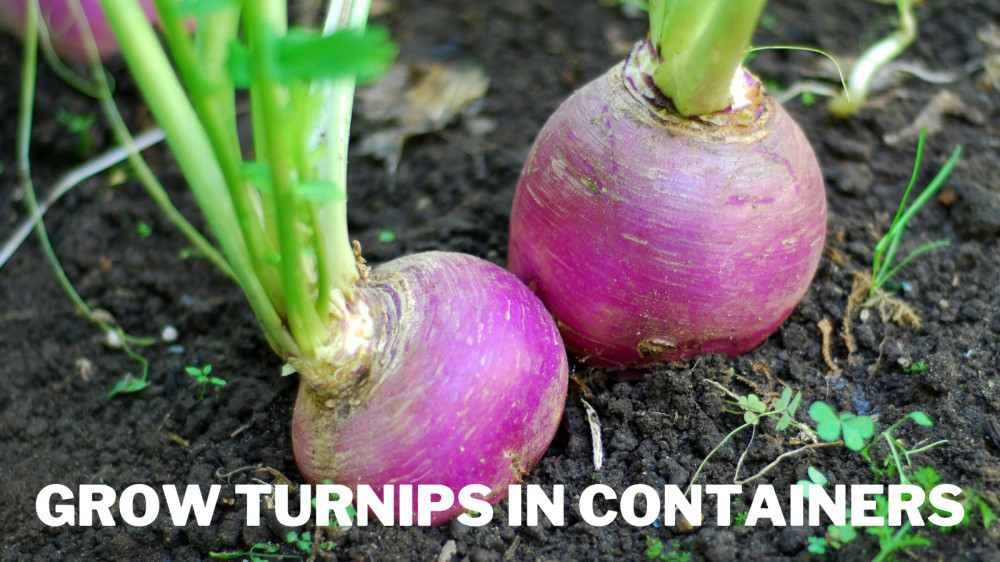
Best Steps To Grow Turnips In Containers
Best Steps To Grow Turnips In Containers
Turnip is a root vegetable that grows quickly. It is a herbaceous biennial for making seeds and an annual for eating.
These plants' leaves and roots are both edible. Turnips are cruciferous veggies that are low in calories and high in nutrients.
The leaves of this plant are also edible, and it is farmed all over the world in temperate areas for its bulbous, tasty root.
Larger plant kinds are grown as livestock feed, whereas smaller, more delicate plant species are grown for human food.
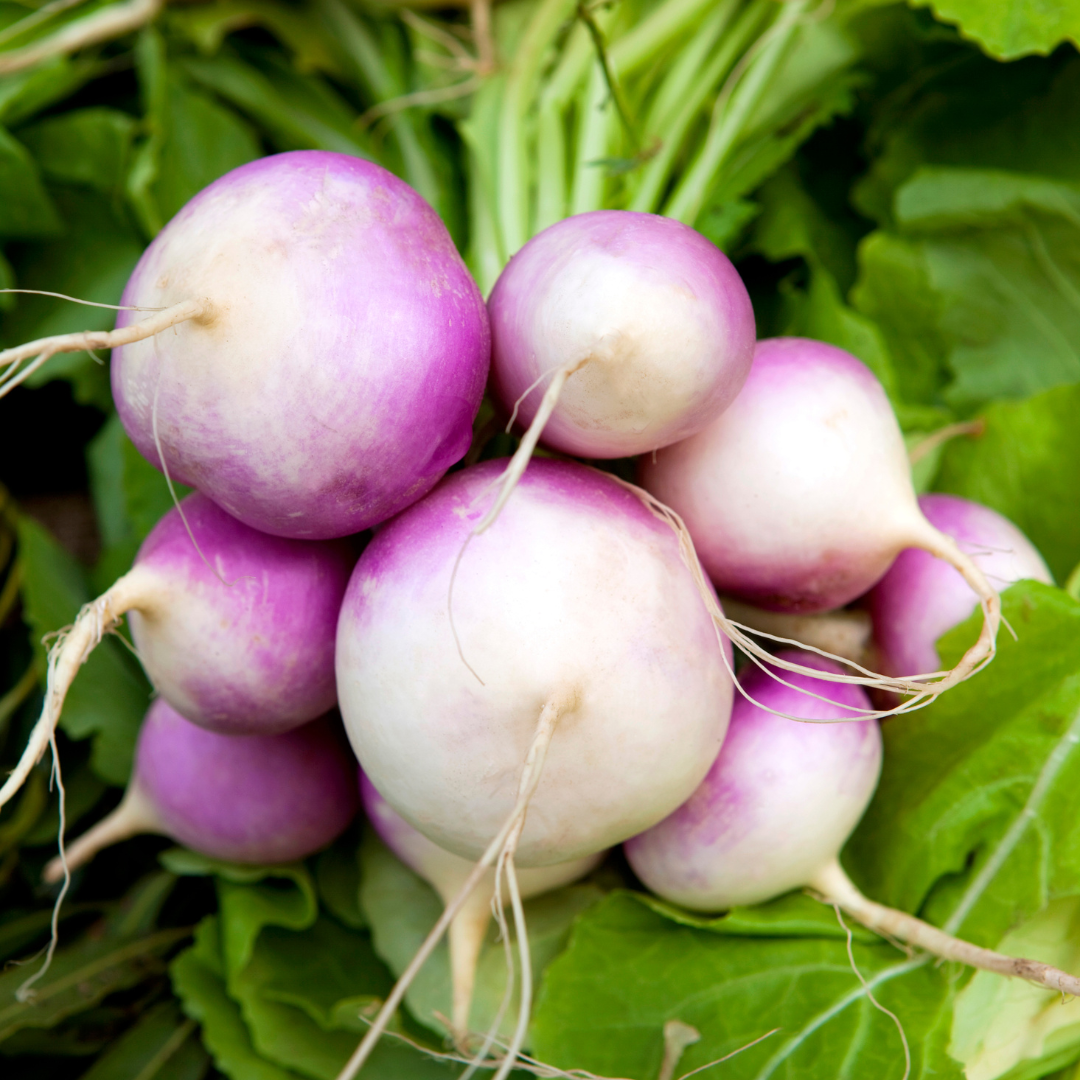
The bulbous storage root is referred to as a turnip. Turnips are a multipurpose, nutrient-dense, cool-season vegetable for their sensitive seeds or lush greens.
Turnips can be grown in containers, which has various benefits, especially for city gardeners who lack enough sunny areas.
Turnips grown in containers require little digging, bending, or stooping and are simple to maintain.

History & Origin Of Turnips
Humans have grown turnips for thousands of years, but even in those early years, they were not a particularly well-liked crop.
The Romans saved turnip roots throughout the Roman Empire to throw at persons they didn't like. Who consumed the turnip vegetable may have contributed to its disfavour.
According to historical evidence, ancient Greece and Rome's poor and rural populations were the main consumers of turnip root. A few affluent Romans only ate turnips, and their flavour was covered with cumin or honey.
Cows and pigs were also fed these roots for generations in Europe, according to the history of the turnip plant.
In the UK, turnip roots gained enormous popularity as cattle feed. Farmers used to cull their cows and pigs before the winter until the 1700s.
This was done to reduce the expense of hay storage during the rainy season. Farmers stopped doing this when they learned that turnips could be grown in gardens in cold, wet climates for animal feed.
It's interesting to note that turnip roots were used to make lanterns. Turnips were hollowed out and lit with flames by Celtic people in Ireland long before carving pumpkins became popular to fend off evil spirits.
Turnips arrived in North America thanks to early European settlers. Since then, they have grown widely here. Turnips can be grown year-round in the garden with no problems.
Even though turnips are cool season biennials, they are typically grown as annuals. Turnips are usually planted in late spring or early fall to avoid the summer heat.
Heat causes turnips to bolt, which prevents them from producing the edible root. These root veggies need a few months to reach maturity.
They can flower early the next spring and can withstand frost well. The leaves and the roots are equally tasty to gardeners.
The seedling's primary root and the young stem's base directly above it thicken to create the turnip root.
During the first year, the stem is short and contains a group of leaves that resemble a rosette at the top of the root.
The leaves have rough hairs and are grass-green in colour. The rosette's central bud develops into a robust, upright, branching stem with somewhat glaucous (having a waxy coating) and smooth leaves if allowed to grow for a second season.
Small, cross-shaped clusters of bright yellow blossoms appear at the ends of the stem and branches, followed by smooth, elongated, short-beaked seed pods.
Despite being a cool-season crop, turnips don't need a long growing season. Turnips are sown either in early spring or late summer in moderate locations.
They grow quickly enough to yield a crop before summer or late fall weather extremes. On occasion, it is produced as a crop for cattle fodder.

Types Of Turnips
The cultivation of turnips dates back more than three thousand years. You may grow it throughout the fall and spring seasons, and it comes in various sizes, colours, and shapes.
Whether growing turnips in a garden or pots, it is incredibly simple! The greatest varieties of turnips to raise are listed here!

1. Purple-Top Mammoth Forage Turnip
One of the most popular and identifiable turnip varieties is this one. The portion of the vegetable that is growing underground is white.
Bright purple is present and visible above ground. The purple piece gives rise to the stems and leaves that make up turnip greens. This sort of turnip is the biggest.
Turnips with purple tops mature in about 55 days. Keep them somewhere cold and dry. Use this type of turnip in casseroles and stews. Its spicy flavour will enhance the food.

2. Carter Green Globe Forage Turnip
The multipurpose turnip is called a Carter Green Globe. Due to their primary use as dairy cow fodder, Green Globe turnips are probably not something you'll find in your local grocery store.
Lambs and other grazing animals consume it as food. These turnips' nutritional value aids the cows' ability to produce milk.

3. Royal Crown Turnip
This turnip has white flesh with wonderful flavour and purple shoulders. This hybrid turnip plant has larger leaves, which are a perk for turnip greens fans.
The turnip becomes four to five inches long and slightly flatter. Perfect for soups and casseroles, this tuber. It takes 50 to 55 days to harvest.

6. Shogoin Turnip
Shogoin turnips, a traditional Japanese type, are huge turnips that can grow up to 20 inches long and 8 inches in diameter.
The leaves and the white meat are both tasty. The hardness and freshness of the large, delicious greens' flesh go well with their mild flavour.
This Japanese turnip works well in stir-fries, salads, and soups. This is a terrific pickle alternative as well.
The shogoin turnip's roots can be harvested in 55–70 days, whereas the greens collect in 30-35 days. When making soups and salads, you can use both roots and greens.

7. Hakurei Turnips
The Hakurei turnip is one of the most effective hybrids. Eat raw or cooked, and it tastes best. Its leaves are also used in cooking.
Hakurei has white flesh inside and white outside. It has a mild, incredibly sweet flavour. If you want a turnip that is sweet and delicious, choose hakurei.
This turnip is smaller, with a maximum diameter of 3 inches. They are crunchy, flavorful, and raw, and because of this, they taste great in salads. You can also eat them cooked with greens for a naturally sweet flavour.

8. White Egg Turnip
The white egg turnip is another type of turnip. The name of this vegetable comes from how it resembles an egg.
Contrary to other turnips, its white flesh is crisp and flavourful but contains a lot of water. Snowball turnips, or White Egg turnips, have a subtly sweet flavour.
They can be either dry or juicy, depending on how much water is in them. White egg turnips can be harvested in 40–45 days and have egg-shaped, 4-5-inch long roots with white flesh.
The white egg turnip has a higher water content than regular turnips, which makes it juicier. The flesh is tender and has a delicate texture. The flesh's sweet, soft, and crispy flavour makes it perfect for stews and soups.

How To Grow Turnips In Containers
Turnips are a diverse group of wholesome, cool-season vegetables produced for their sensitive roots or lush greens.
Turnips can be grown in pots, which has a lot of benefits, especially for urban gardeners who lack enough sunny outside areas.
Can turnips be grown in containers? Yes. Turnips are simpler to grow from seed in pots than you may imagine.
Additionally, vegetables grown in containers are simple to maintain because they need little digging, bending, or stooping.
Turnip seeds should be planted in the early spring for use in the early summer or the late summer or fall for use in the winter.
1. Choose The Right Container To Grow Turnips
The variety of turnips you are growing will largely determine your chosen pot, as huge turnip varieties require more development space.
Plant regular turnips in pools at least 8 inches deep because their diameter shouldn't exceed 3 to 4 inches.
The number of turnips you intend to grow and whether or not they are huge or tiny will determine how broad the pot should be.
Use window boxes or regular pots, but keep a minimum distance of 4 inches between them. In light of this, a circular pot that is 12 inches wide can hold up to 4 turnips if you wish to overfill it.
Turnips don't perform well with transplanting, so plant them in your desired container. Choose a pot that is 12 inches deep if you're cultivating a huge root variety like Hinona kabu turnip.
On the other hand, a small planter with a depth of 6 inches is adequate if you wish to produce turnip greens.

2. Soil Requirements Of Turnips
Another crucial element for growing turnips successfully in containers is soil management. Because the standard potting soil doesn't have enough nutrients and organic matter to support the plant's growth, you shouldn't grow them there (and it will likely be very compacted).
Use a potting mix made specifically for plants in containers as an alternative. It will have the organic matter and nutrients required to encourage growth, drainage materials to improve soil aeration, such as perlite or coarse sand, and slow-release fertilizers that won't leak into your turnips.
3. Sunlight Requirements Of Turnips
If you're growing turnips in containers, pick a spot that receives lots of sunlight. Whether you grow them outside or indoors, they will benefit from getting as much sunlight as possible (ensure they get at least 4-5 hours). Growing them indoors is preferable in a region with hot summers.
Also, consider the weather conditions and the plant's water requirements. Ensure they have access to a window that receives enough sunlight and shut the curtains as necessary to keep the temperature between 15-20°C (60-68°F).

4. Watering Requirements Of Turnips
It is necessary to continuously provide water to this turnip plant. The water requirement for turnip plants is at least 1 inch each week. Soak it well each week if it doesn't rain enough in your location.
You should provide water twice a week in particularly dry areas. Turnip plants require more water if their leaves appear weak or wilted. Anytime the top 2 inches of soil feel dry, water the containers.
Turnip greens will become bitter if the soil is allowed to dry out. In porous terra cotta containers, the soil will quickly dry out in dry and windy conditions; therefore, check the ground daily.
For healthy roots, provide at least 1 inch of water each week. Turnip plants require speedy growth, which regular watering and good soil will facilitate.
Turnips require little maintenance, but continuous soil moisture is crucial. To keep the roots from growing tough and bitter, keep the soil gently moistened by watering at a rate of roughly 1 inch each week.
5. Fertilizer To Grow Turnips In Containers
Fertilizer is necessary for turnip plants to generate large, robust turnips. When preparing the container, include compost in the potting soil if possible.
If you don't have compost, add a balanced organic fertilizer to the potting soil when preparing the container.
You might choose a granular fertilizer with a gradual release and incorporate it. Any balanced fertilizer, such as 5-5-5 or 10-10-10, may be used.
When applying it to the soil, follow the manufacturer's directions. When you water the plant, the slow-release fertilizer will disperse into the soil and assist in delivering nutrients to the roots.
Following that, you can keep adding fertilizer each month. Alternatively, you might think about utilizing liquid organic fertilizer, which provides potting soil and foliage with an immediate injection of nutrients.
Every two weeks, apply this fertilizer. Follow the manufacturer's recommendations for how much water to add to the liquid fertilizer before using it.

6. How To Plant Turnips From Seeds
There isn't much to do regarding soil preparation before planting turnips, assuming you have tested the pH of the soil and added some aged compost.
Nothing stops you from growing turnips indoors so that you can transplant seedlings outside later; however, you can also sow directly as long as the soil is warm enough. Just adhere to the following guidelines for fruitful planting:
Start indoors by planting two seeds in each module in a propagator set to 59°F (15°C). Germination should only take 10 days or less.
From the weakest seedling in each module to the thickest. Harden off Young plants for a week before transplanting after observing four or five genuine leaves.
Direct sowing should be done at 1 in (2½cm) depth. Lucy Chamberlain advises seeding in groups of five to encourage the strongest plants to compete for space. Water wisely.
At 4 in. (10cm) high, thin seedlings. Chris advises thinning to 4-6in (10-15cm) for little turnips or 9in (23cm) for larger crops, depending on size.
Continue to water frequently, check to ensure no weeds are growing on the plot, and pull them out carefully to avoid upsetting the crops.
Repeat sowings every two weeks. If you fill any plot gaps, you'll have a better chance of experiencing a longer, more abundant harvest.
7. Pests & Diseases Of Turnips
Turnips belong to the Brassica family, so it seems to sense that viruses and parasites would plague them.
But you'll discover that producing turnips is a pleasantly simple process. There aren't many issues to be concerned about.
The flea beetle is a major problem in the first several weeks following planting. This immediately heads for sensitive green branches and leaves behind telltale holes.
Covering young plants with insect-proof netting or horticultural fleece can help keep flea beetles at bay.
Most typical brassica issues, such as powdery mildew and clubroot, may be avoided by maintaining moist, well-drained soil and keeping things cool and evenly spaced.
Aphid removal shouldn't be anything you have to worry about, either. Turnips are a great aphid repellent, which is just one of their many appeals.
And because your turnip plants develop so quickly, they will promptly outgrow any surface damage brought on by passing pests that wreak havoc on nearby crops.

8. Harvesting Turnips
The turnips will be ready for harvest about 30 to 60 days after you plant the seeds. As it protrudes from the ground, the crown will be apparent.
You can also view them by clearing a small potting soil. You can harvest them between two and three inches in diameter.
Harvest the turnips as soon as they are mature because if you let them get larger, they will become bitter.
Grasp the turnips' bases and pull them out with little pressure. You may twist them a little before pulling them out if they are tight. You can mix the turnip greens with your salad because they are also edible.
9. Winter Storage Of Turnips
Keep turnips in the winter in moist peat moss or sand in an unheated garage or shed where the temperature is between 4 and 8°C (40° and 46°F).
Always keep their roots moist; if there's any chance they get too dry, mist them with water before covering them with dirt.
Take the turnips out of storage in the springtime and place them in a container with new potting soil so they can continue to grow.
Conclusion
Turnips can be ideal if you're searching for something simple and entertaining to cultivate in your vegetable garden.
They may be grown in pots or containers, making them a fantastic option if you don't have much room.
You can plant many of them because they don't take up a lot of space. Try growing turnips this year. We think you'll enjoy it!
I trust you enjoyed this article on the Best Steps To Grow Turnips In Containers. Please stay tuned for more blog posts to come shortly. Take care!
JeannetteZ
>>>Please click here to read my all-inclusive article, About The Essential Companion Planting Guide<<<
>>>Please click here to read my all-inclusive article about Container Gardening<<<
>>>Are you interested in homegrown herbs and medicine? Please click here to find out more about it!<<<
Your Opinion Is Important To Me
Do you have thoughts, ideas, or questions? I would love to hear from you. Please leave your questions, experiences, and remarks about the article the Best Steps To Grow Turnips In Containers in the comments below. You can also email me at Jeannette@Close-To-Nature.org.
Disclosure
This post may contain affiliate links. As an Amazon Associate and other affiliate programs, I earn from qualifying purchases at no extra cost to you. Please read my full affiliate disclosure.
You might also enjoy these blog posts:
Healthiest Root Vegetables For Gardening
Best Steps To Grow Chickpeas In Containers
Best Steps To Grow Crocuses In Containers
Best Steps To Grow Irises In Containers
Best Steps To Grow Primulas In Containers